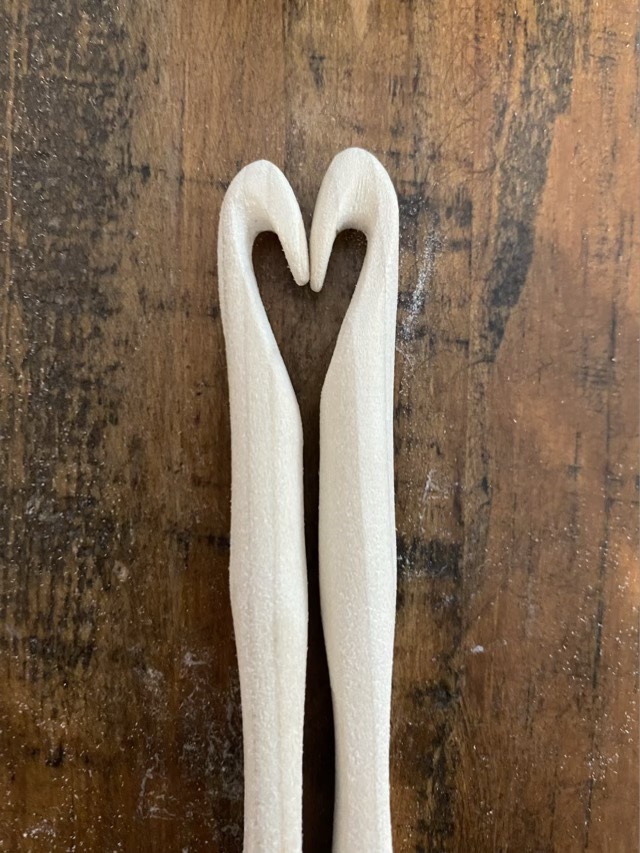
I’m working on making wooden crochet hooks and noticed that when two hooks face each other, it forms a heart.
Two crochet hooks, the space between forms a heart
These hooks are of the larger variety for super bulky or blanket yarn. Where I like to finish my spindles with a clear matt finish, so they have some grip, the crochet hooks get a clear gloss so they slide through loops better. The hooks in the picture are unfinished, and only partially through their sanding process. It was truly an unexpected heart.
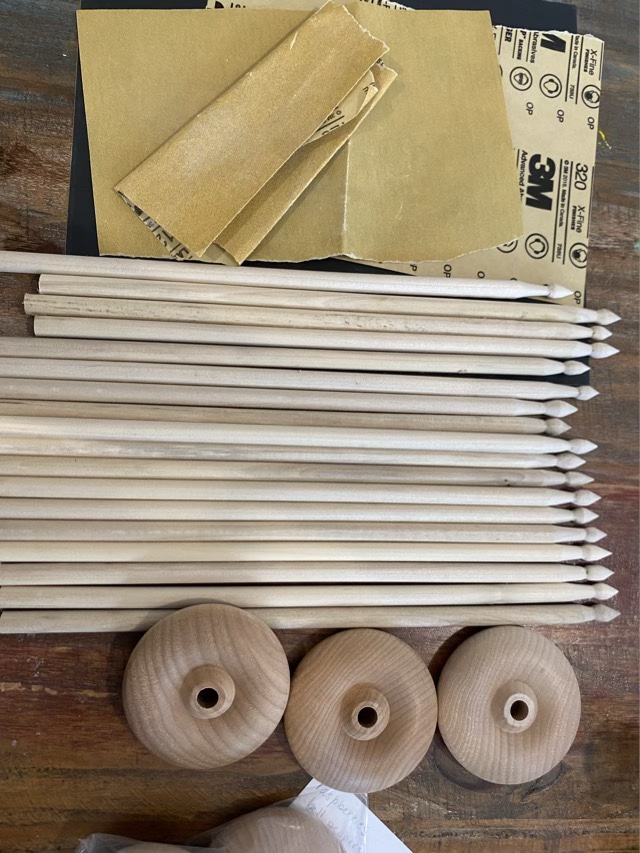
I’ve been working on a new drop spindle. I like my previous student spindles, but they are on the light side, just over an ounce. This light weight can be more challenging, so I wanted something a little heavier for upcoming spinning classes. I sourced some beautifully made wooden whorls from Pinehurst, TX, (yes, they are marketed at toy wheels, but they make lovely whorls) and some locally obtained dowels to make the shafts.
Sand paper, carved shafts with end notch, and Pinehurst crafts wheels
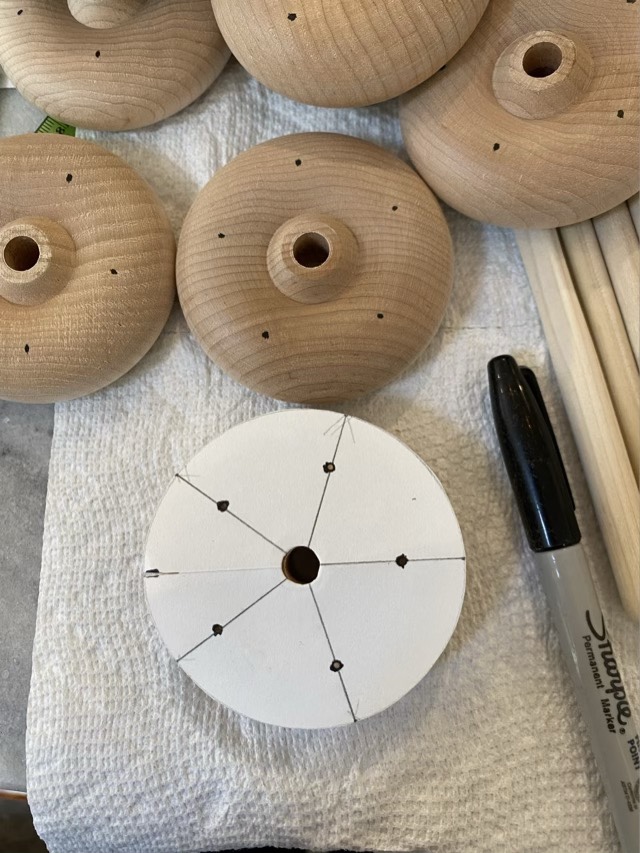
The whorls are lovely, but with the 12” shafts, the weight tipped over the two ounce mark, which is heavier than I wanted. To lighten the load, I drilled out material with my drill press and a 1/2” drill bit.
Marking whorls with a template to evenly space five holes
Then came the sanding and finishing. I sanded each piece down to 600 grit, wet the wood and let it dry, then sanded with 600 grit again. Both the whorl and shaft are finished with a clear matte coating to protect from stains. The most delicate part of the spindle is where the screw hook engages the wood, so I wrap the shaft with beeswax coated silk thread to strengthen.
Finished spindles with different colored silk wrap
These spindles can be used as a top whorl with hook, or flipped over and used as a bottom whorl drop spindle with the notch to keep a half-hitch in place. I’ve tested both ways and am pleasantly surprised how long these spin! The finished weight on all of them is around 2 ounces.
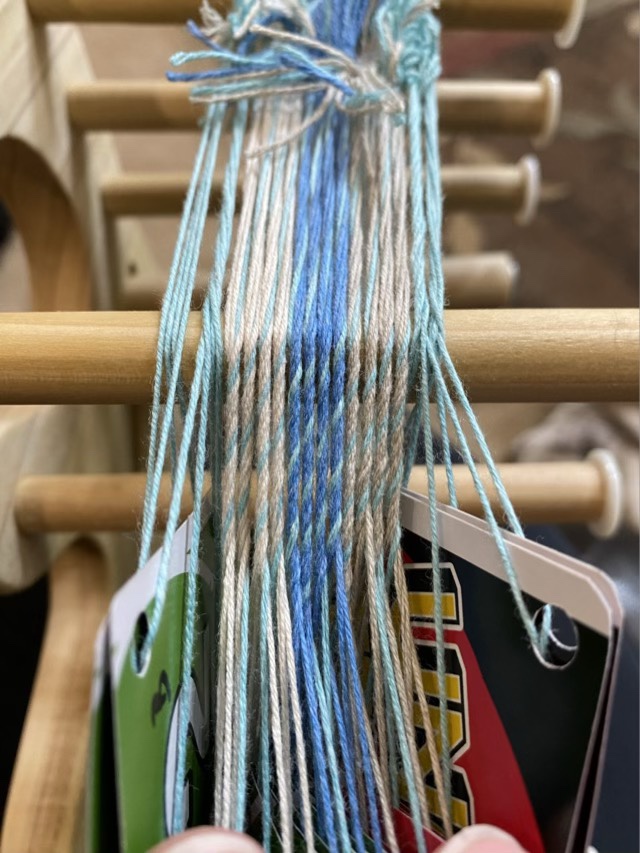
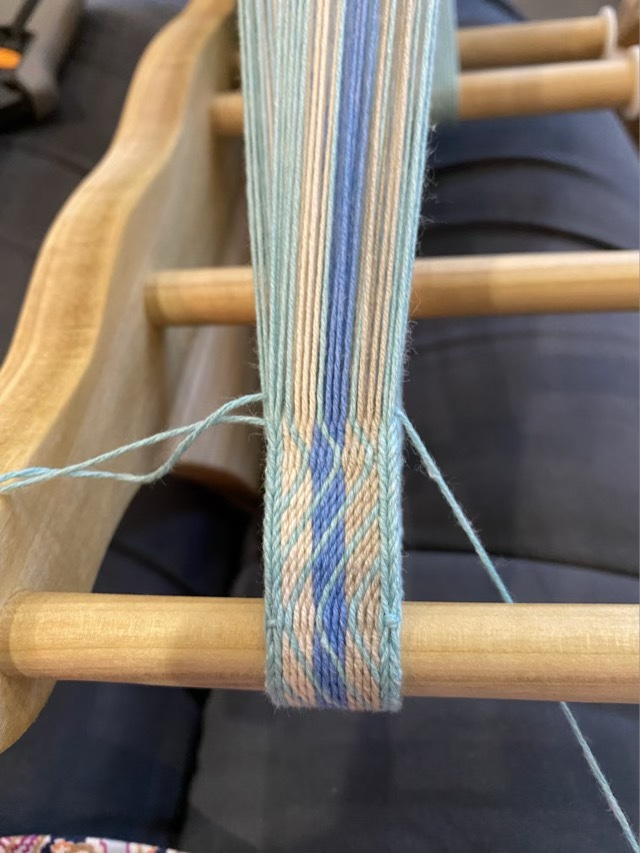
Time to test my inkle loom! I picked a tablet weaving pattern that had an easy 12 turns forward, 12 turns back progression for my test. I warped the loom with a cotton blend yarn in four colors. There are several ways to warp an inkle loom. For this first test, I did four strands at a time (one for each corner of the card), and used a square knot to tie the ends together.
Inkle loom warped for tablet weaving
I started the weave with four slips of card stock, as recommended by several weavers, both to get an even start and to leave room for fringe. I wove the tail back into the first few passes to lock it in.
Starting to weave
One of the big issues when tablet weaving on an inkle loom is the buildup of twist.
Twisted warp threads
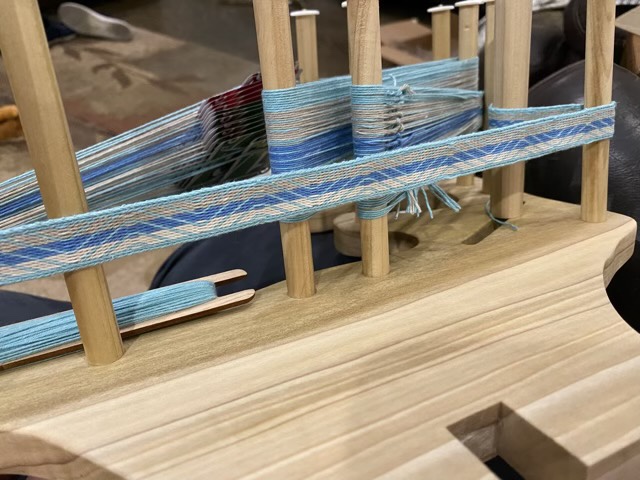
Traditional tablet weaving with a backstrap allows the weaver to comb out the twist (which I would still find an irritating process). Modern weavers will make use of swivel hooks and chase the twist out to the swivel, or use a balanced pattern the has the same number of forward twists as backward twists. I also found a card flipping method that allows turning to continue in the same motion, but flips the twist. However, it flips the diagonals on the weave as well. With a solid color border this change in direction is harder to detect, but I can still see it. Hm.
Borders of the tablet weaving showing a change of diagonals (at the wooden post)
Aside from the twist issue, the weaving is going well. The tension post works, the pegs are solid (I have one peg that didn’t come out perfectly straight, but it doesn’t seem to harm the weaving at this width). Now to weave for awhile (but not too long because it goes fast).
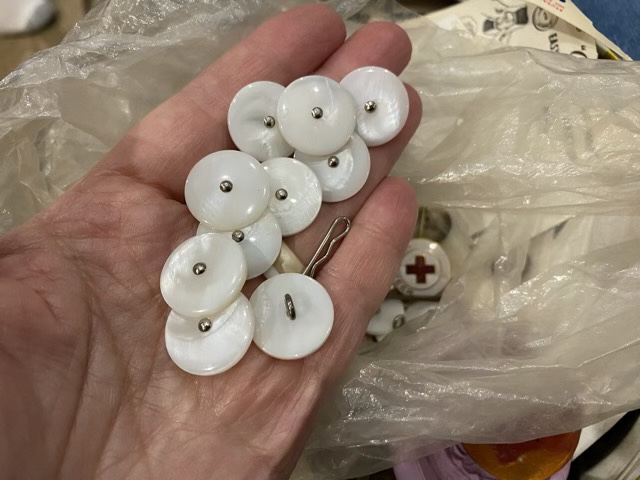
I’ve made the body of the loom, secured the rods, and finished the loom with tung oil, so it is done, right? Well… I saw another loom with knobs turned onto the end of each rod. While I didn’t want to turn each rod on the lathe with this project, I did like the idea of stops on the ends of the dowels.
Clip on buttons
In my stash of buttons (hm, apparently I have four containers full of buttons now), I found my grandmother’s old clip on buttons in a bag with her red cross volunteer name badge and pin. These clip on buttons have a single central hole with a pin through and a loop behind. They clip onto garments with a small steel pin. The buttons are made with a pearlescent material that is quite lovely and they are just over a 1/2” in diameter.
Button to tack conversion
I cut the looped pin off the buttons, and reamed out a few holes that were slightly too small for the small brass nails I had. I drilled tiny starter holes in the end of each dowel and used a tack hammer to attach each button.
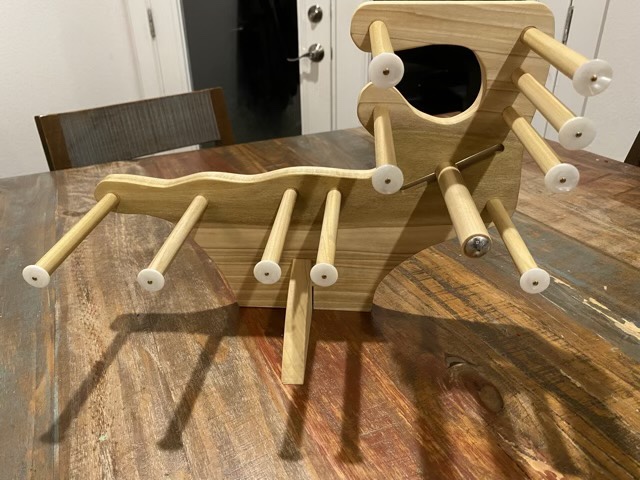
Inkle loom with button stops and tension rod installedBack of finished loom
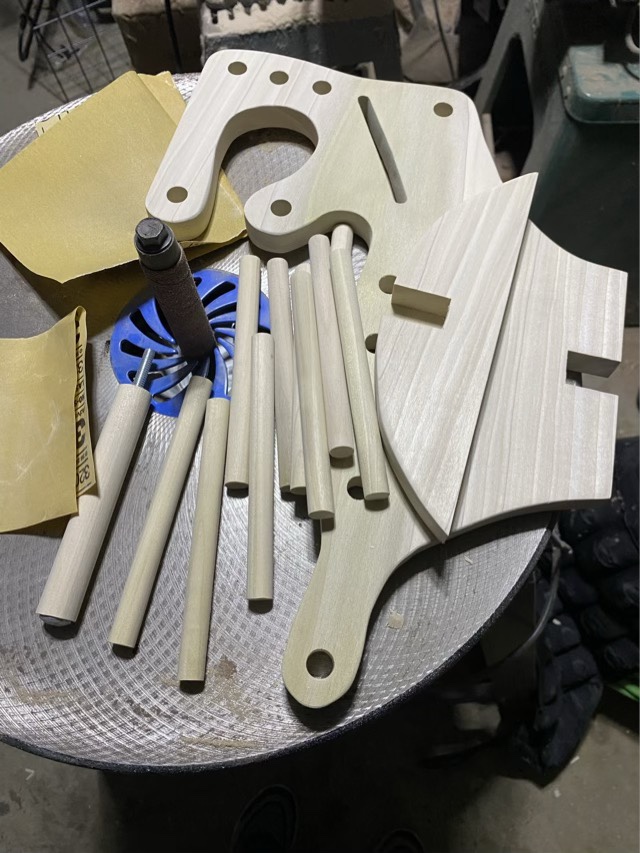
I’ve broken this post into several sections because of the length of the explanations. Yesterday was part one, laying out and cutting of the body of the loom.
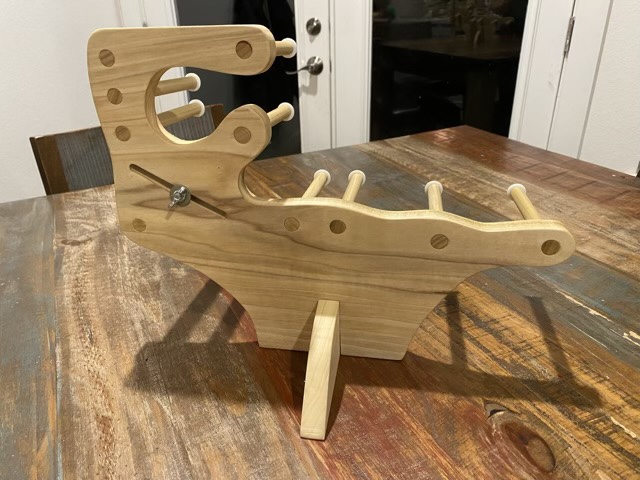
Body of the loomParts assembled and sanded
For the posts, my limiting factor was the length of the carriage bolt. I could make the 1/2” posts 6” long, but the 3/4” tension rod needed the carriage bolt to be accessible on the back of the loom. So the rods had to be 5 3/4”. I drilled a quarter inch hole through the 3/4” dowel, and threaded in the carriage bolt, pounding in the last bit to lock it in. All the parts were sanded down successively to 320 grit.
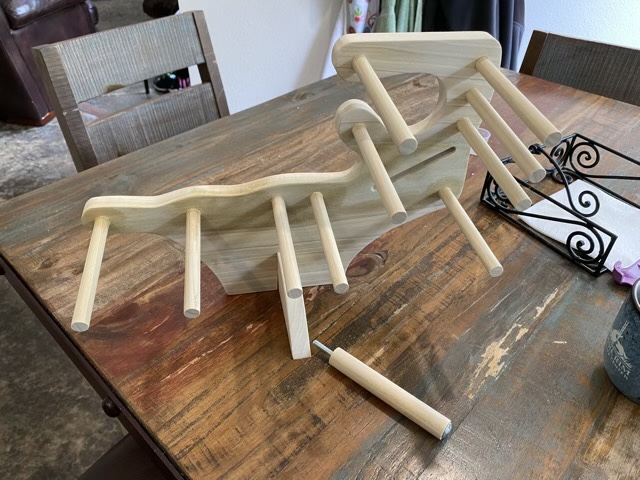
Assembled loom with rods
To secure the rods into the loom body, I applied a thin layer of wood glue at the bottom, and used a rubber mallet to pound the dowels into the holes until they were flush with the back. Before the glue dried, I wiped the whole loom down with a wet cloth to both remove the excess glue, and raise the wood grain. When the water dried, I sanded everything down again with 320 grit.
Finishing with tung oil
To give the loom a light stain-resistant finish, I rubbed in a 50/50 mixture of tung oil and mineral spirits to soak into the wood, then when that was dry, rubbed a light coat of pure tung oil over the surface.