Dishwasher magnet

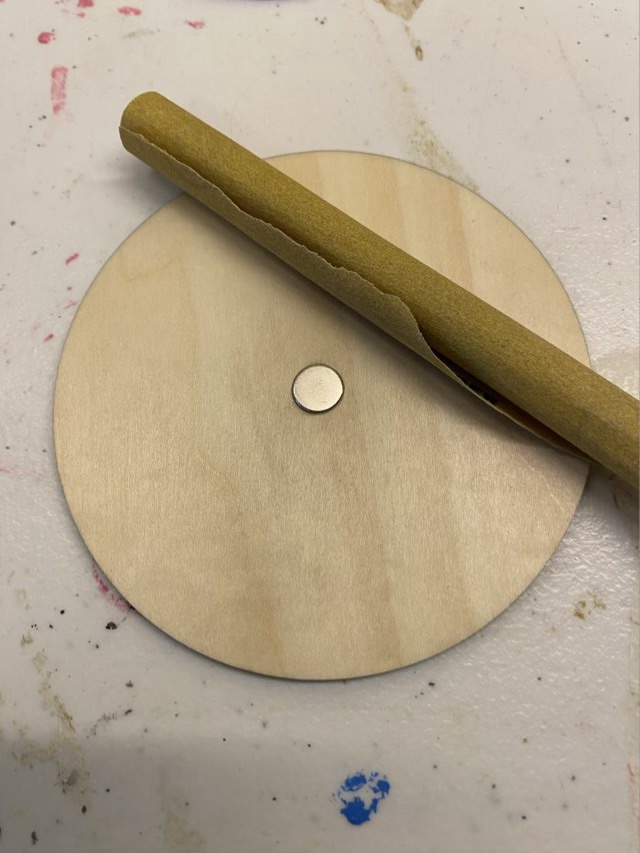
The problem with multiple parallel projects is sometimes bits get buried and I forget I have a work in progress. That happened with the dishwasher signs that I made with my folks’ laser cutter. I brought the parts home then got distracted. It happens. I found the parts again, realized I had everything I needed to complete it, I just had to make the magnet hole a little larger.

Photo description: laser cut wood disc with roll of sandpaper. The center hole was slightly too small for the magnet, so it had to be sanded until the magnet could be pressed in.

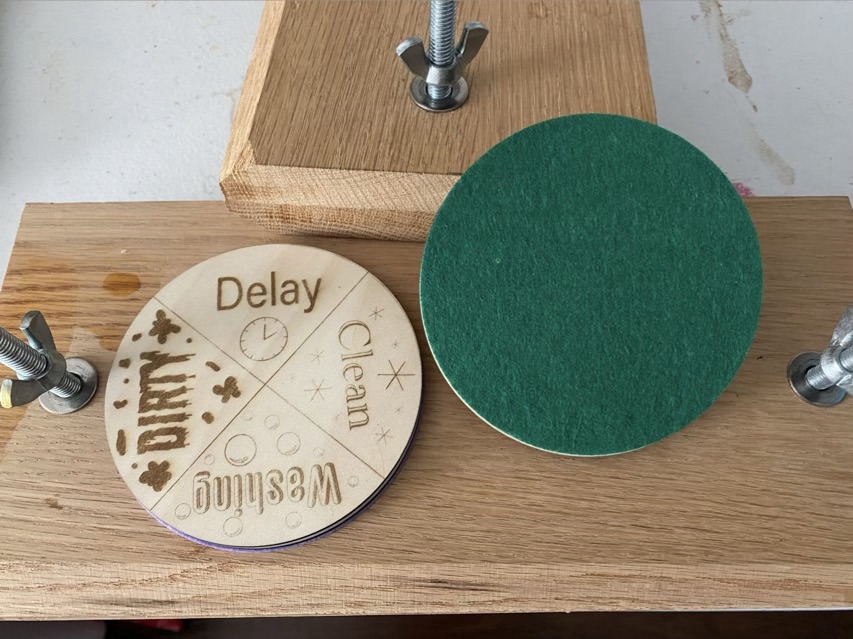
After fixing the magnet to the middle of the center layer, I could then glue all three layers together: the sign, the magnet layer, and the laser cut felt. To make sure everything set tight, after brushing on the wood glue and assembling, I wrapped the magnet in wax paper and clamped it in a book press to dry.

Photo caption: two dishwasher magnets, one sign up, one felt up, sitting on two book presses

To finish and protect the wood, I used Howard’s Feed-n-Wax.

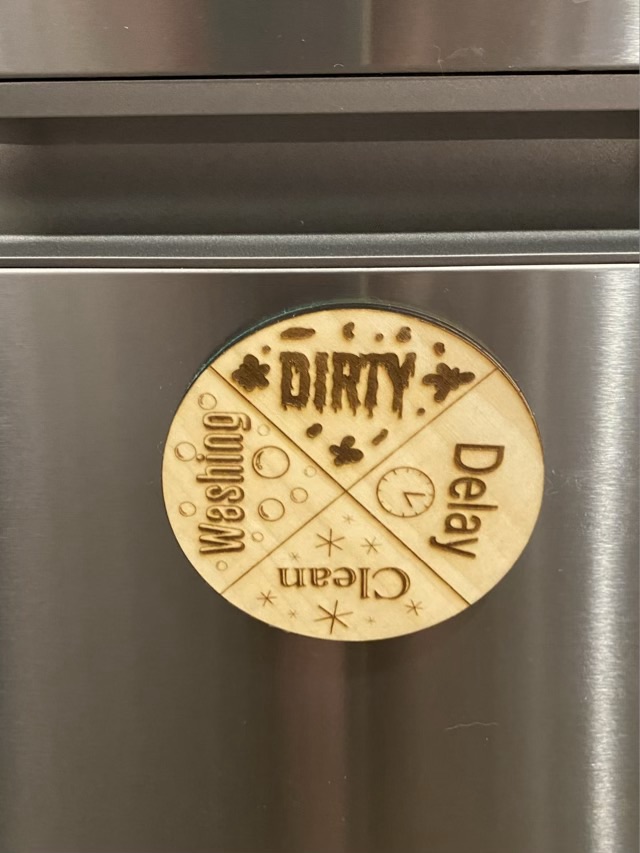
Photo description: dishwasher magnet in use with four labels on a rotating circle: Dirty, Delay, Washing, and Clean

Feed-n-Wax

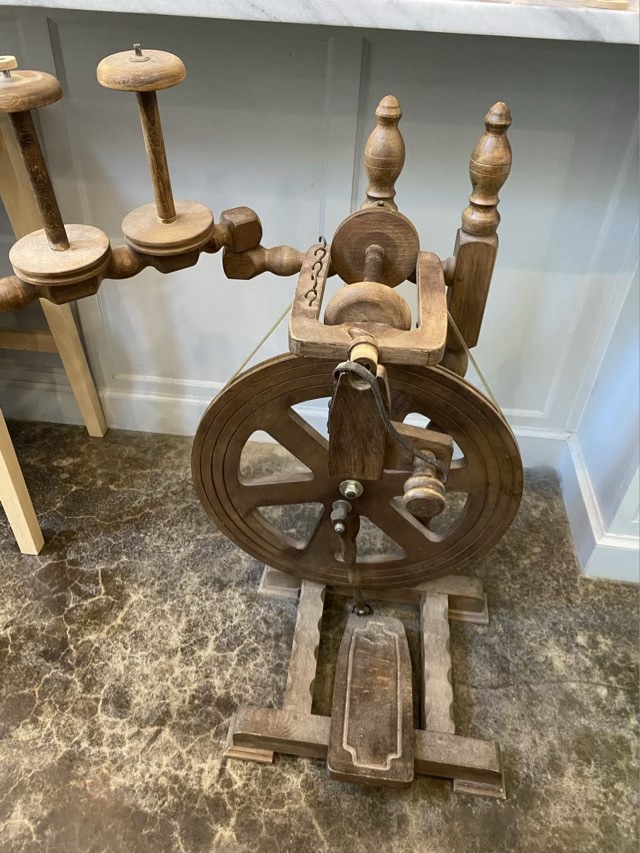
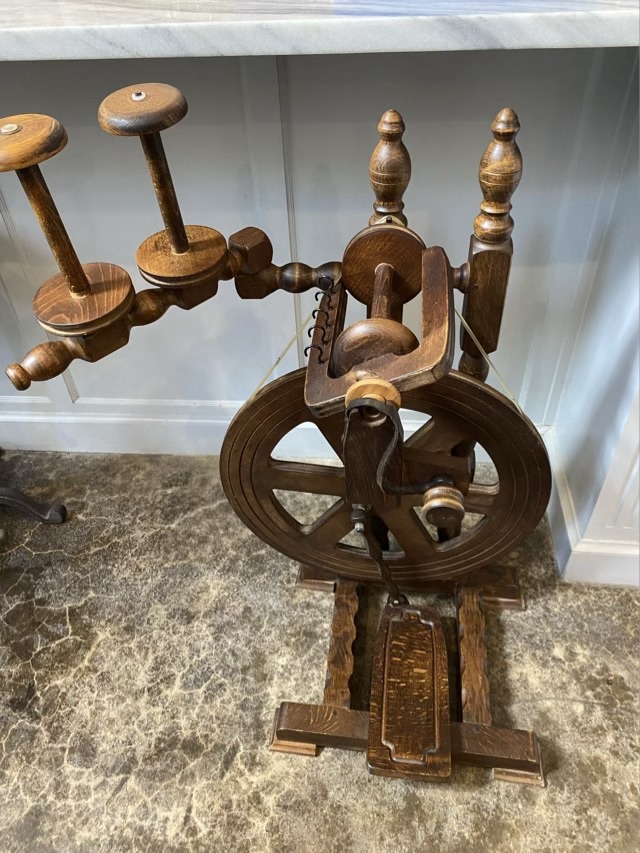
I’ve posted before about Howard Feed-n-Wax and how much I love it for the ease of use and beauty it imparts to wood. Here is another testimonial with my Befra Willy Spinning Wheel.

Photo description: Befra Willy spinning wheel before application, showing the wheel functional, but the finish is dull
Photo description: same spinning wheel after application of Howard Feed-n-Wax, the color deepened to a rich brown, the grain of the wood is more evident, and there is pleasant shine

I did replace the hooks on the flyer assembly as well. They weren’t broken, but I have an idea about how to wind the spun yarn more smoothly and larger hooks may help. More on that later.

Photo description: new hooks on the flyer assembly, old smaller hooks on the counter

Laser cutter

I recently visited my folks, who have a new laser cutter, so I had to give it a go. I had sketched up a design before I visited of a new idea for a dishwasher magnet, then I got carried away filling the space with simple yarn shuttles, weaving needles, and even a drop spindle whorl.

Photo description: 1/8th inch plywood cutouts clockwise from top right: three yarn holders, two weaving needles, two 2-part dishwasher magnets, and a dragonfly spinning whorl on a wooden shaft (the shaft is from a different spindle)

The laser cutter is like a Cricut cutter, but on steroids. The cuts were smoother than I expected, and really don’t need clean up. The engraved dragonflies actually have some depth, which is neat. The dragonfly design is one of mine that I pulled from archives to test out (because I could). There is some learning curve, and experimentation with power and speed is necessary for the best results. It was overall a fun project. I do have some assembly and testing work ahead of me.

Throwback Thursday: rolling pin

This Throwback Thursday doesn’t go quite so far back, we’re going to December 2021. I made a tapered French style rolling pin for my Mother-in-law and decorated it with painted daisies. I took some in process pictures, but because it was the holidays and I was in a whirlwind, I forgot to take final pictures. My MIL graciously sent me pictures of the rolling pin recently, so now I can share the project on the blog!

Photo description: maple wood tapered end rolling pin fresh off the lathe in 2021
Photo description: recent picture of the rolling pin painted with daisies and finished with a food-safe oil and wax mixture (photo credit to my MIL)
Photo description: closeup picture of the painted daisies, which really do look better close up (photo credit to my MIL)

Throwback Thursday: coaster study

In June of 2007 I did a wood and epoxy coaster study for Father’s Day.

Photo description: wood coaster with recessed center filled with symmetrically placed fishing lure, hooks, weights, and swivels covered in clear two part expoxy
Photo description: back side of coaster showing three round carved wooden “feet” and the words “CJH 2007 Coaster Study #1”
Photo description: wood coaster with offset rectangle carved out and filled with a slice of polymer clay in shades of blue and gray of a jumping fish, drawn fly hook on a line, all covered in a thick layer of clear two part epoxy
Photo description: back side of the coaster with three oblong “feet” carved in the wood and the words “CJH 2007 Coaster Study #2”

I used a hand held router setup with my rotary tool to carve the recesses and feet on each coaster.

My Dad sent me a picture of the fish coaster, 17 years later, and the coaster has held up well living in a display case. Interestingly, the blue “feather” I drew on the hook has faded.

Photo description: 17 year old wood and epoxy coaster