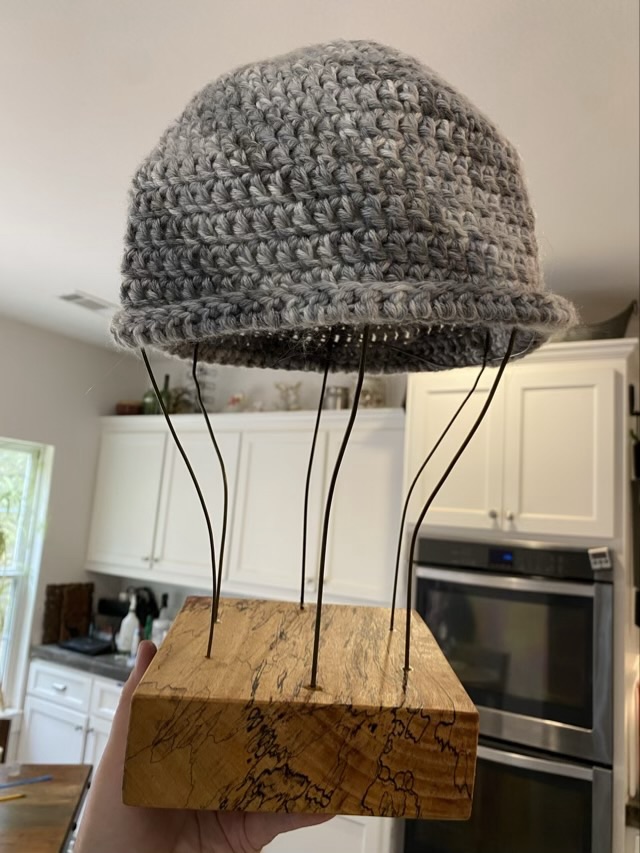
I’ve needed a hat stand for awhile now, mostly to block hats after I wash them. I decided to make one using a pretty block of spalted tamarind and some hanger wire so I could use it at the craft fair where I was selling all those hats I’ve made.
Photo description: finished spalted tamarind wood block with wire hat form holding a crocheted gray beanie.
I wanted to just have the thick wire so that I could adjust the size based on the hat, but the hat looked a little strange with only vertical support. I added a spiral of aluminum wire, which helps the hat, but looks strange without the hat. Hm. It worked fine at the fair, but I will continue to fiddle with the form.
Photo description: form without the hat showing all the wire
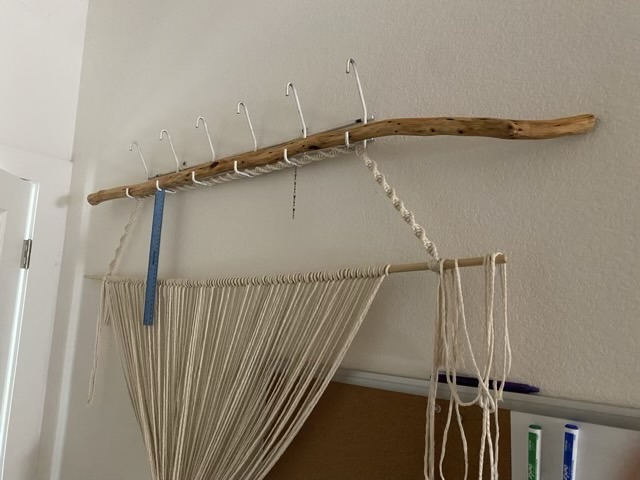
I realized that I had a free substitute for the thin dowel I tried to use for a large macrame hanging: a branch from the yard. Not only do we have copious available branches, naturally shaped wood looks really nice with macrame. I even had a nice long cedar branch that I had cut a few months ago that didn’t work for the project at the time, that had been sitting out and curing. I stripped off the bark, which is much easier after the rain when the bark is wet, then let the wood dry. I used an oscillating spindle sander to get the remaining traces of bark removed, then sealed it with several applications of Howard’s Feed-n-Wax.
Photo description: curved smooth cedar branch set above the thin dowel with cotton cord tied on with larks head knots
Transferring the cotton cord from the dowel to the branch wasn’t difficult once I used some spare cord to tie it up above the dowel. Larks head knots are very stable, but very easy to remove.
Photo description: all the cotton cords transferred to the branch which is naturally curved not bent due to the attached weight
I left the old thin dowel hanging as a pattern line, and added a couple more guide lines to the wall using washi tape.
Now I have to settle on my macrame pattern. I initially intended a simple all-over grid, but my ideas keep getting fancier and I’m thinking of pockets and loops. Hm.
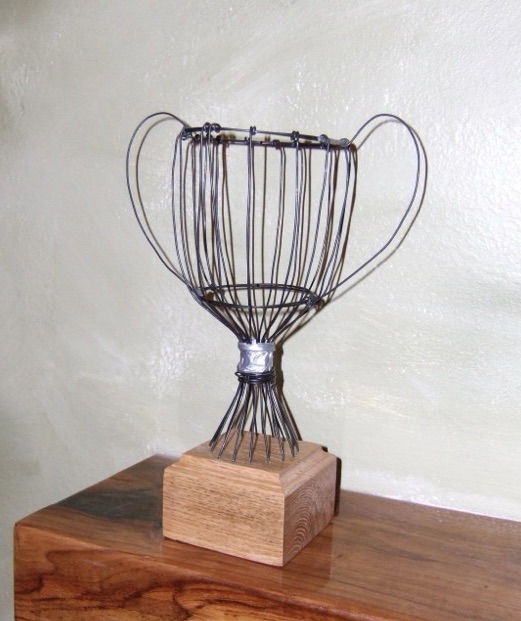
I was tasked with making a trophy for a duct tape contest back in December of 2009. I found a block of wood from my stash, imbedded several hanger wires, then shaped them into a chalice.
Photo description: wire armature chalice set into a finished block of wood with routed edges
I covered the whole thing in strips of standard duct tape, then forgot to take a final picture. Hm. When it was presented, though, it was deemed way fancier than the requester envisioned. That’s what happens when a crafter gets their hands on duct tape.
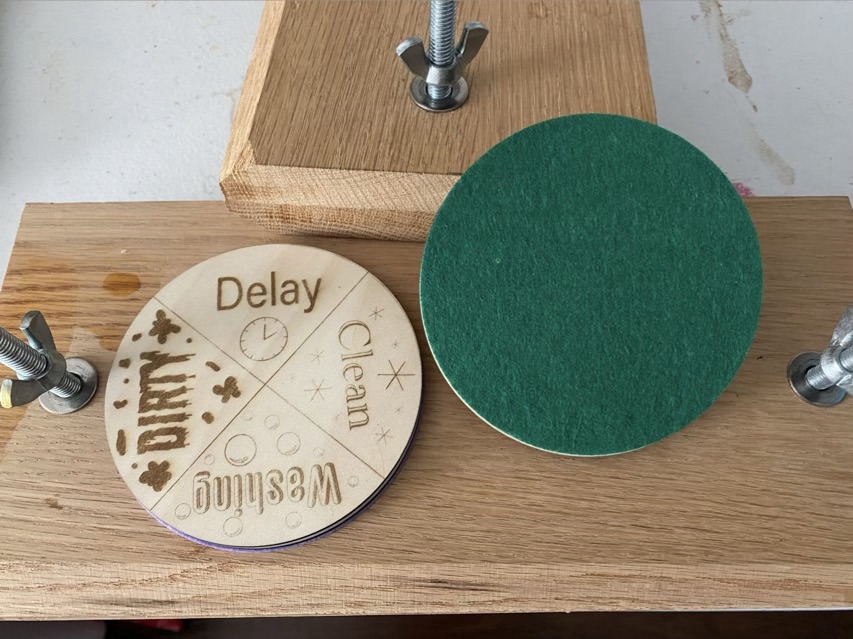
The problem with multiple parallel projects is sometimes bits get buried and I forget I have a work in progress. That happened with the dishwasher signs that I made with my folks’ laser cutter. I brought the parts home then got distracted. It happens. I found the parts again, realized I had everything I needed to complete it, I just had to make the magnet hole a little larger.
Photo description: laser cut wood disc with roll of sandpaper. The center hole was slightly too small for the magnet, so it had to be sanded until the magnet could be pressed in.
After fixing the magnet to the middle of the center layer, I could then glue all three layers together: the sign, the magnet layer, and the laser cut felt. To make sure everything set tight, after brushing on the wood glue and assembling, I wrapped the magnet in wax paper and clamped it in a book press to dry.
Photo caption: two dishwasher magnets, one sign up, one felt up, sitting on two book presses
To finish and protect the wood, I used Howard’s Feed-n-Wax.
Photo description: dishwasher magnet in use with four labels on a rotating circle: Dirty, Delay, Washing, and Clean
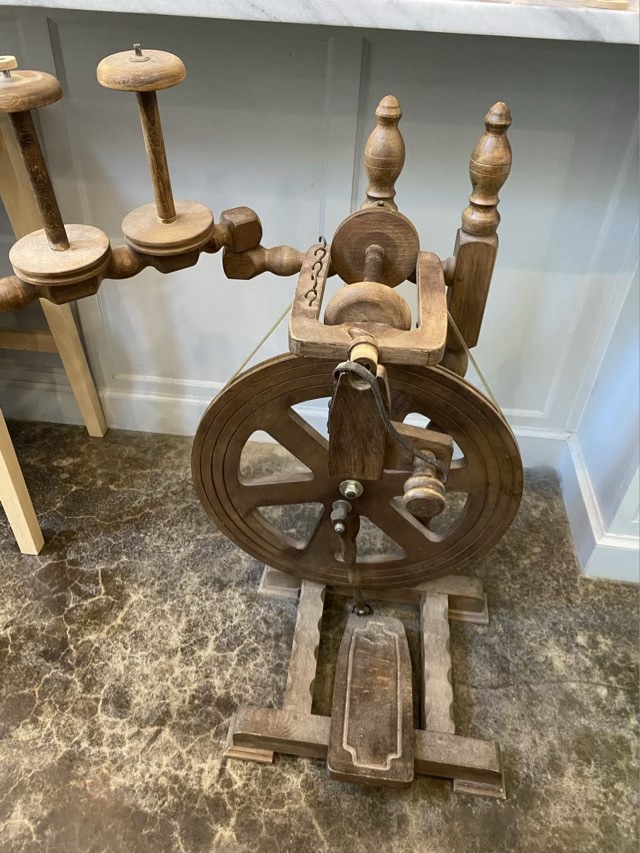
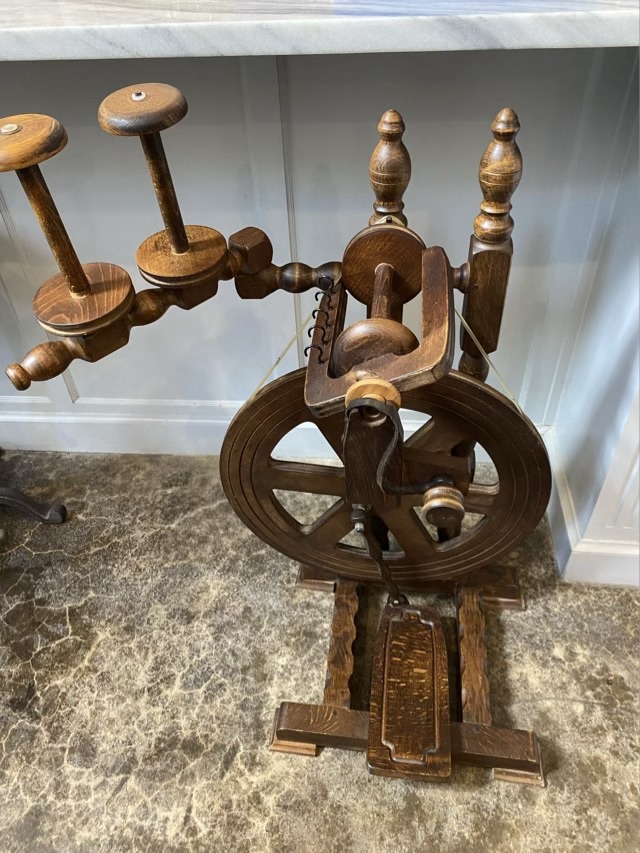
I’ve posted before about Howard Feed-n-Wax and how much I love it for the ease of use and beauty it imparts to wood. Here is another testimonial with my Befra Willy Spinning Wheel.
Photo description: Befra Willy spinning wheel before application, showing the wheel functional, but the finish is dullPhoto description: same spinning wheel after application of Howard Feed-n-Wax, the color deepened to a rich brown, the grain of the wood is more evident, and there is pleasant shine
I did replace the hooks on the flyer assembly as well. They weren’t broken, but I have an idea about how to wind the spun yarn more smoothly and larger hooks may help. More on that later.
Photo description: new hooks on the flyer assembly, old smaller hooks on the counter