Many of the pictures of woven loop potholders are taken when the work is still on the loom. This makes it easy to see the order of the colored loops by looking at the colors on the pegs. For plain weave potholders, this is all the info needed to recreate the pattern.
Photo description: potholder on the loom in light green and dark green, the vertical loops have 9 alternating colors, which then repeat, giving two light green loops in the center and light green on the outside. The horizontal loops switch this, with the dark green doubled in the center and on the outside.
Since the loom was out, and there were still loops left, I had to give this neat directional pattern a go.
It bothered me that the cast off for my last potholder was so tight, so I did up another diagonal line weave and tried something different. I used the same method of weaving, working from one corner and hooking pairs of loops together at a ninety degree angles.
Photo description: potholder loom with purple loops on one side and the start of a rainbow on the other, showing how the loops wrap around each other in order to achieve a sharp return to the edge peg
To finish, I tied a new loop to a corner loop, by chaining them together, then threaded this longer strand through the loops on the side of the loom.
Photo description: finishing a potholder by running loops tied together through the loops on the pegs of the loom
This method of finishing does produce a softer edge, but it doesn’t have the neat, crisp look of a crocheted edge. It also makes the potholder one “row” bigger as it is essentially weaving an additional row on each side.
Photo description: two loop woven potholders using a diagonal method, left square finished off with traditional crochet chain, right square finished by threading tied loops through the edge
I did get my center twists all going the same way in my second attempt. Yay.
This is more of a craft Throwback, rather than a picture from the past. The potholder loom was a craft I did when I was young. All those loops! I bought two sets for my kids years ago, and they sat unused. I was recently scrolling Pinterest and saw a diagonal design that used a technique I had never seen. I had to try it. I dug out a kit from the craft closet and set to work figuring out how to do it.
Photo description: laying out brightly colored knit cotton loops on a standard potholder loom, laying on loose loops.Photo description: weaving started on the potholder loom with purple and red loops that twist around each other and are hooked at a 90 degree angle instead of straight across. Harrisville Design box as the background.Photo description: weaving finished and showing a strong diagonal line with green, blue, and purple on one side, and red, orange, and yellow on the otherPhoto description: same potholder with the edges finished and removed from the loom showing a definite cup effect from the extra tension added by the 90 degree twist. This potholder later relaxed and laid flat.
This is a neat technique. I did learn that I need to pay attention to which way I twist the two colors around each other and keep it consistent. I switched directions a couple times in the project and it can be seen in the final product as an inconsistent line.
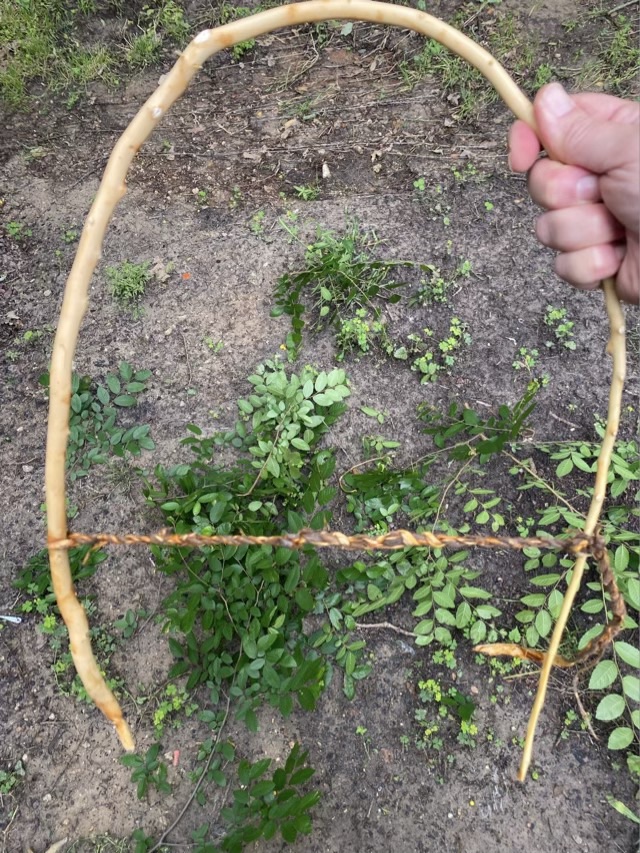
I was trimming the yard, and took down a sapling (iNaturalist identified it as a type of elm) growing near the AC units where it didn’t need to be. I noticed that the diameter was similar to some bent cane weaving frames that have been popping up on my Pinterest feed. Because I am easily distractible, my next task became making my own frame. As I stripped the side branches off, I noticed that the bark peeled off easily, like that of a mandarin orange. The bark was flexible, strong and fibrous, so I roughly split it into thick strands and twined the strands together to make a primitive rope. I used this rope to keep the branch in a nice curved shape while it dries.
Photo description: stripped elm cane bent into a narrow arch and secured with elm bark twine
I think this frame is on the small side for the kind of weaving I want to attempt, but it was a good exercise, and I have an acre of woods to source longer cane.
I have finished a new fiber page for my spinning book! I mounted all my samples from hand spinning soybean top (top is the description of the fiber preparation, involves combing, and produces parallel fibers) on prepped black card stock. I would definitely use this fiber again, it is very strong, yet so soft.
Photo description: Soybean top fiber page. Clockwise from top left: original card from Hearthside Fibers reading “Soybean Top Developed in the USA in the 1930s by Henry Ford Used in Ford car upholstery pre-1940”, single spun, 2-ply, and 4 ply yarn samples, woven swatch, nålbinding swatch, crochet swatch, knit swatch, combed fiber.Photo description: same page with swatches flipped up to show the writing underneath: plain weave on Clover mini loom, nålbinding Dalarna O/U O:U O, crochet 1.75mm hook, Stiockinet size 2 needle knit.