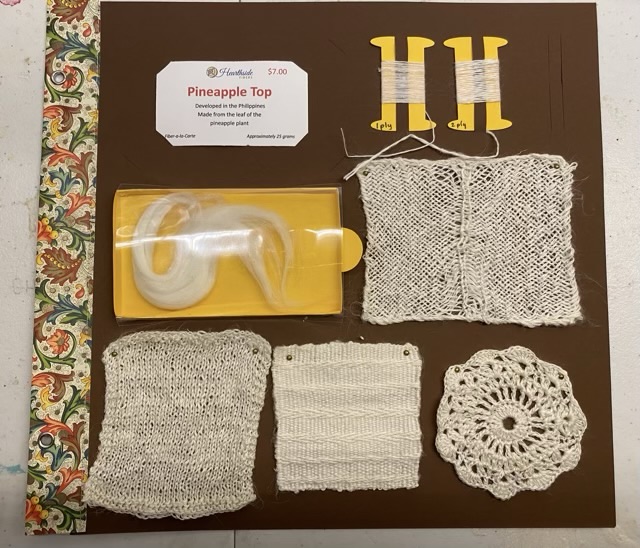
My fiber study page for my pineapple fiber sample is done!
Photo description: clockwise from top left: card from Hearthside fibers that says “Pineapple Top, Developed in the Philippines, Made from the leaf of the pineapple plant”, paper bobbins with single spun and 2-ply hand spun yarn, sprang swatch, crochet swatch, woven swatch, knit swatch, unspun fiber
The crochet round gave me fits with this fiber. I spun it so fine I was having trouble getting the right gauge for my regular coaster pattern. I think I ripped it apart three times. I ended up winging it, filling the space with stitches and numbers that fit.
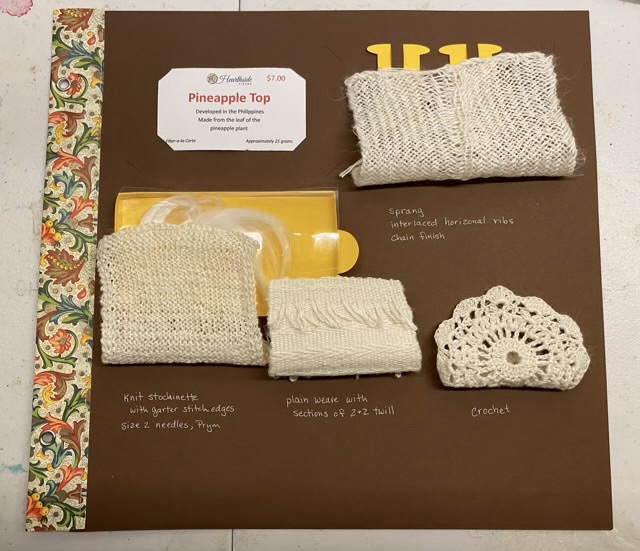
Photo description: same page with the swatches flipped up to show hand written descriptions: “Sprang interlaced horizontal ribs chain finished”, “crochet”, “plain weave with sections of 2×2 twill”, “knit stockinette with garter stitch edges size 2 needles, Prym”
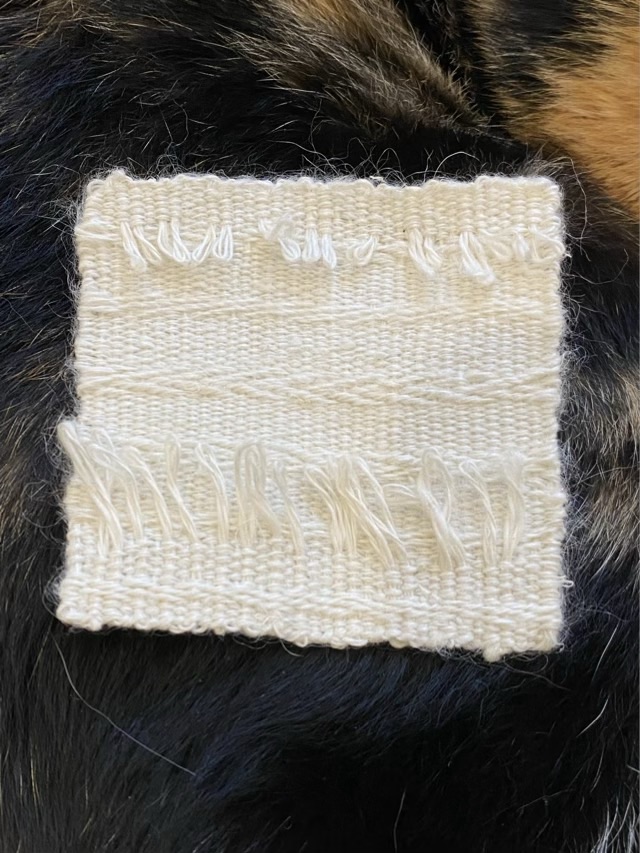
On my pineapple fiber weaving swatch I wanted to try a different method of finishing the warp ends, so wove the loops back into the fabric after taking it off the loom.
Photo description: needle inserted vertically through the top five passes of the weft, with the warp loop through the needle eye
My warp loops were quite small, so I had to insert the needle through the fabric first, then put the warp yarn through the eye of the needle, so I could pull the yarn through.
Photo description: back of the woven swatch showing all the warp threads woven through the fabric and left untrimmed
This is now my favorite way to finish my small woven swatches. The resulting edge has a nice ripple and a clean finish. I left the loops on the back to remind me what I did.
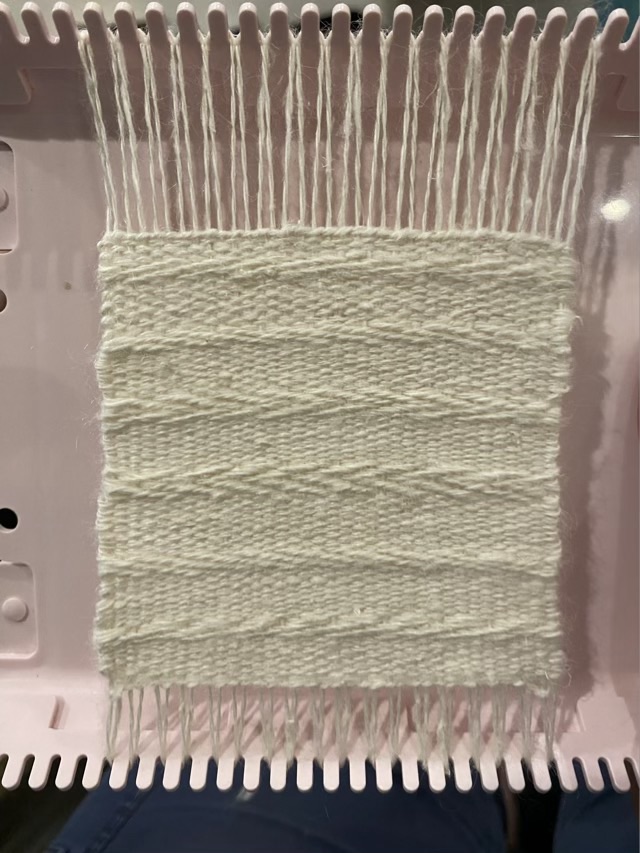
When weaving up a swatch of hand spun pineapple fiber, I decided to do a little experiment with twill. In plain weave, the weft yarn alternates going over or under one warp thread all the way across the fabric. Twill goes over or under multiple strands. You can have a pass go over two under two, or over three under one (denim), or any number of combinations. The next pass has the same pattern, just offset by one strand. The resulting twill fabric has a diagonal line going left or right depending on how the passes are aligned.
Photo description: Clover mini loom with a swatch of woven pineapple fiber showing bands of plain weave, bands of 2×2 twill at at right diagonal, 2×2 twill at a left diagonal, and 2×2 twill chevrons going left and another band going right
This was a fun experiment. I rather like twill, and it is definitely something that requires some brain power.
We picked up a fast food dinner and were given a plethora of paper napkins. I had a stash of straws. Could I make a basket? (Because that is the logical thought process with excess disposable paper products, right?)
Photo description: unbleached paper napkins and paper wrapped straws
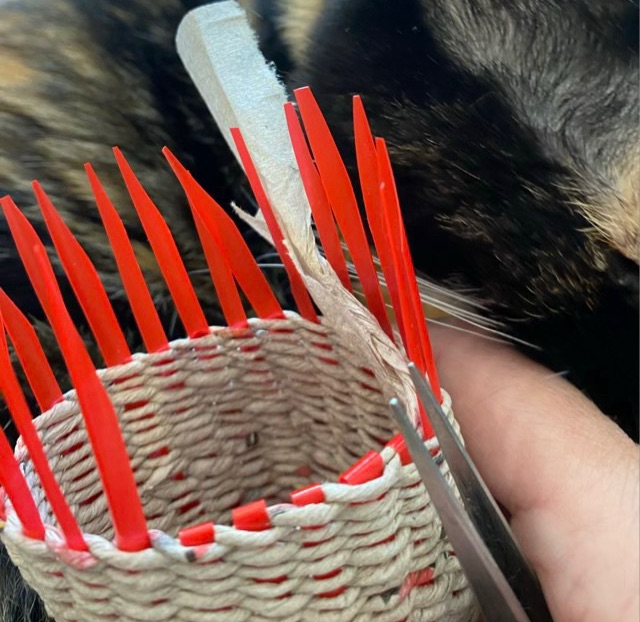
I unwrapped and split the straws by running a scissors down the length to obtain four plastic strips from each straw. I wove a square base (6×6 straw pieces). I tore the napkins into 1/2” strips and twined them around the straw “staves”.
Photo description: slivers of red plastic straws woven together and secured with paper napkin twine
It took some time to twine up the sides of the basket. The joining method I liked best was to overlap the end of a napkin strip with a new strip, fold the sides to the middle, then secure with a good clockwise twist. The two clockwise twisted strands were then wrapped counterclockwise around each straw, which isn’t as complicated as it sounds. To finish the basket, I trimmed the end of the straws to a blunt point, and used tweezers to thread them back down through the weaving.
Photo description: in process threading of the straw staves back into the twined weave, calico cat as a background
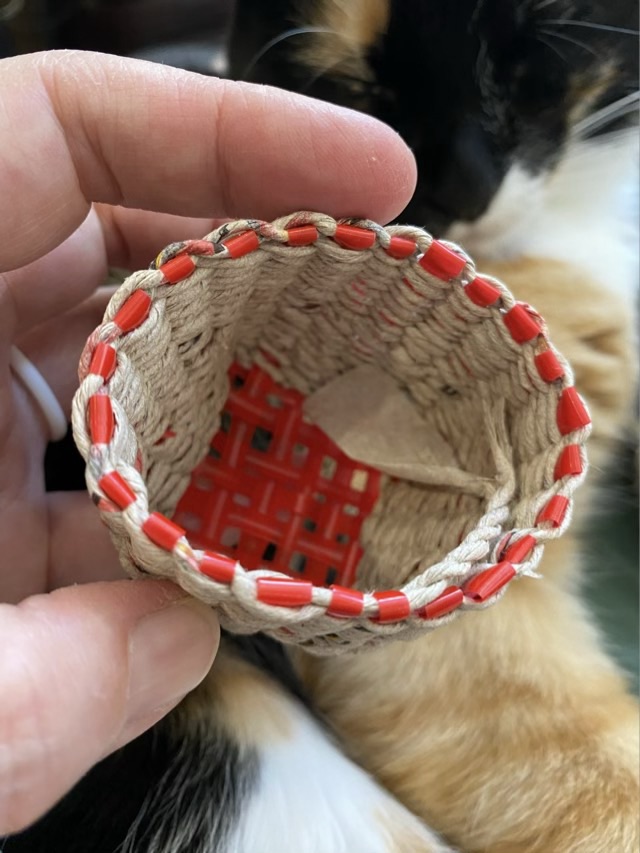
I was quite surprised that the little basket is fairly sturdy. It certainly won’t hold up to water or washing, but it is a cute little basket. I left the end of the napkin twine inside the basket to remember its humble origins.
Photo description: finished basket, top view, happy calico cat as the background Photo description: finished napkin and straw basket, side view, sitting on a calico cat
The Baize Shetland wool was the first Livestock Conservancy Shave ‘Em to Save ‘Em fiber I purchased. I bought a 13 oz batt, and have been spinning it at demonstrations and fair booths. I’ve been quite remiss in actually making a fiber page! That is now rectified, and this wonderful fiber has a page in my sampler book.
Photo description: Post card from the breeder (top left), single spun and two ply yarn (top right), unspun wool as purchased scoured and carded (middle left), crochet round (middle right), two Shetland lace knit samples (bottom left), nålbinding (bottom middle), and a woven swatch with combed fringe.Photo description: same page, but with the samples folded up to show the descriptions
Shetland wool is a joy to spin, and is definitely on my “will purchase again” list.