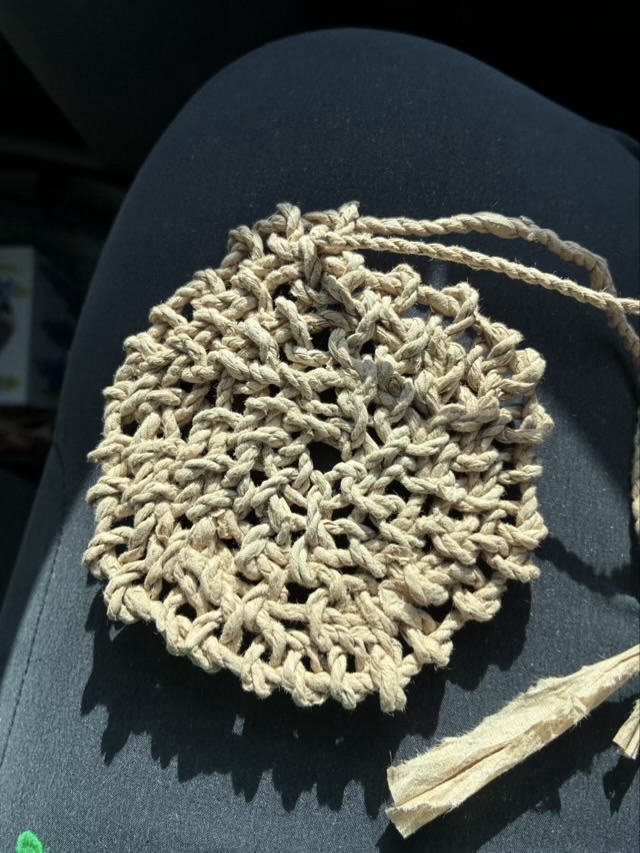
I have a car project for which I tear unbleached fast food napkins into one inch strips, twine the strips together, then add stitches to a loop and core basket. Well, I intended it to become a basket, but I am doing my stitches (button hole loop or Coptic stitch) upside down. It makes it hard to add the stitches because I’m going through a smaller loop.
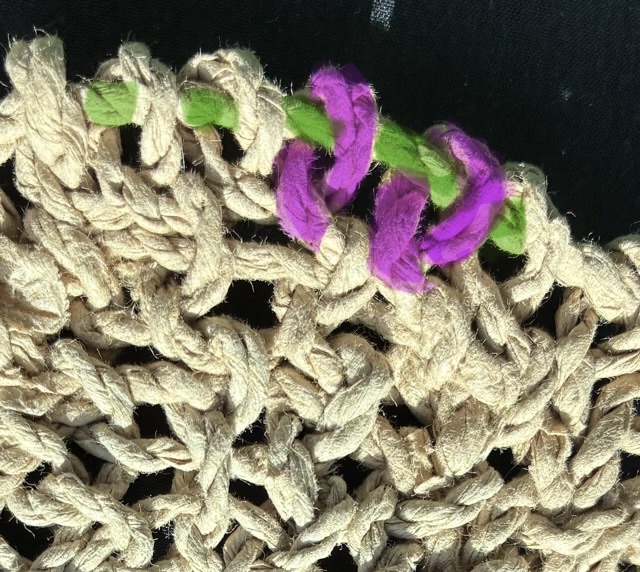
Photo description: round loop and core base make from paper napkinsPhoto description: close up of the stitches with the core twine marked in green, and two loops highlighted in purple
Opening up the smaller loop to add the next row of stitches weakens the twine at that point, and paper twine is not robust stuff to begin with. I will probably continue to the end of the core twine (there isn’t much left), and experiment with preservation methods with the finished object. The feel of the fabric is quite nice, flexible but firm with an interesting texture.
There are so many applications for the word “twining” in crafting. I was going to start this blog post talking about twining wool, but I think I have to specify that I was making twine from wool. Typically twine is made from plant bast fibers: cotton twine, jute twine, hemp twine, for example, and forms a dense strong string. I took a long staple wool, Teeswater, and twined it in a similar manner. Twining wool could also refer to construction techniques in weaving or knitting, but not in this case. Here I am making yarn, nålbinding a few stitches, then making more yarn (I’m going to call it yarn because it is softer than typical twine, yes, I’m splitting hairs (haha)).
The problem I encountered was a strong twist in the small pouch I was constructing. I experienced this with a different project, so decided to try twining the opposite direction, by switching hands, but the twist still happened. I think it is in my nålbinding stitch. I do not enjoy twining with my left hand as much, so I halted the project.
Photo description: start of a nålbinding project that has a Z twist bias making it spiral
Then I had the problem of what to do with the abandoned project. Undoing nålbinding is a difficult, sometimes impossible task, which is what makes it good for items that need to be sturdy. So what could I make from a small bit of wool? Well, a cat toy, of course. Thor the cat loves wool, and steals socks and doll clothes that are made from wool. So I sewed up the seam, stuffing it with un-spun wool as I went, and ended up with a little roll.
Photo description: stuffed tube made from wool
The new cat toy was a big hit with Thor the cat. He loved it and it was very difficult to get a photo of him as he carried it around the house, flipping it and chasing it at speed.
Photo description: large gray tabby going in for the grab of the wool roll
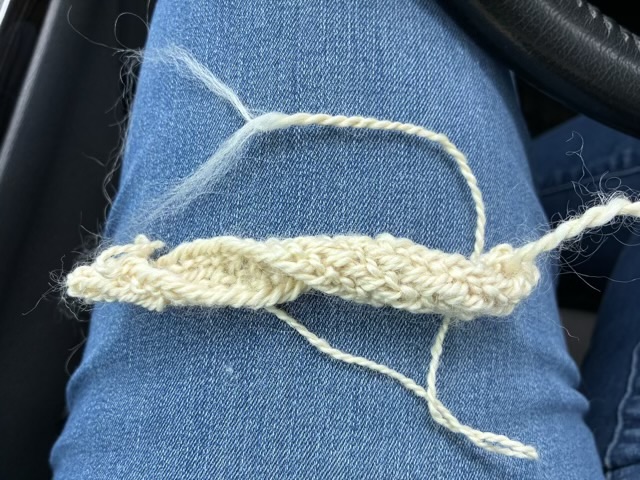
I’ve been twining with plant bast fibers (the long ones from the stems of plants), and wondered if I could twine long wool. I selected some Teeswater from my stash that has a staple length around 5-8 inches, grabbed a sponge and a spray bottle of water, and started twining. There was a bumpy learning curve, especially since I decided to learn to twine left handed to get an opposite twist. I wanted an S twist direction because my current favorite nålbinding stitch has a bias Z twist, and I thought the opposite twist yarn would help. It didn’t really.
Photo description: twined Teeswater wool and the beginnings of a nålbound pouch sitting on my jeans in the car while waiting in the pickup line
As I write this post, I’m wondering if the twist in my work is the stitch, or the method of construction I’m attempting. I’m working in the round, which is typical for nålbinding, but I’m working around a long base chain, which is a little different. I’ll keep on and see if things even out, either as I go, or after I block the finished work.
The exciting part of this project is there are no joins in the yarn, rather, the yarn is created as I go.
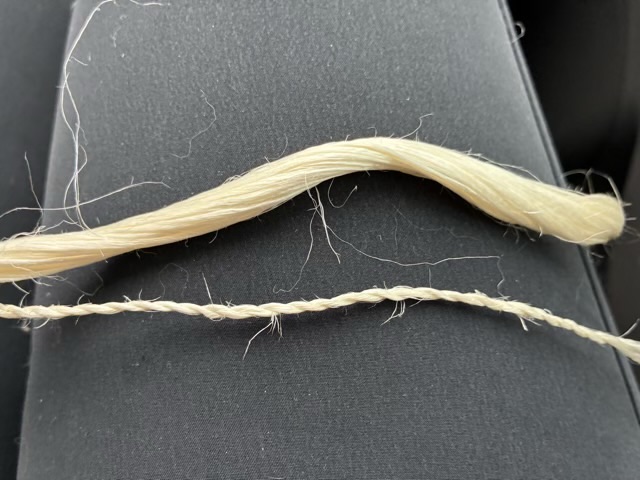
This is lotus flower fiber, from the long stalks of the water plant.
Photo description: bundle of lotus stalk fiber (above) and a small twined rope (below)
I should have hackled this fiber to separate the strands and remove the shortest sections, but I picked it as a travel project, and figured out I should have run it over my steel combs about 30 minutes down the road. I’ll be finding tiny bits of lotus fiber in the car for the foreseeable future (along with bits of flax and yarn ends).
The fiber is enjoyable to twine. There are some very long fibers in the bundle, around 5-6 feet long. Twining goes better with a little sponge and a spray bottle of water so I can keep my finger tips moist as I twist.
Twining has become my favorite travel project because I can watch the scenery and not have to keep my eyes on my hands.
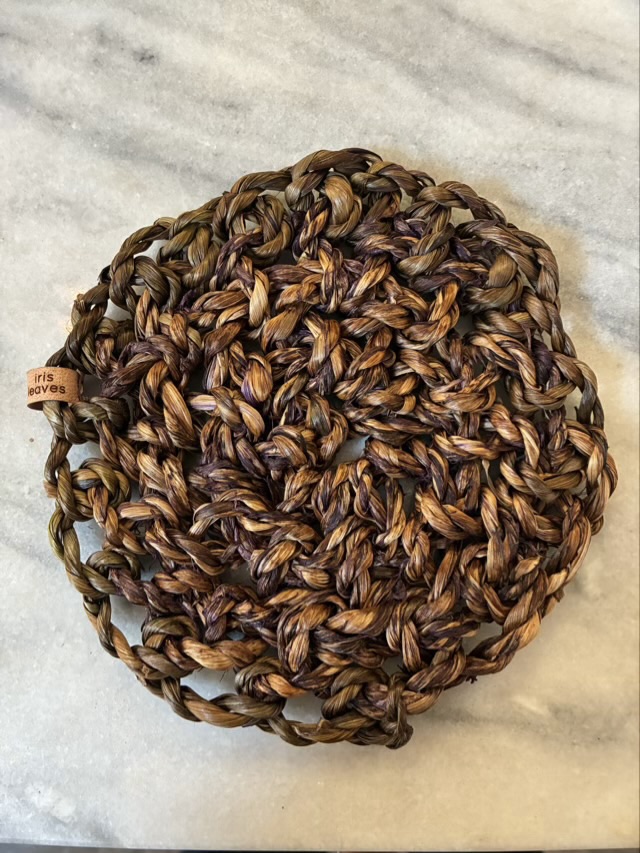
I recently found a tutorial from Sally Pointer on looping around a core and really wanted to try it. I look some dried and rehydrated iris leaves from my garden, twined them, then started looping. I didn’t have enough material for a basket, but the thick twine did make a nice trivet.
Photo description: trivet made of twined iris leaves with simple looping over a core construction
I did overestimate the amount of core, but rather than cut it off, I switched to just looping with the tail and was able to add some width to the trivet. I then sewed a leather label in a circle to an outer loop.
I like this method of construction. The core gives a way to tighten the stitches and fill in the density of the looping. It can also be done as the twine is created and without tools, which makes it a great skill when I am waiting and don’t have a project with me.