Pegboard sandwich board

I used scrap pegboard to make a display for all my twine cards for the Pioneer Festival at the Doss Heritage and Culture Center. To make the two pieces of pegboard into a sandwich board I cut and punched a strip of leather and riveted it to the top of the boards.
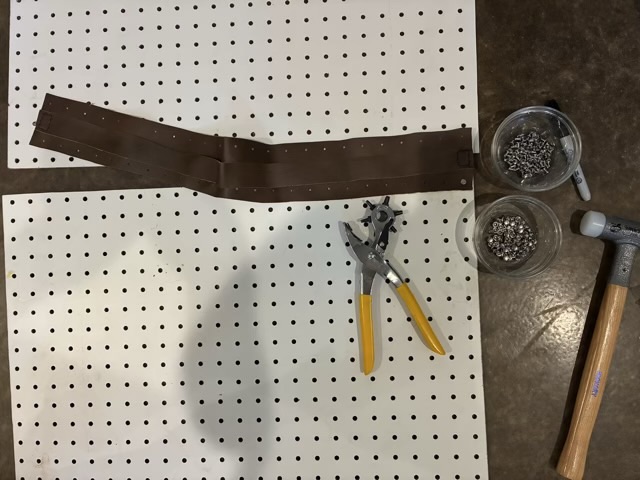
Photo description: pegboard, leather strips, leather hole punch, two bowls holding one half of the two sided rivets, and a dead blow hammer

My rivets were just the right size to lock together through the leather and the pegboard. I used a dead blow hammer to secure them as the board laid flat on the floor. The second board was a little tricky to set the bottom rivet, so I flipped the board over, put in the rivets, and secured them with tape so they wouldn’t fall out. I used screw rivets to secure side straps to keep the boards at the same angle when open.
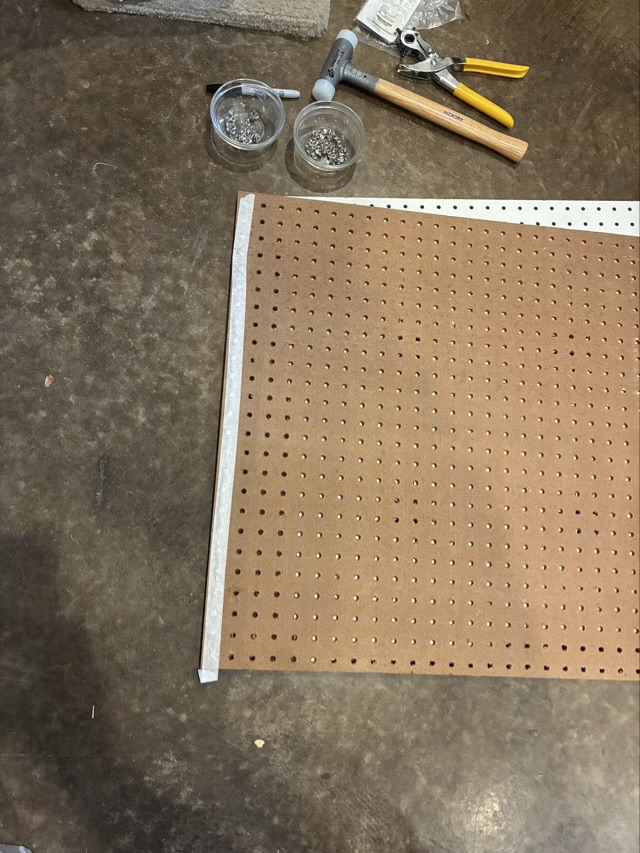
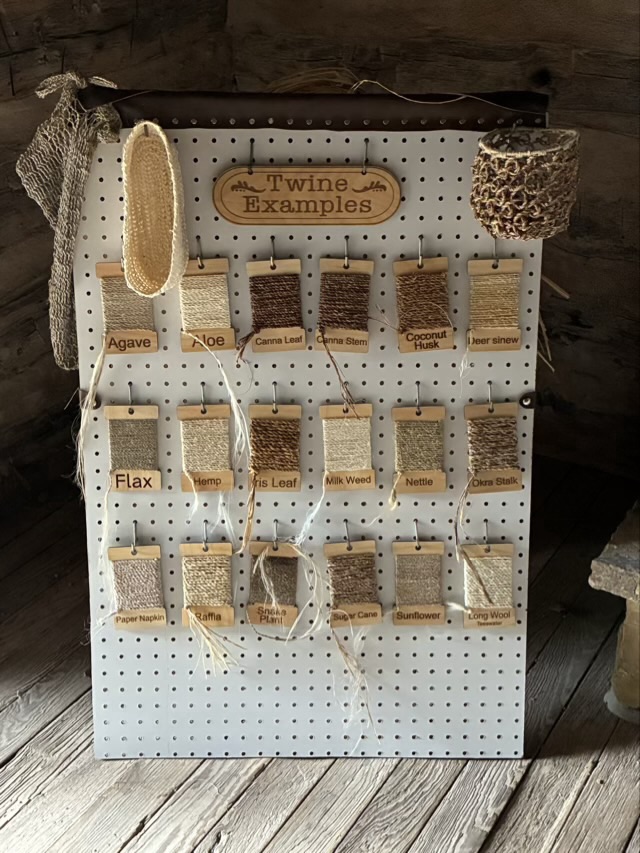
Photo description: back side of the pegboard with half the rivets in the top holes secured with tape
Photo description: finished pegboard sandwich board with 18 examples of twine, a laser cut “Twine Examples” sign, two baskets made from looped twine, and a bag made from twine

The twining went over well. I took raffia and taught two wonderful volunteers to twine and they taught hundreds of people coming through the event to twine bracelets while I demonstrated spinning on a great wheel and a treadle wheel (not at the same time, but as a comparison). Of course I didn’t take a single picture of my period outfit, but I did take one of the wheels I worked with in the 1850s cabin I was in.
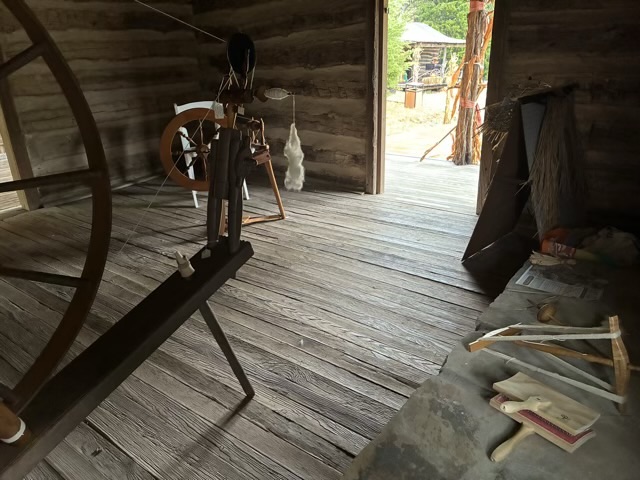
Photo description: inside the Strain cabin with a great wheel (left), modern treadle wheel (behind the great wheel, twine display (far right), and spinning tools on the hearth: carders, niddy noddy, and drop spindles

The treadle wheel was meant to only be decoration, but it just needed a new string on the footman at the bottom, and a bit of wire at the top to keep it on. I cleaned it and oiled it and had it spinning wool again. On the Great Wheel I was spinning Texas grown cotton.
Take it back

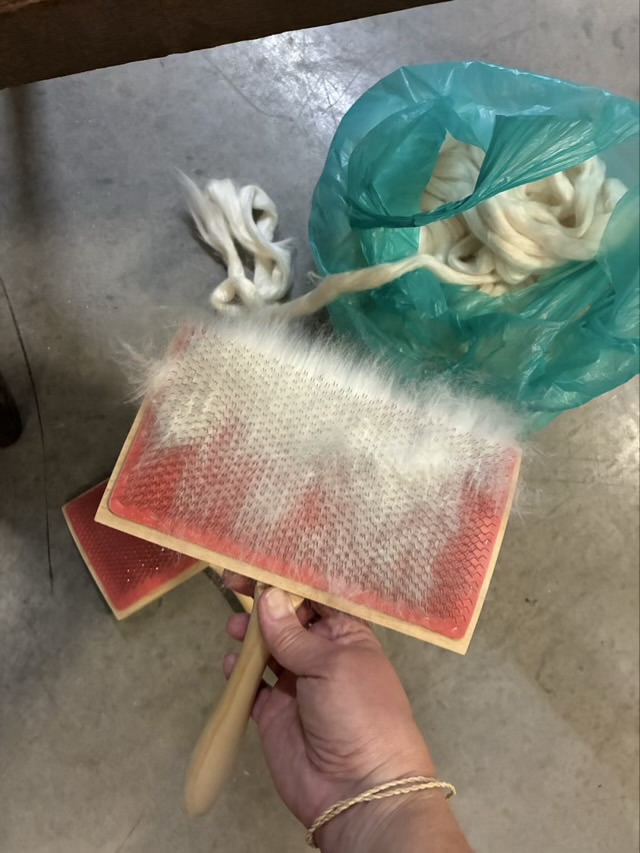
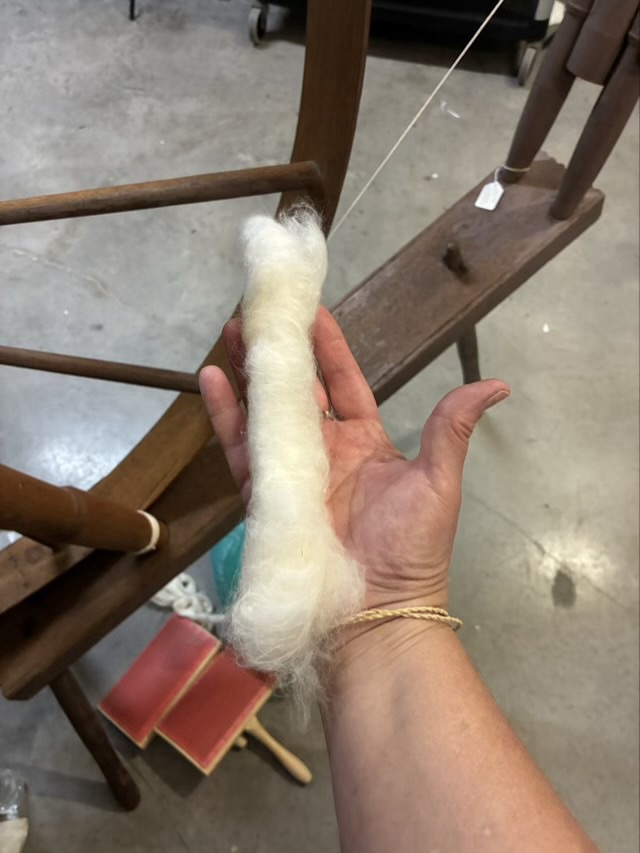
I have been using Texas grown cotton sliver, a combed preparation, to spin on a Great Wheel at the Doss Heritage center. The sliver is very smooth and all the fibers are aligned, but it has been fighting me when I spin. So I took it back a step and carded it. This mixes the alignment of the fibers, especially when I roll it up into a rolag.

Photo description: fine carder loaded with cotton, bag of sliver in the background
Photo description: cotton rolag held in my hand, after taking it off the card

This woolen preparation (fibers not aligned is “woolen”, fibers aligned is “worsted”) actually spins much easier with fewer clumps and bumps. The draft zone flows better and the wheel and I happily spun for an hour (three rolags) with very few issues. The wheel did pick up a squeak, which I remedied with spinning wheel oil.

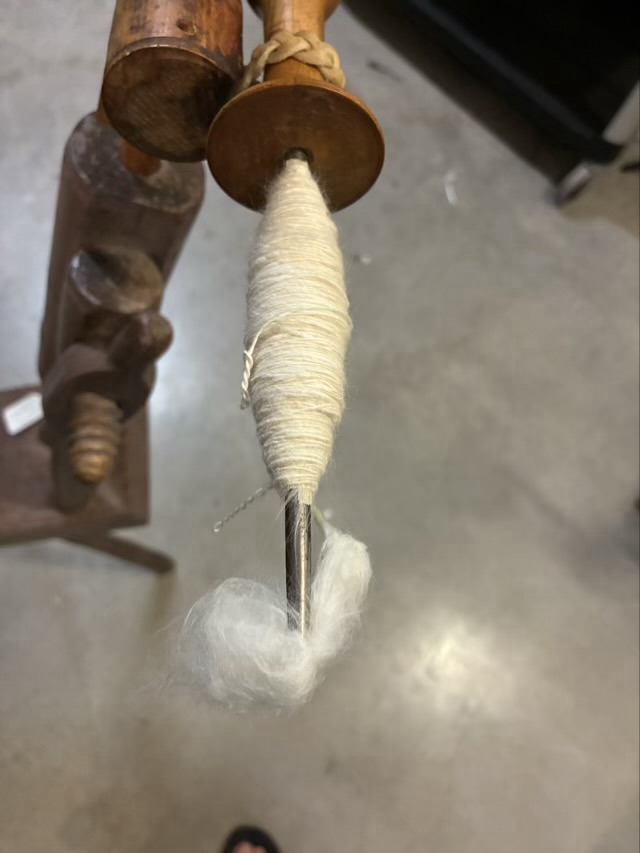
Photo description: cop of single spun cotton yarn on a Great Wheel spindle

I will be demonstrating at the Pioneer Festival at the Doss Heritage Center in Weatherford, Texas on October 3rd, 2026!

Fempto turtle

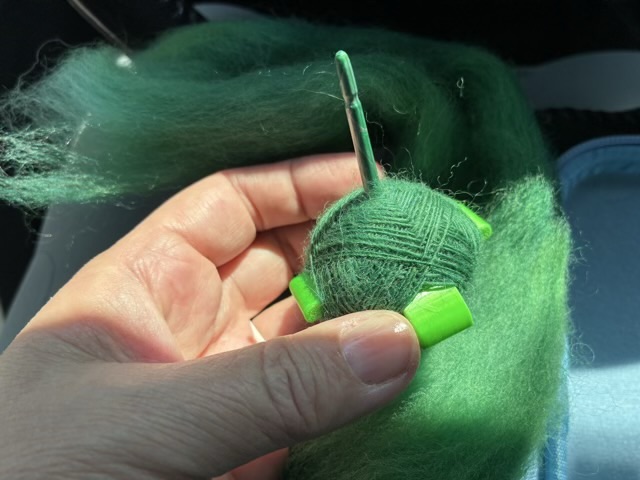
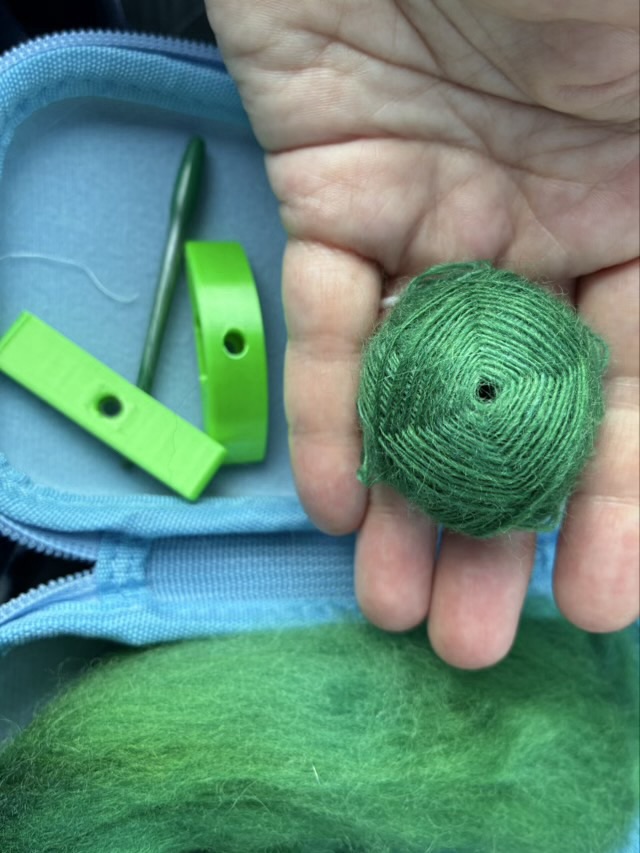
I have finished my first cop of yarn on my fempto spindle which was 3D printed by Turtle Made on Etsy. The cop of yarn from a Turkish spindle is typically called a turtle, I assume because it looks like a turtle in its shell.

Photo description: full Fempto spindle on green roving dyed by AnnieWhere
Photo description: freed yarn turtle held above the roving, ridged case, and disassembled spindle

This is a particularly slow turtle, as it is in my car as an emergency craft, so the 9 months from start to finish does not reflect at all the actual time spent spinning.

It works!

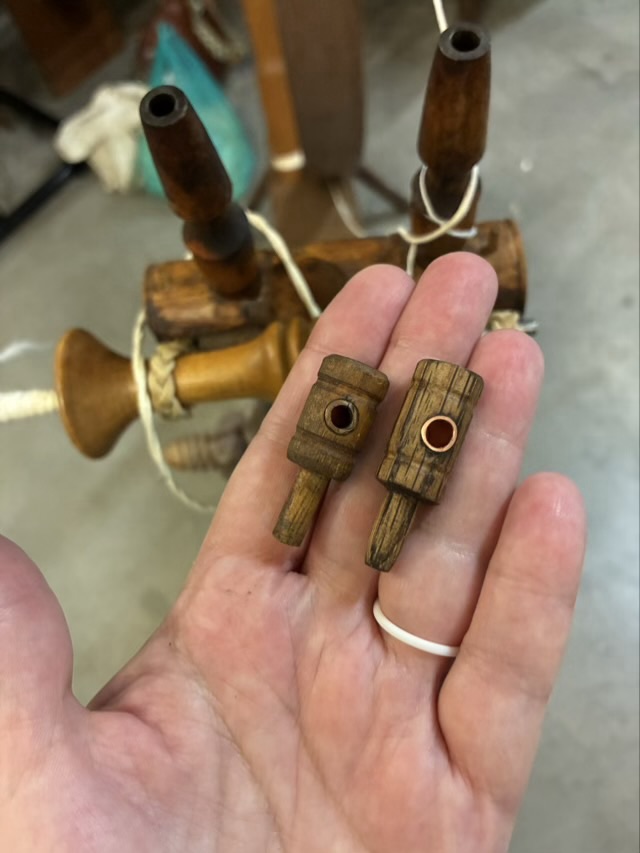
The new bearing that I made for an antique great wheel works! It is slightly longer than the original, but since the maidens adjust separately, the fraction of an inch difference doesn’t affect functionality.

Photo description: my hand holding the original bearing on the left and the new one on the right

The shaft of the bearing ended up being a little thick. It was a tight fit, but needed to be able to rotate to hold the accelerator wheel as the maiden post was twisted up or down. I used my pocket knife to shave off some of the wood so the bearing could rotate.

Photo description: bearing with the shaft narrowed held in my hand next to the maiden post, spindle visible below
Photo description: fully assembled accelerator head on a great wheel with new bearing on the left side of the picture and the original bearing on the right

I spun for about an hour, working on my yarn width consistency and testing out my new part. It worked just fine! And rotated in the socket when it came time to stop and release the tension on the drive bands. I always lighten the tension between spinning sessions so the bands don’t stretch. I don’t loosen them enough to come off when stationary, which is standard practice for spinners. I can see though, how someone coming along and turning the wheel might be startled by the drive bands coming off or the parts not moving. The bands just need to be tightened before use.

Another Great Wheel

I had the opportunity to make friends with another walking wheel! I went to the Doss Heritage and Culture Center in Weatherford, Texas and met with the lovely people working there with the collections and events. They let me go down to the basement where there were two antique walking wheels, one with all the parts, albeit with some field-expedient repairs, and another missing the spindle and accelerator wheel.

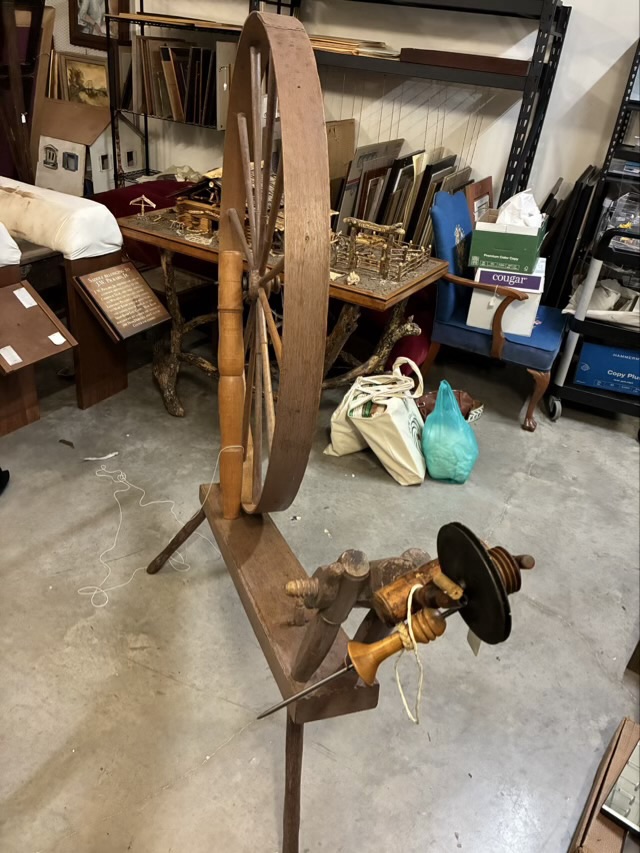
Photo description: great wheel before I started
Photo description: mother-of-all with spindle and accelerator head

I took off the mother-of-all, which holds the maidens, accelerator head, and spindle, to get a good look at the condition. I’m fairly certain that this mother-of-all is not the original one that went with the wheel, or the wheel was painted at some point, but the colors don’t match. The top of one of the maidens has also been lost to time, replaced with a dowel and metal spike, which certainly does the job.

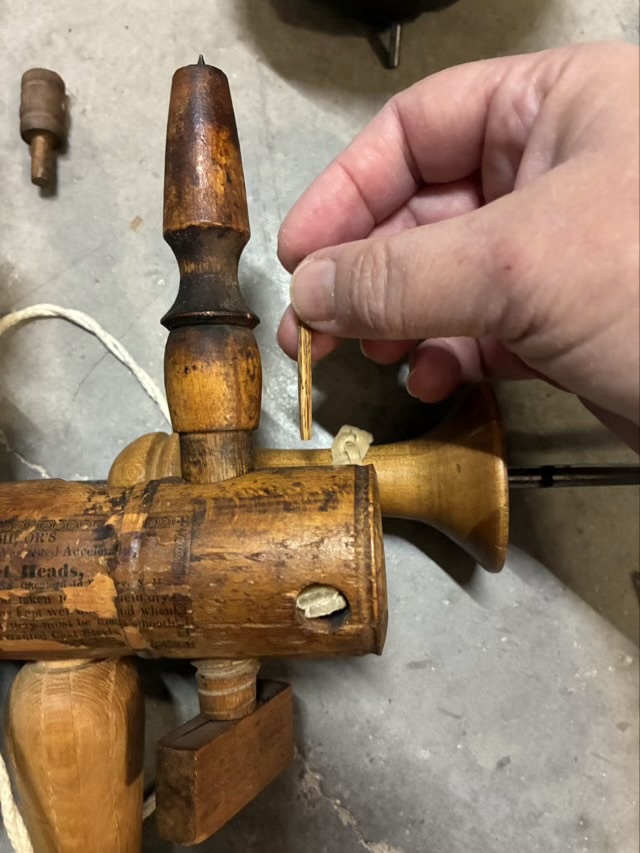
Photo description: small wood stake that goes into the mother-of-all to hold the braided rawhide straps in place

Where the last great wheel I worked with had waxed linen that held the spindle, this wheel had rawhide magic braids that were nearly as hard as the surrounding wood. I was surprised that the pegs holding the rawhide in place could still be pulled out.

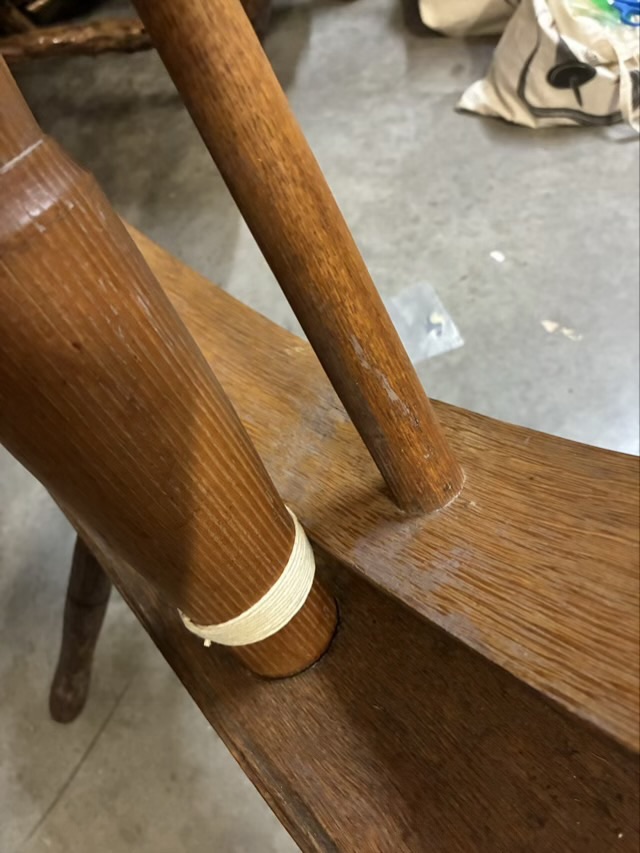
After looking over the mother-of-all, I put it back on the wheel, upside down. Oops. It took me about an hour of tinkering and fussing before I figured it out. In that time, though, I gave her a new cotton drive band waxed with beeswax, waxed the accelerator band, aligned the wheel with the base, and adjusted the wheel spacing against the post. The wheel rubs against the post, so I wrapped the post with waxed cotton cord to protect it from abrasion.

Photo description: waxed cotton cord lashed around the base of the post where the wheel rubs against it
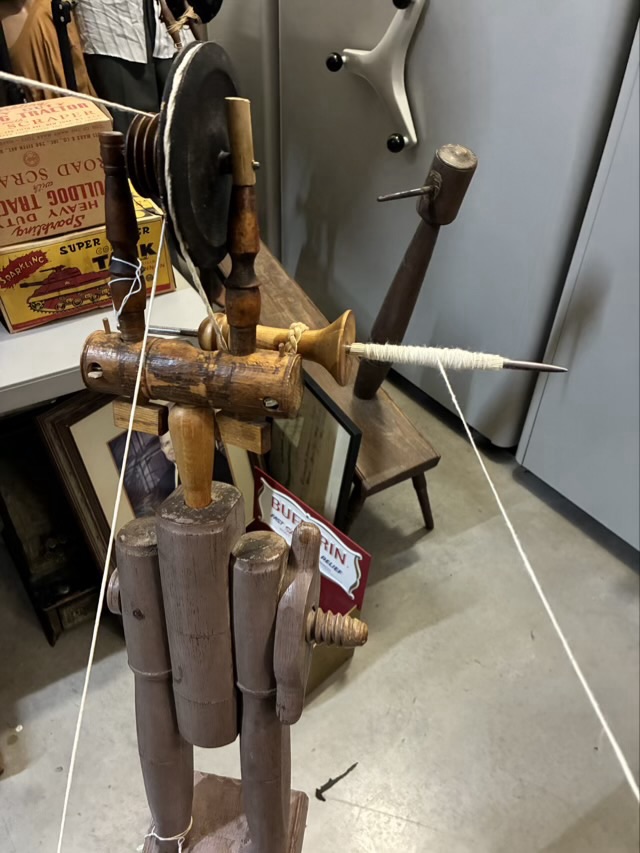
Photo description: great wheel mother-of-all and tension system set up and spinning, there is another great wheel base in the background, which has a wheel, but the hub hole has worn away and it needs refitting

I love the tensioning system on this wheel. The wood nut on the right in the picture loosens to allow the center post to rotate forward and backward, decreasing or increasing tension. I think I actually like this set up better than the double nut Great Wheel, although both are more reliable over time than a greenwood tension system that relies on the bend-ability of fresh wood.

I did put a corn husk quill over the spindle to make it easier to remove the cop of yarn. For a leader I pulled three strands from my cotton twine, and did a larks-head knot over the corn husk quill. I spun Texas grown cotton sliver for a while before time called me away.