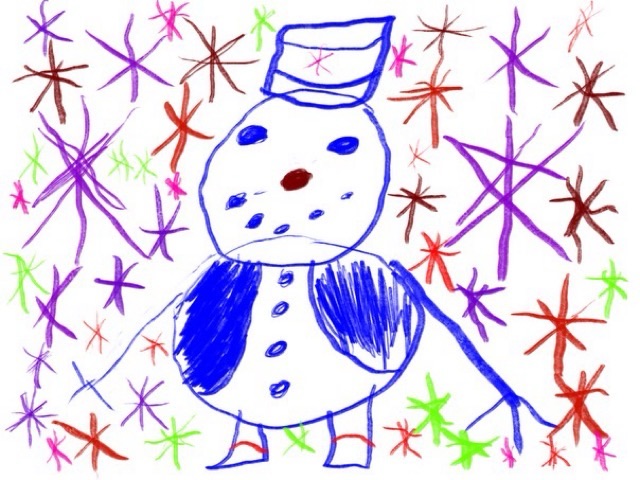
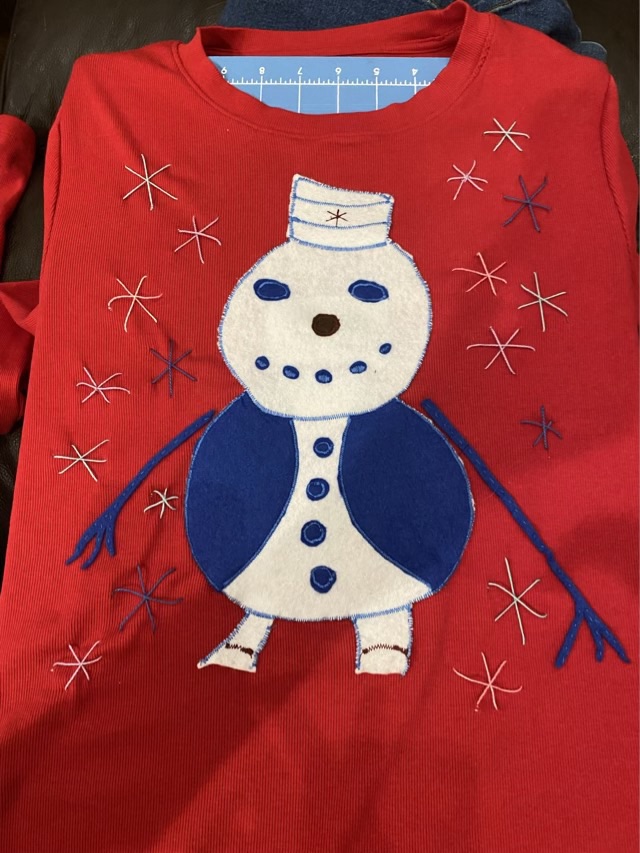
My youngest had a home-made holiday sweater contest at school. She drew up her design, and I sewed it into a red long sleeved shirt using felt and embroidery floss.
Photo description: Original art by my youngest with a snowman and multi-colored snowflakes.Photo description: Snowman art rendered in felt and embroidery.
I also harvested a small led switch from a holiday decoration and sewed it in behind the snowman’s face, so there would be flashing lights.
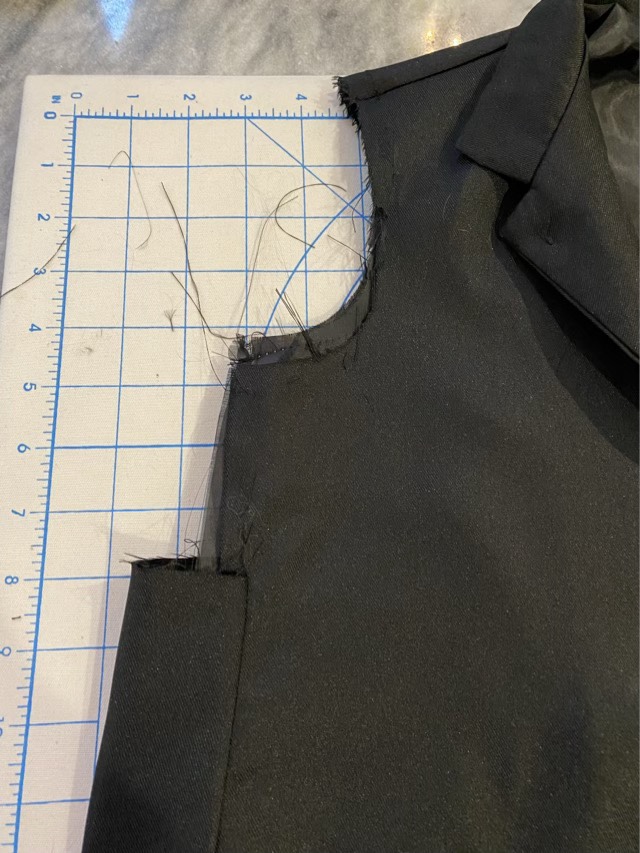
My eldest ordered a size large costume online; when it arrived it was a YOUTH large. Oops. There wasn’t time to return and reorder, and all the critical identifying marks were on the jacket, so we ripped some seams and turned the buttoned jacket into a vest.
Photo description: Right arm hole of black jacket with sleeve removed and a gusset added to the side.Photo description: Same right arm hole, trimmed with black bias tape.
We obtained a black shirt and black pants to go under the vest, and I rather like the crop vest with the long shirt. It is a subtle stylized version of the character.
I modified another t-shirt. I don’t care for crew neck t-shirts (sensory thing with fabric touching my neck), so I cut off the binding, and used black crochet thread to make a blanket stitch all around the neckline, then added a simple chain 3, double crochet repeat pattern row. I like 3/4 sleeves, so I used the same 3 chain, double crochet pattern to lengthen the short sleeves, and added a scalloped edging by making five chain 1, 1 double crochet in every other junction.
Photo description: Black Smashing Pumpkins t-shirt with black crocheted lace at the neck and sleeve.
I am not historically a lace person, but the practicality of it in our Texas heat is appealing. The idea of practical lace also amuses me.
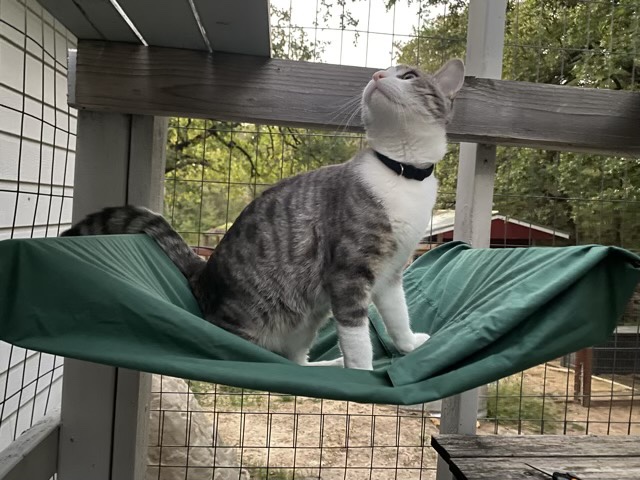
One of the sling beds in the catio gave up under the weight of the kitten and popped its grommet. I removed the rest, it has lasted awhile, and puzzled over a replacement. The two sections of 1 x4” wood that I screwed to the catio supports seemed about the size of a pillow case. It turned out it was a little wider, but with a quick seam and a couple of snipped holes, I converted an old pillow case into a cat sling bed that slides over two parallel boards.
Photo description: Gray tabby sitting in the hammock made with a repurposed green cotton pillowcase suspended by two boards
Cotton does degrade in the sun, but this might be a better design idea than grommets in the corners screwed to the board. I’ll see of the cats use this setup, and if they do, replace the cotton with outdoor resistant fabric.
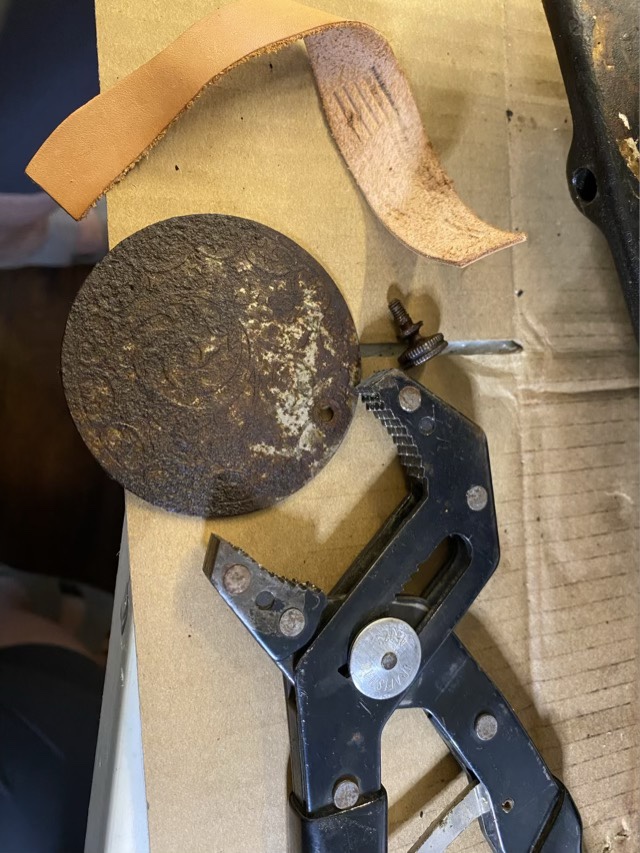
I’m still regularly oiling the Singer 27 treadle machine and attempting to remove more parts for cleaning. My husband has been helping, and he was able to free several bolts! I did take a tool to a thumb screw for the back plate; I figured if it was going to break, better that I’m the one that breaks it. I wrapped the knob in leather, then used an adjustable wrench, and slowly turned the screw. Success!
Photo description: Large adjustable wrench on the bottom, next to a very rusty back plate, next to a small knurled knob that held the plate in place on the machine, and at the top, a 1/2” strip of tooling leather
I photograph all the removed parts and put them in a labeled ziplock bag with a spray of PB blaster. When I get all the parts free, I’ll clean everything before putting it back together (fingers crossed).