Duped

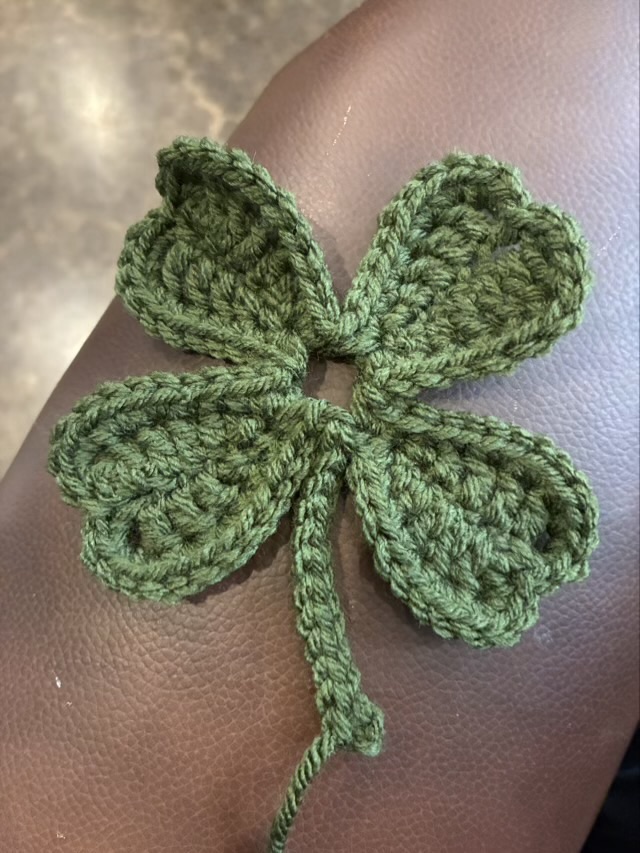
Shame on me, really, for not doing my due diligence on my purchase. I wanted to crochet a shamrock, and went looking for patterns. I found one that looked cute and was “on sale” with high ratings and over a thousand purchases for the shop in Etsy. I bought it because I really do want to support pattern makers. The pictures were beautiful, but not helpful, and the instructions were skeletal and incomplete. The layout looked like it was copied and pasted from the free version of ChatGPT version 1. I did attempt to make the shamrock, and found that I had to lean heavily on my own crochet knowledge to puzzle out what to do on a pattern listed as “beginner friendly.” My shamrock had a hole in the middle.

Photo description: crocheted shamrock fail

So this post is going to be about what to look for when purchasing patterns.

  • Check how long the shop has been in business (on Etsy this information is on the shop page). Under a year is suspect.
  • Check the shop name. Does it match the logo or has there been numbers tacked on? The logo might look professional and familiar, but if the shop name is different, it is someone pretending to be a different shop.
  • Read the 1 star reviews, even if you have to scroll for while.
  • You get what you pay for. A $2 pattern is not going to be a complete tutorial on how to crochet. (Although in my professional opinion if it says beginner, it should, regardless of price.)
  • Reach out to the shop owner. I did get a prompt response, with canned answers. It was obvious from the first interaction that the answers were not from someone well versed in crochet or helping or teaching.

My $2 purchase cost me more time and hassle than it was worth. What really makes me boil is that there are beginner crafters out there looking for patterns and this kind of garbage causes doubt in their own ability, rather than looking to the pattern as the fault.

And all those 5 star reviews? I strongly suspect that they are all the same person (or group of people?) posting the same fake or pirated photos under different accounts. A complicated ruse, but a profitable one, unfortunately.

Paper serendipity

Sometimes, not very often, when I’m wrapping presents the paper pattern and the box size coincide and the fold at the back is a perfect continuation of the pattern. Ah.

Photo description: “let it snow” wrapping paper that has been wrapped around a box with the two ends meeting up to complete the snowman pattern

Glow Jellyfish Hat (free pattern)

Here is a fun project! A glow in the dark jellyfish that you can wear. Just think of all those lovely floating jellies in the park on a cold night! I’m happy to provide my pattern for free, please tag me on instagram @carynjhall if you make the hat, and be kind, don’t sell my pattern, but do share the link to this blog post.

Lion Brand Yarn is doing a Show Us Your Glow contest, so if you want to pop over here, you can vote until March 19th, 2025.

Photo Description: Two pictures of the same crocheted hat, one in natural light, one in the dark showing the glowing yarn

Materials:

  • one skein each of DIY Glow Cozy Lion Brand Yarn #LionBrandYarn, in white, pink, lilac, aqua, neon green, and neon yellow
  • size I-9 crochet hook
  • yarn needle

Terms:

  • ch – chain
  • sl st – slip stitch
  • sc – single crochet
  • scbl – single crochet in the back loop
  • sc2tog – sc two stitches together
  • dc – double crochet
  • CDCS – Chainless Double Crochet Start (I like Moogly’s method)
  • Row 1: with white ch 2, 20 dc in magic circle, sl st to first DC
  • Row 2: CDCS, dc, ch 2, *dc, dc, ch 2* repeat ** 9 more times, sl st to start (10 ch 2 spaces)
  • Row 3: Sl st to ch2 space, CDCS, dc, ch 2, 2 dc, *in next space 2 dc, ch 2, 2 dc* repeat ** 9 more times, sl st to start
  • Row 4: CDCS, *in next space (2dc, ch 2, 2dc), skip 2 dc, dc in next dc* repeat ** 8 more times, in next space (2dc, ch 2, 2dc), sl st to start
  • Row 5: CDCS, dc in same st, *in next space (2dc, ch 2, 2dc), skip 2 dc, 2 dc in next dc* repeat ** 8 more times, in next space (2dc, ch 2, 2dc), sl st to start
  • Row 6: CDCS, ch 1, dc in next st, *in next space (2dc, ch 2, 2dc), skip 2 dc, dc in next dc, ch 1, dc in next dc* repeat ** 8 more times, in next space (2dc, ch 2, 2dc), sl st to start
  • Row 7: sl st to 1 ch space, CDCS, ch 1, dc in same space, *in next space (3dc, ch 2, 3dc), in next ch 1 space, (dc, ch 1, dc)* repeat ** 8 more times, in next space (3dc, ch 2, 3dc), sl st to start
  • Row 8: sl st to 1 ch space, CDCS, dc, ch 1, 2dc in same space, *in next space (3 dc, ch 2, 3 dc), in next ch 1 space, (2dc, ch 1, 2dc)* repeat ** 8 more times, in next space (3 dc, ch 2, 3 dc), sl st to start
  • Row 9: sl st to 1 ch space, CDCS, 2dc, ch 1, 3dc in same space, *in next space (3 dc, ch 2, 3 dc), in next ch 1 space, (3dc, ch 1, 3dc)* repeat ** 8 more times, in next space (3 dc, ch 2, 3 dc), sl st to start
  • Row 10: in neon green sl st to 1 ch space, CDCS, dc, ch 1, 2dc in same space, *in next space (3 dc, ch 2, 3 dc), in next ch 1 space, (2dc, ch 1, 2dc)* repeat ** 8 more times, in next space (3 dc, ch 2, 3 dc), sl st to start, do not cut yarn
  • Row 11: in aqua sl st to 1 ch space, CDCS, dc, ch 1, 2 dc in same space, *in next space (2dc, ch 2, 2dc), in next ch 1 space, (2dc, ch 1, 2dc)* repeat ** 8 more times, in next space (2dc, ch 2, 2dc), sl st to start, do not cut yarn
  • Row 12: in liliac sl st to 1 ch space, CDCS, ch 1, dc in same space, *in next space (2dc, ch 2, 2dc), in next ch 1 space, (dc, ch 1, dc)* repeat ** 8 more times, in next space (2dc, ch 2, 2dc), sl st to start, do not cut yarn
  • Row 13: in pink sl st to 1 ch space, CDCS, ch 1, dc in same space, *in next space (dc, ch 2, dc), in next ch 1 space, (dc, ch 1, dc)* repeat ** 8 more times, in next space (dc, ch 2, dc), sl st to start, do not cut yarn
  • Band: Don’t break yarn with color changes, pick up the floats and carry them along in the stitches. In pink ch 8, turn. 7 sc. *In lilac sc2tog, turn. 7 scbl, ch 1, turn. 7 scbl. In aqua sc2tog, turn. 7 scbl, ch 1, turn. 7 scbl. In aqua sc2tog, turn. 7 scbl, ch 1, turn. 7 scbl. In neon green sc2tog, turn. 7 scbl, ch 1, turn. 7 scbl. In pink sc2tog, turn. 7 scbl, ch 1, turn. 7 scbl. * repeat ** until beginning is reached. Stitch sides of band together, weave in ends.
  • Tentacles: In neon yellow, join yarn to the bottom of the band, chain 50. Join neon green, ch1, 3sc in each of the next 13 chains. Join aqua, 3sc in each of the next 13 chains. Join lilac, 3sc in each of the next 12 chains. Join pink, 3sc in each of the next 12 chains. Bind off, weave in end. Note: I changed the number of stitches of each color on my tentacles to give some more interest, and made one tentacle per two color stripes. Make shorter tentacles near the face.

@carynjhall @LionBrandYarn #LionBrandGlow

Peachy keychains

I recently created a PDF pattern for a local yarn shop. It is the owner’s pattern, but they needed it taken from written shorthand to a sharable PDF. It is a cute little peachy amigurumi, and in testing the pattern, I made up 6 little peaches.

Peach amigurumi

The pattern is by Anniewhere at NerdCraft. I’m very excited about the wool yarn I used for the body of the peach, because it was locally spun and dyed by Texas Prairie Fiber Co. I love using locally produced supplies! The leaves I made from my own handspun yarn, that I spun from Blue Faced Leicester and silk blended roving dyed by Frabjous Fibers. This turned out to be quite the collaborative project.

Keychain peach amigurumi

I did make each one into a keychain by sewing on some chain and attaching a split ring. I used hand-spun alpaca scraps from a naturally brown alpaca (Aimee) to sew on the chain. So each peach has a little brown stem.