Military trunk

My Dad let me take his Army trunk on our last visit. I cleaned it up and did some minor repairs, because it is still in good condition.

Photo description: a misalignment with the closure on the trunk made it so the trunk didn’t close completely and the lock latch couldn’t close

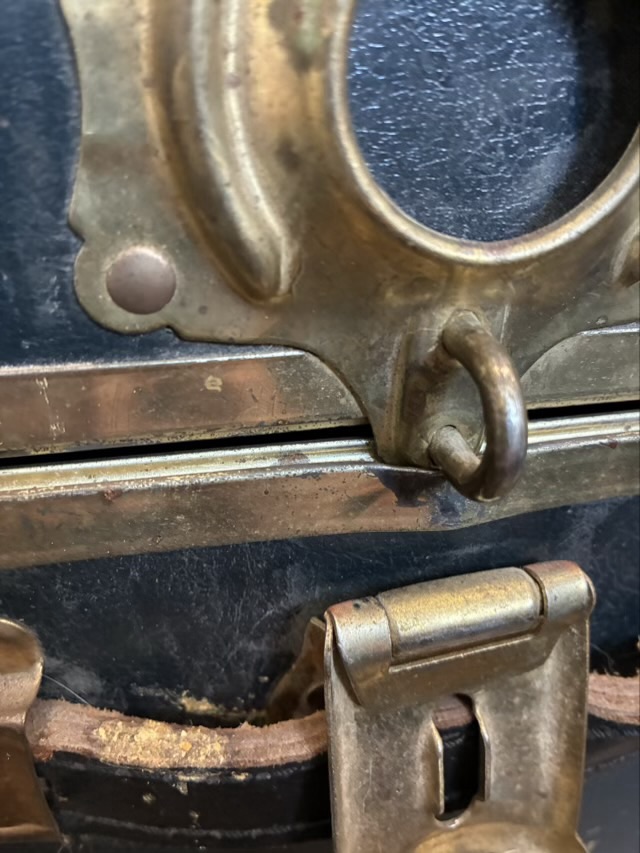
The first thing I did was gently ease the metal edge back into place so the lock latch slid to the outside rather than hit the inside groove. I used a pair of smooth needle nose pliers so I didn’t scar the metal. The lock latch is missing the actual lock mechanism, but I don’t need to lock it, so I’ll leave it as is.

Photo description: trunk with the lock latch in place and the edge completely closed

I did remove my Dad’s social security number with some rubbing alcohol and cotton swabs, for security purposes. I left his name and rank because I want to remember that it is his. I wiped down the whole exterior with leather cleaner. I tried to polish the brass in a hidden spot, and it turned silver, so I stopped, deciding to leave the patina and the gold color.

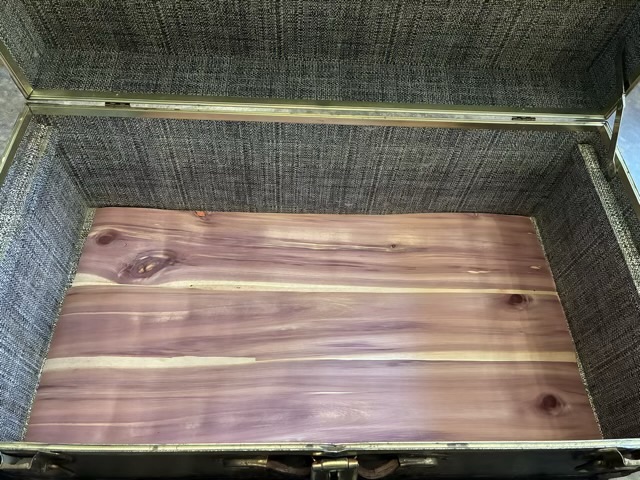
Inside, I removed some old contact paper, which came out surprisingly well, with no residue, and cut some cedar liner to fit the bottom of the trunk.

Photo description: new cedar liner for the inside of the trunk

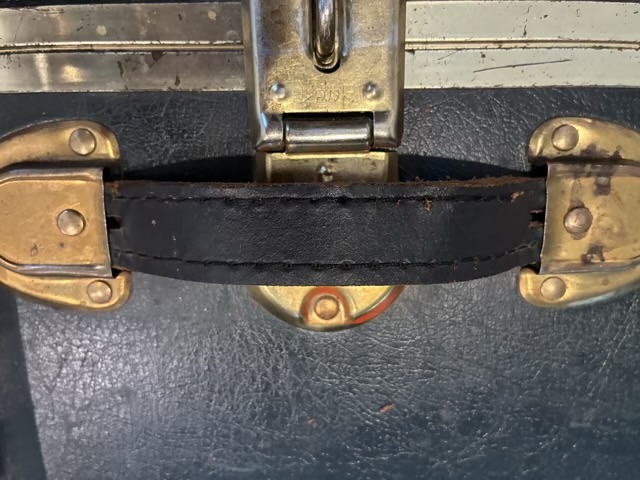
The main side handle had some stitching come loose.

Photo description: loose thread on the multilayer leather handle

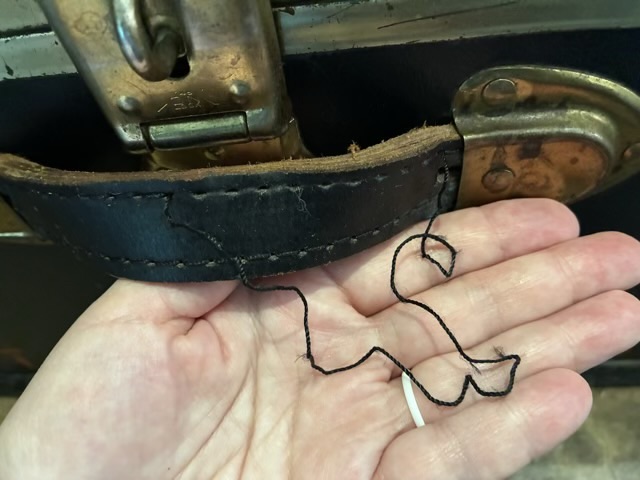
I was able to find the end of the thread and sew the leather layers back together without having to disassemble the handle.

Photo description: leather handle with stitches restored

Stick spinning

I did forget to bring a spindle when I went on my trip north. Horrifying, I know. I rallied by finding a smooth stick and screwed in a cup hook at the end.

Photo description: smooth stick with a metal hook on the end

Using a stick with a hook is actually my preferred method to teach people spinning. It slows down the twist, making it easier to see and control.

Throwback Thursday: stamped bracelets

In December 2016 I was all about the stamped aluminum bracelets.

Photo description: bracelet stamping tools: steel wool, metal letter stamps, dead blow hammer, pencil, finishing wax, steel stamping block, aluminum bracelet blanks, forming pliers
Photo description: nine stamped aluminum bracelets laid out on black velvet

The next level for this craft is using tools for alignment so the words come out straight every time. Pencil layouts can only take you so far.

I did have fun finding sayings that fit on the bracelets.

Throwback Thursday: ancient fibulae

Here is an example of a picture without a thousand words from January 2013. As I was going through my album looking for Throwback posts, this almost didn’t make the cut because I didn’t leave myself enough information.

Photo description: printed image of an ancient bronze fibulae, clay model with wire spring, polished bronze clay fibulae (new), mystery fibulae (made by me)

At the time of the photo I was still experimenting with metal clay. My sister is an ancient historian and I suspected this was a project for her, so I pinged her for confirmation. She provided the name “fibulae” and an interesting article about their findings and use.

I can tell from my photo that I had a museum photo as reference, and I made a model with less expensive polymer clay, that looks more swan-like than my reference photo. The middle polished bronze clay fibulae I obviously spent more time on, but I’m not sure if I fired the clay with the wire in place or epoxied it in later (I’m already not using ancient foraging techniques, since I’m working with modern metal clay.) The last fibulae on the right is what raises the most questions. Did I not polish it? It is the same shape and style as the bright bronze, so I’m sure it is my work (my replication skills are not finely honed, especially then.) Did I try to antique it by adding patina, or is this how it came out of the kiln? Did I make this before or after the bright bronze fibulae? I have a feeling that I fired it with the wire in place and either the firing or the antiquing weakened the metal, causing the breakage. Did I do it on purpose? So many questions.

Here is a picture of the back, which answers the question of how the pin fastens.

Photo description: back of modern-made bronze-clay fibulae showing the pin pocket

Now I’m dangerous

My folks gave me a laser engraver, because I spent so much time at their house playing with their laser. My level of craft ability has now reached dangerous (on a scale of “beginner”, “how cute”, “nice”, “wow”, “dangerous”, “how?”, “mastery”). I started with my business logo on rock, painted brass, and a thin slice of purple heart wood that I sliced on my band saw.

Photo description: smooth river rock with a white mottled tree and roots logo for Caryn’s Creations

The rock ended up with a mottled white design that does not wash off. It has a pleasant texture but probably won’t survive a sealant (testing on that later).

Photo description: circle of purple heart wood engraved with the same burned logo.

I’m still experimenting with settings. The purple heart with logo was a little too intense and the burn carried outside the design.

Photo description: black painted brass with the paint burned away for the logo

I tried a circle of brass (I used a jeweler’s saw to cut it, the blue diode laser won’t cut brass). I originally did clean brass, but it only made a ghost image, so I spray painted the blank with black primer paint, let it dry, and ran it again. I quite like the result.

My head is swimming with all the possibilities.