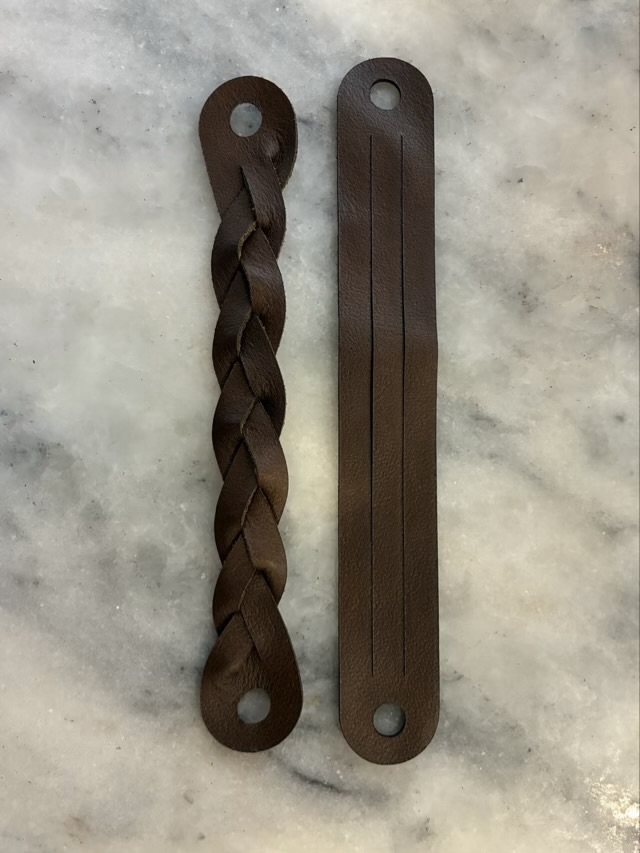
I’ve been fascinated for years with the magic braid done with leather where both ends of the braid are uncut. I found a good tutorial that uses reclaimed leather, and I had to try it.
Photo description: two pieces of leather reclaimed from an old recliner and cut with a laser cutter, the one on the left has been braided, the one on the right has not
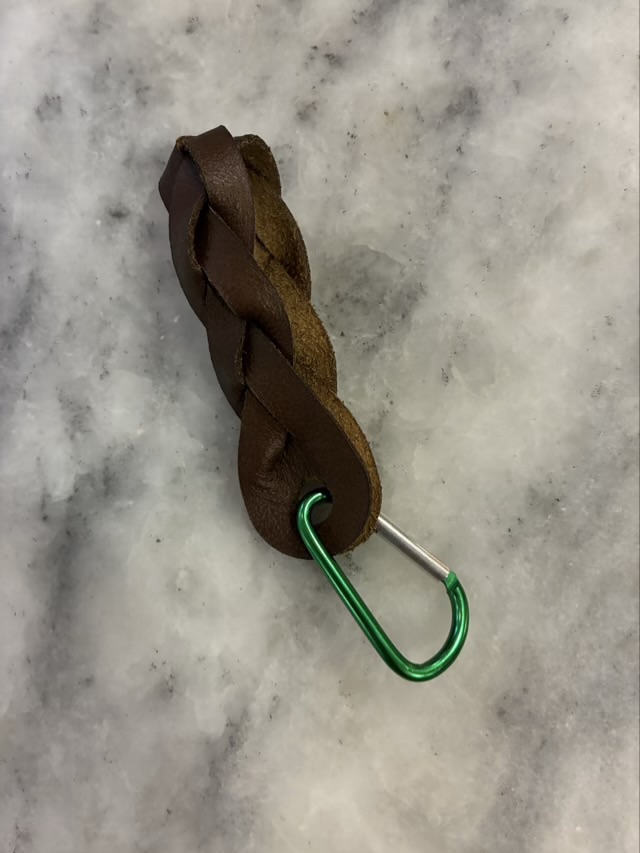
I did not make these into bracelets as in the tutorial, but into key chain fobs, by folding them in half and adding a clip.
My Dad let me take his Army trunk on our last visit. I cleaned it up and did some minor repairs, because it is still in good condition.
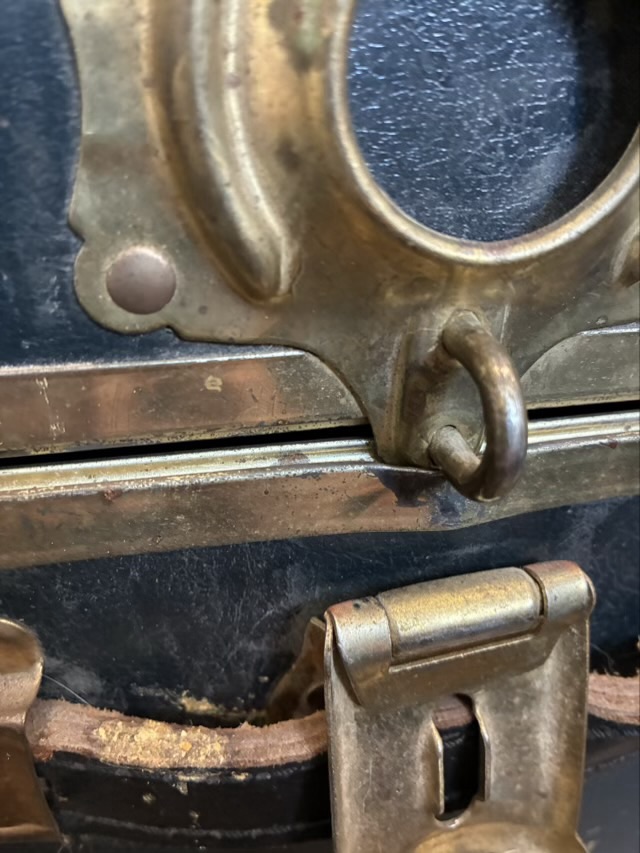
Photo description: a misalignment with the closure on the trunk made it so the trunk didn’t close completely and the lock latch couldn’t close
The first thing I did was gently ease the metal edge back into place so the lock latch slid to the outside rather than hit the inside groove. I used a pair of smooth needle nose pliers so I didn’t scar the metal. The lock latch is missing the actual lock mechanism, but I don’t need to lock it, so I’ll leave it as is.
Photo description: trunk with the lock latch in place and the edge completely closed
I did remove my Dad’s social security number with some rubbing alcohol and cotton swabs, for security purposes. I left his name and rank because I want to remember that it is his. I wiped down the whole exterior with leather cleaner. I tried to polish the brass in a hidden spot, and it turned silver, so I stopped, deciding to leave the patina and the gold color.
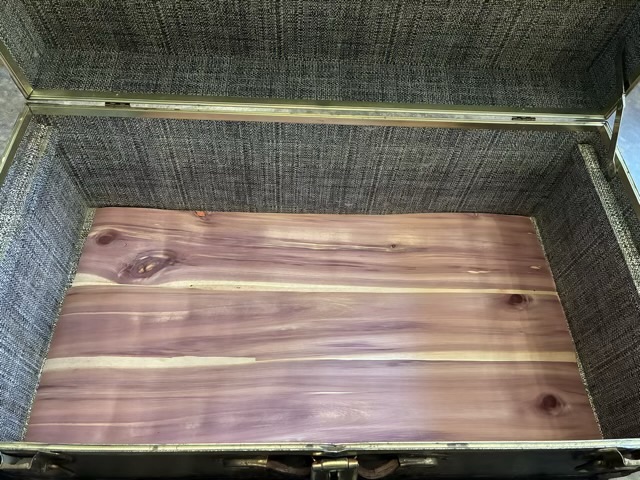
Inside, I removed some old contact paper, which came out surprisingly well, with no residue, and cut some cedar liner to fit the bottom of the trunk.
Photo description: new cedar liner for the inside of the trunk
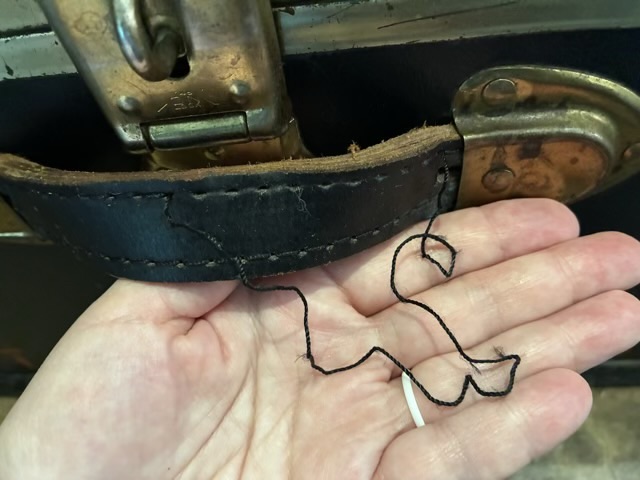
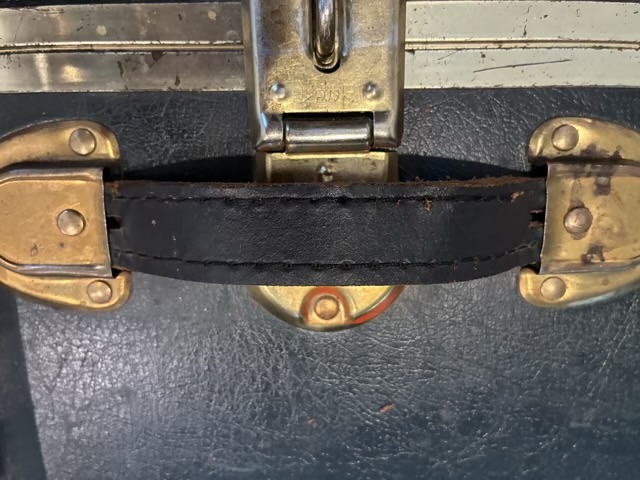
The main side handle had some stitching come loose.
Photo description: loose thread on the multilayer leather handle
I was able to find the end of the thread and sew the leather layers back together without having to disassemble the handle.
Photo description: leather handle with stitches restored
It is traditional for Sweet Adelines to give small gifts of encouragement or luck in the time leading up to contest. Last year I crocheted worry worms, this year I made small four leaf clover charms from dyed green leather.
Photo description: suede side of a 1 inch charm cut from green leather, sitting on my hand
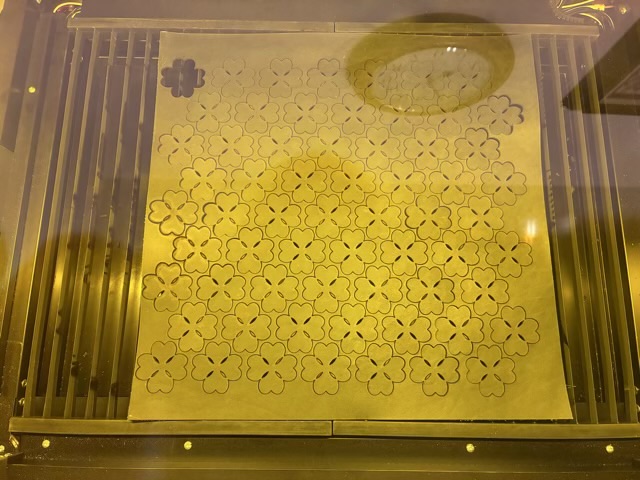
I designed the cut out in Adobe Illustrator. The grouping of four hearts represents the four voices of Barbershop Harmony. I originally wanted to do a fill engrave, then a cut out, but overall processing time would be 1.3 minutes each. I needed 60 charms. I redesigned the charm to be cuts only, using open slits to delineate the heart-shaped leaves, which dropped the processing time to 18 seconds each. The slits can also be used to hang the charm on a keyring or similar. I’m quite pleased with the number of pieces I was able to cut from a 12” square of leather.
Photo description: view through the yellow window of the WeCreat blue diode laser cutter to show the tight formation of clover shapes
I did lose three cuts on the left because the leather wasn’t completely flat, but all the other charms came out well. The laser does leave a charred edge, so I washed all the charms with water to remove the soot, then let them dry overnight.
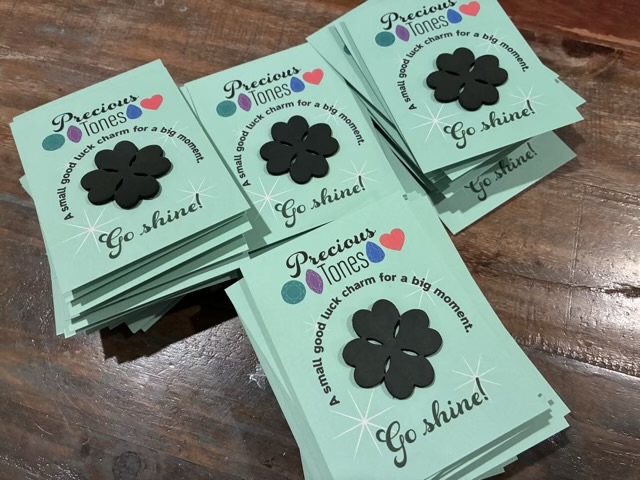
I designed, printed, and cut flat cards and used glue dots to mount the leather charms to the cards.
Photo description: 60 Good Luck cards with leather charms that have my quartet logo “Precious Tones” with the words “A small good luck charm for a big moment. Go Shine!”
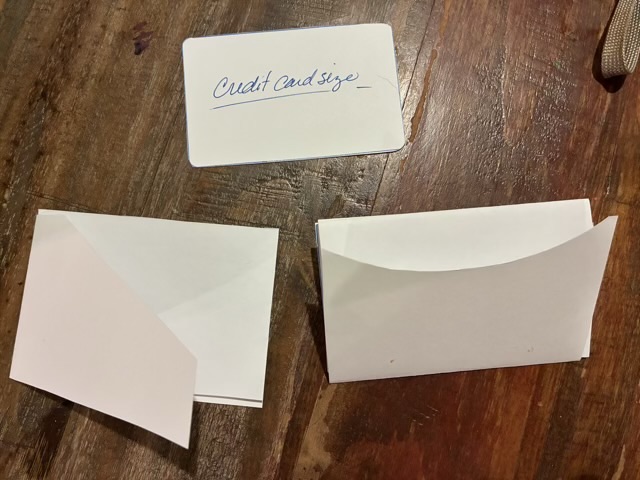
I designed a couple variations of minimal wallets by starting with paper mock ups.
Photo description: paper mock ups for two wallet designs, the bottom left has an angle access and a traditional quarter fold insert, the bottom right has a scoop access and an accordion fold insert, top middle is a credit card mock up
After getting my dimensions figured out with paper, I designed the leather cut out in Adobe Illustrator, and used a blue diode laser cutter to cut and emboss vegetable tanned tooling leather.
Photo description: leather with embossed design after cutting with a laser and rinsing with water, the folding
I stained the leather and let it dry, then applied a coat of resolene, which will make it water resistant.
I wanted the insert to have RFID blocking capabilities, so I used spray glue to adhere cotton quilting fabric to faraday fabric.
Photo description: cut cotton fabric glued to faraday fabric using spray glue on the back of the cotton
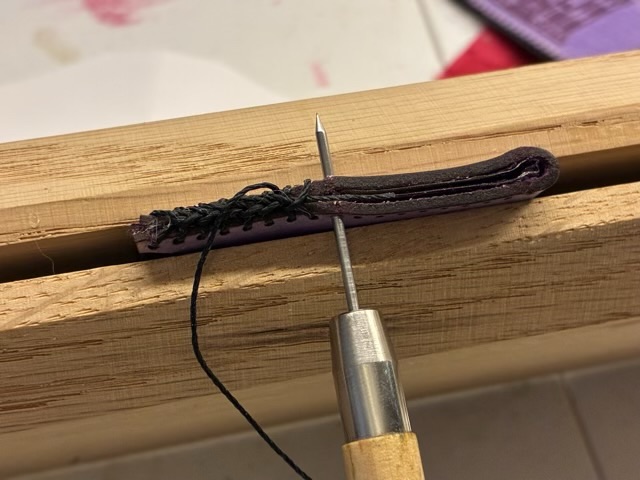
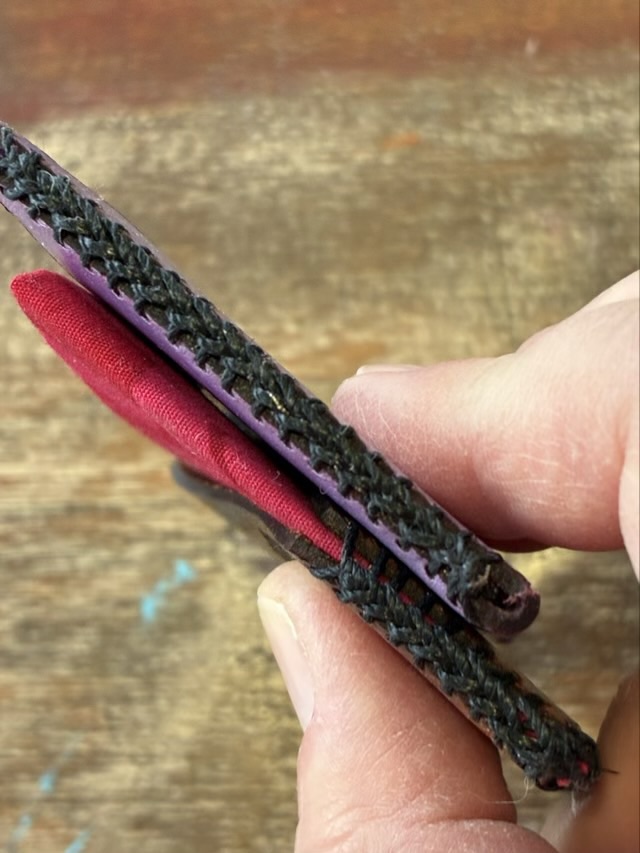
My favorite part of this project was learning a new-to-me edge stitch: triple loop lacing. It took a few tries on scrap leather to get the hang of it, but it was worth it. I love the braided edge look with the heavy waxed thread.
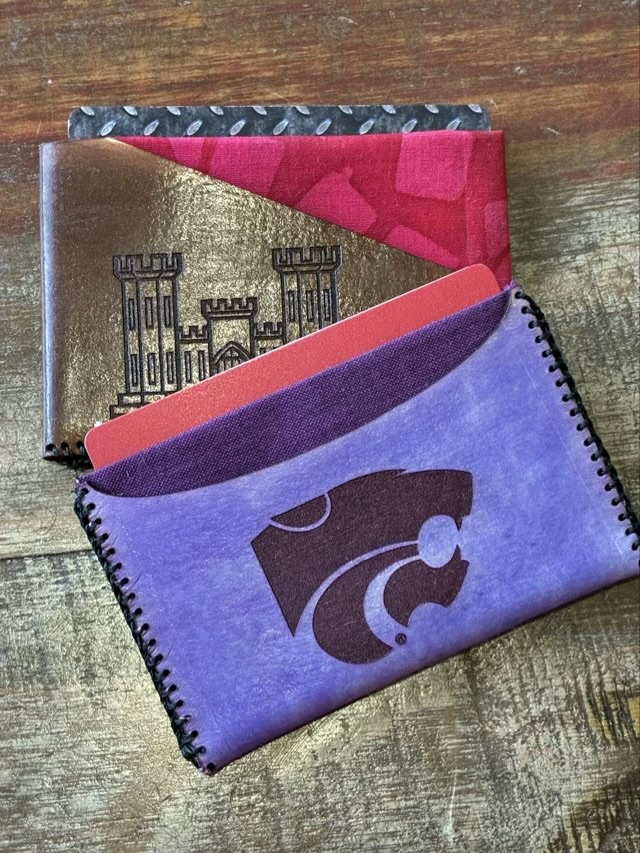
Photo description: using an awl to poke through the fabric using the precut leather holes as guides, the leather is secured in a book clampPhoto description: close up of the edge stitching on two leather and cloth minimalist walletsPhoto description: finished wallets with gift cards in the center pocket. Each wallet has three pockets: front, middle, back
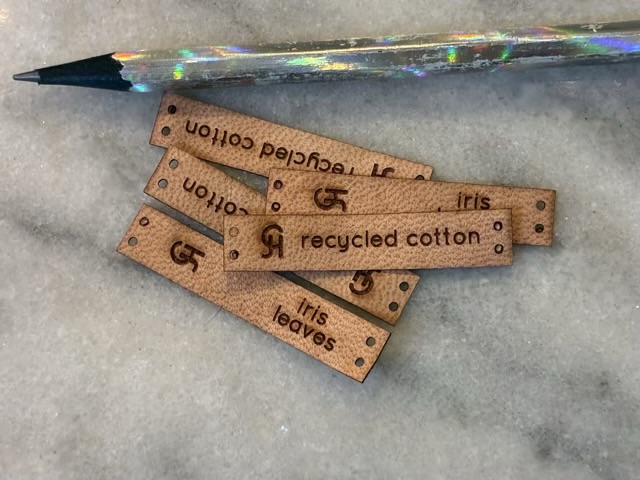
I wanted to add labels to my handmade items, so used the laser cutter to make some from thin leather. I added pairs of holes to the edges so they could be sewn on, my signature mark, and the primary material used for the item.
Photo description: labels cut from leather with a blue laser cutter, pencil for scale
I’m really pleased with how these came out. I’m getting better at estimating laser cutter and engraving settings; I had only one test cut before dialing in to settings that gave me my desired result. For the cut I had a speed and power of 100, and the fill engrave was power 30, speed 100, line density 100. The labels are 1cm by 5cm, which is just about as small as I can go and still sew them into a circle.