Here is a different version of a row counter for knitting. I used flat round wood beads and copper wire to make a chain with larger loops to accommodate larger needles. I then used a wood burner to number each bead; it is actually easier to wood burn the assembled chain rather than individual beads. To mark the tens, I used a copper lobster claw clasp with a copper clay leaf (that I made many, many years ago and has been waiting for a project). I find the lobster claw easier to deal with than a melody clip.
Photo description: handmade row counter in the center with handmade copper leaves on the right, then going counter clockwise: purchased copper lobster clasps, bead reamer, pliers, a pile of row counters waiting for their dangle, and a spool of 22 gauge copper wire.
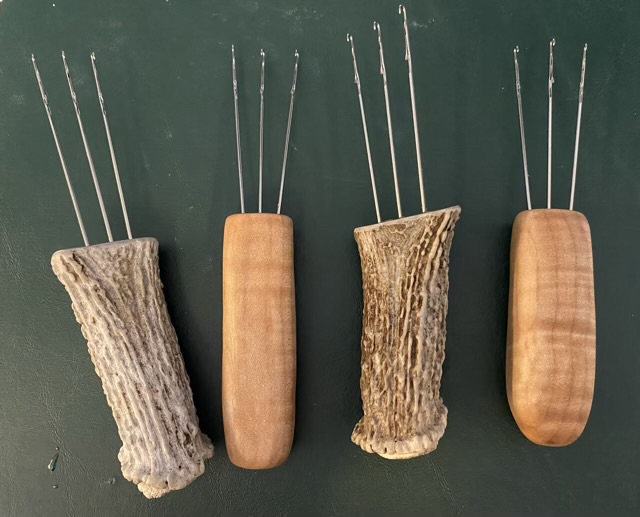
I ordered replacement hooks for a knitting machine, which are essentially latch hooks without a handle. I made handles from flame maple and deer antler horn and mounted three hooks in each handle using epoxy in holes I drilled with a drill press.
Photo description: four 3-hook cord makers, the far left and middle right handles are made of deer antler, the far right and middle left are made of flame maple.
I sealed the flame maple with Howard’s Feed and Wax (I think I’ve mentioned before how much I love this stuff!)
They work! I spread the tines a little more on these, which gives a more flexible i-cord than my first i-cord maker.
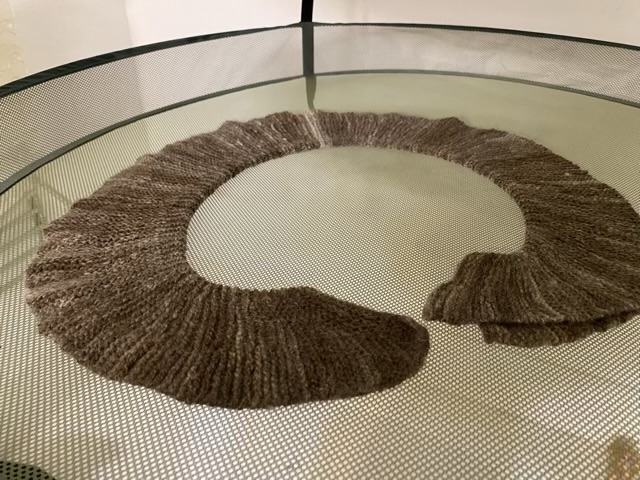
Blocking a knit item really can work wonders. My Helix scarf increased in length about a third, making it a nice size. I’m glad I didn’t add on.
Photo description: Helix scarf knitted from hand spun blended wool and silk yarn, then soaked with water and laid out to dry in a semicircle shapePhoto description: nearly dry Helix scarf hanging from the drying rack showing off the lovely undulations created by short rows.
This could be my favorite piece of spinning and knitting that I’ve done. I started spinning the yarn about a year ago, and knitting it took me about a month. That being said, this was not my only project during that time. I call myself a serial crafter, but really I should consider the title parallel crafter. A parallel serial crafter. A craft dispatcher. Hm. This train derailed, but I’m glad the scarf made it to the station.
I finished knitting my Helix scarf! It has lovely ripples when laid out, but is a bit short. I used all my hand spun blended wool and silk yarn, so if I need to add on, it would have to be a different color. Hm. I think I will block it (get it wet and lay it out) before making rash decisions.
Photo description: Helix scarf made with hand spun fingering weight 2-ply yarn, showing opposing ripples along a central spine.Photo description: same scarf, but folded in half and laid out in a circle.
I really love this pattern, and the way they do the short rows. It really is a wonderful way to show off hand spun yarn, and I like the subtle variation in color that the blended fiber produced.
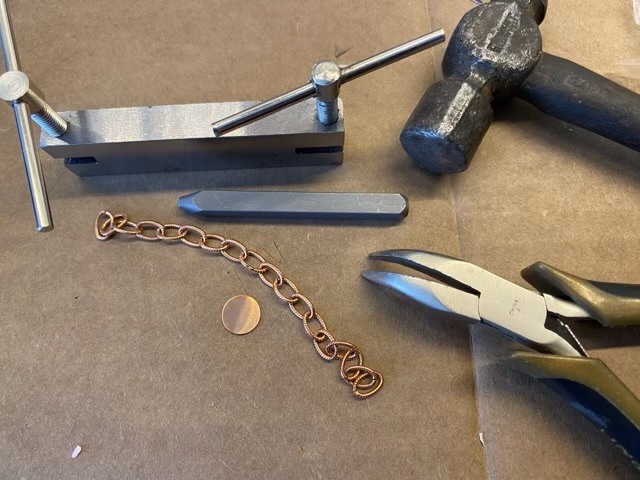
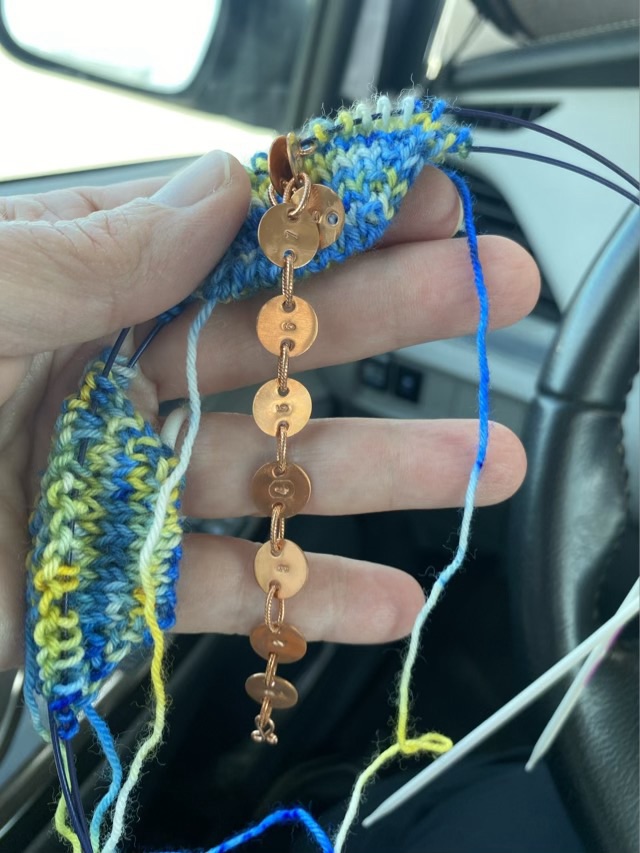
I saw the idea of using a numbered chain to count knitting rows. A simple sequence of 1-10, with a melody clip to mark the tens, will allow counting up to 110. I did not want to buy plastic beads, but I did have copper circles and chain in my stash.
Photo description: clockwise – metal hole punch, antique ball peen hammer, bent nose pliers, copper circle, copper chain, metal number stamp
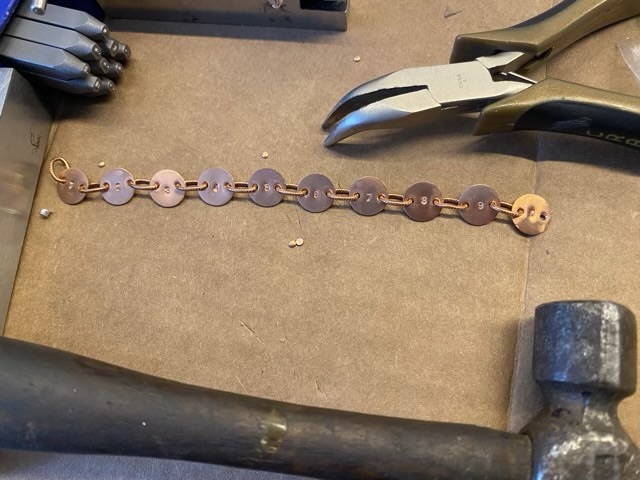
I started by punching two holes in the sides of the copper circles, then I stamped a number between the circles and planished the back flat. I connected the number links with links of chain.
Photo description: copper circles linked with oval copper chain surrounded by the tools mentioned above. My “10” link is a 0 because there wasn’t room for a 1.
I made a small melody clip out of 20 gauge copper wire. The size of the copper links means this will only work on knitting needles that are size 2 or smaller, which is perfect for sock making.
Photo description: toes of two socks with the row counter on the needle between stitches. The melody clip is on the first link, and the needle is through the eighth link.
To use the row counter, every time you knit to it, you move it one link. For the start of the sock toes, I’m really just using it to keep track of odds or evens, an increase row or no increase row. This is because I had to rip out these socks already because I forgot the no increase rows. I do like the row counter!