Stitch markers from satin cord

Making Celtic button knots is one of my favorite things to do. I use them for decorative ends, jewelry clasps, and now I have a way of making stitch markers for knitting! It is a great DIY for the stitch marker exchange at your favorite fiber meetup.

Photo description: ten rainbow hued stitch markers made from satin cord, with a decorative knot and a loop.

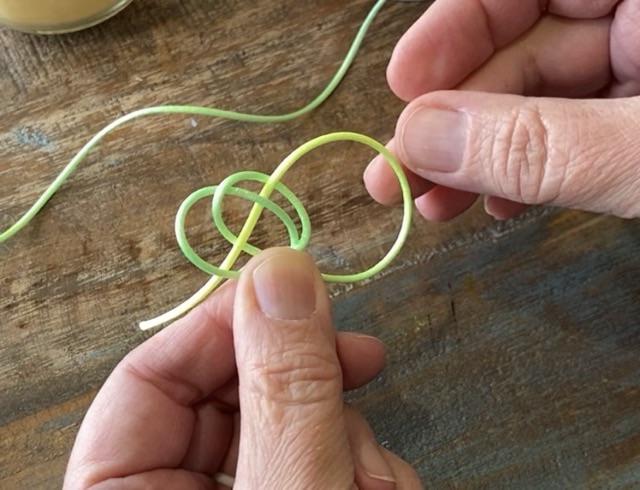
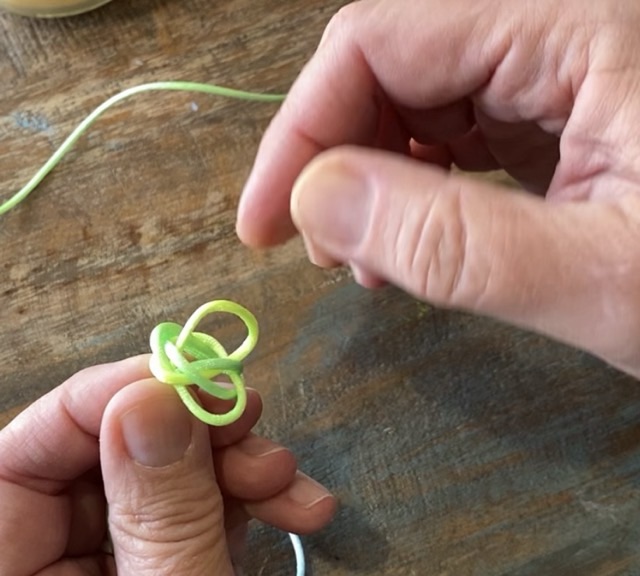
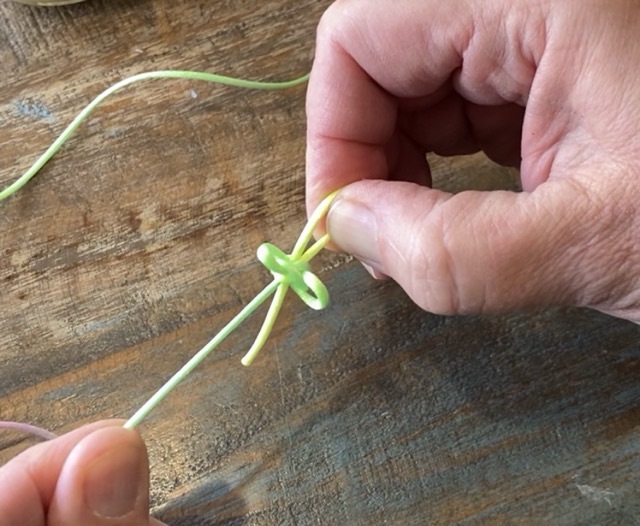
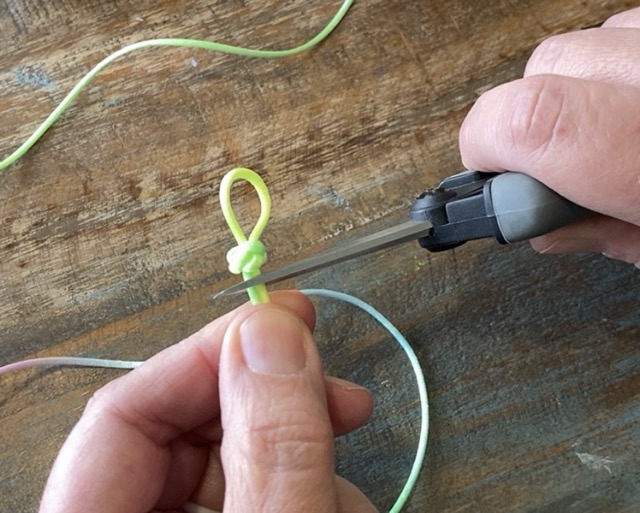
Here is my DIY video. It is a single take and you can hear my dogs pacing around me in the video, but all the data is there. For those that prefer pictures and words, I’ve provided steps below.

Step 1: With the satin cord, make a counterclockwise loop, pinch with thumb. Make a second loop about the same size, also counterclockwise, laying on top but slightly to the right of the first loop.
Step 2: From right to left weave the end over, under, over, under the sides of the two overlapped loops.
Step 3: Take the end counterclockwise over the right most loop side, under two strands, and up through the middle. Pull the knot gently but leave the center hole open.
Step 4: Put the end through the center hole, but leave a loop. Hold onto the end and pull the knot tight using the cords next to the knot.
Step 5: There will be loops in the knot after tightening, gently pull these taught by tracing the cord around the knot. This is the longest part of the process.
Step 6: When the knot is tight and neat around the loop, cut off the ends leaving a very short tail. Melt the ends using a candle flame so the ends fuse together. If you are using leather or cotton, glue the ends so they don’t pull out.

Knitting row counter

Here is a different version of a row counter for knitting. I used flat round wood beads and copper wire to make a chain with larger loops to accommodate larger needles. I then used a wood burner to number each bead; it is actually easier to wood burn the assembled chain rather than individual beads. To mark the tens, I used a copper lobster claw clasp with a copper clay leaf (that I made many, many years ago and has been waiting for a project). I find the lobster claw easier to deal with than a melody clip.

Photo description: handmade row counter in the center with handmade copper leaves on the right, then going counter clockwise: purchased copper lobster clasps, bead reamer, pliers, a pile of row counters waiting for their dangle, and a spool of 22 gauge copper wire.

More 3-hook i-cord makers

I ordered replacement hooks for a knitting machine, which are essentially latch hooks without a handle. I made handles from flame maple and deer antler horn and mounted three hooks in each handle using epoxy in holes I drilled with a drill press.

Photo description: four 3-hook cord makers, the far left and middle right handles are made of deer antler, the far right and middle left are made of flame maple.

I sealed the flame maple with Howard’s Feed and Wax (I think I’ve mentioned before how much I love this stuff!)

They work! I spread the tines a little more on these, which gives a more flexible i-cord than my first i-cord maker.

Blocking magic

Blocking a knit item really can work wonders. My Helix scarf increased in length about a third, making it a nice size. I’m glad I didn’t add on.

Photo description: Helix scarf knitted from hand spun blended wool and silk yarn, then soaked with water and laid out to dry in a semicircle shape
Photo description: nearly dry Helix scarf hanging from the drying rack showing off the lovely undulations created by short rows.

This could be my favorite piece of spinning and knitting that I’ve done. I started spinning the yarn about a year ago, and knitting it took me about a month. That being said, this was not my only project during that time. I call myself a serial crafter, but really I should consider the title parallel crafter. A parallel serial crafter. A craft dispatcher. Hm. This train derailed, but I’m glad the scarf made it to the station.

Helix Scarf progress

I finished knitting my Helix scarf! It has lovely ripples when laid out, but is a bit short. I used all my hand spun blended wool and silk yarn, so if I need to add on, it would have to be a different color. Hm. I think I will block it (get it wet and lay it out) before making rash decisions.

Photo description: Helix scarf made with hand spun fingering weight 2-ply yarn, showing opposing ripples along a central spine.
Photo description: same scarf, but folded in half and laid out in a circle.

I really love this pattern, and the way they do the short rows. It really is a wonderful way to show off hand spun yarn, and I like the subtle variation in color that the blended fiber produced.