I have finished a new fiber page for my spinning book! I mounted all my samples from hand spinning soybean top (top is the description of the fiber preparation, involves combing, and produces parallel fibers) on prepped black card stock. I would definitely use this fiber again, it is very strong, yet so soft.
Photo description: Soybean top fiber page. Clockwise from top left: original card from Hearthside Fibers reading “Soybean Top Developed in the USA in the 1930s by Henry Ford Used in Ford car upholstery pre-1940”, single spun, 2-ply, and 4 ply yarn samples, woven swatch, nålbinding swatch, crochet swatch, knit swatch, combed fiber.Photo description: same page with swatches flipped up to show the writing underneath: plain weave on Clover mini loom, nålbinding Dalarna O/U O:U O, crochet 1.75mm hook, Stiockinet size 2 needle knit.
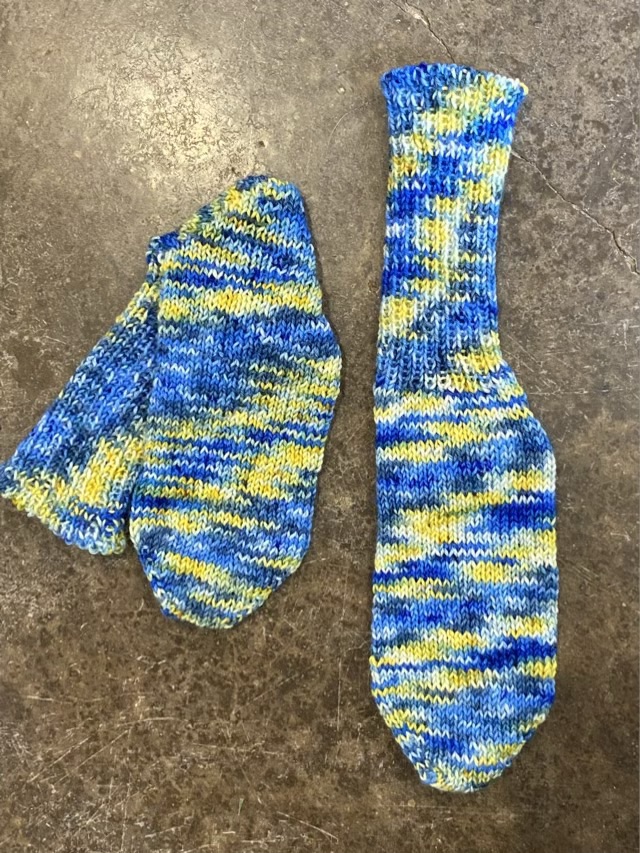
As a comparison to yesterday’s throwback post, here is my latest pair of socks finished. These are women’s size 5 socks knitted from fingering weight variegated super-wash merino wool and nylon yarn. I knitted them at the same time with two circular needles, which I much prefer over double pointed needles. They were knitted toe-up, which I also prefer, except for binding off. I tore out and reknit the top of one sock three times trying to get a stretchy bind-off. I ended up with a tubular bind-off, which is like a Kitchener grafting stitch, and goes well with 1×1 ribbing. I don’t care for the heel construction on these; I didn’t grasp the way to pick up stitches that were wrapped on the short rows. The good news is that there are dozens of different ways to do heels.
Photo description: two blue and yellow variegated knit socks, the right one laid flat showing the top of the foot and ankle, the left folded to show the bottom of the foot and heel.
My youngest reports that they are quite comfy. I do think hand knit socks are worth the effort for this reason.
My current endeavors are not my first foray into knitting socks, as proven here in a picture from November of 2003. I was knitting with thicker wool, and sewed tooled leather to the soles to make a slipper. Tooling leather isn’t the ideal slipper sole, it is thick and stiff. Now I would use suede or a finished supple leather, something to reduce the chance of slipping while walking more than the simple tooling I tried here. I do like how neat my stitches are, though, and worsted weight yarn knits up much quicker than sock weight yarn!
Photo description: cream colored wool slipper socks with a lightly tooled leather sole whipped stitched with leather lacing.
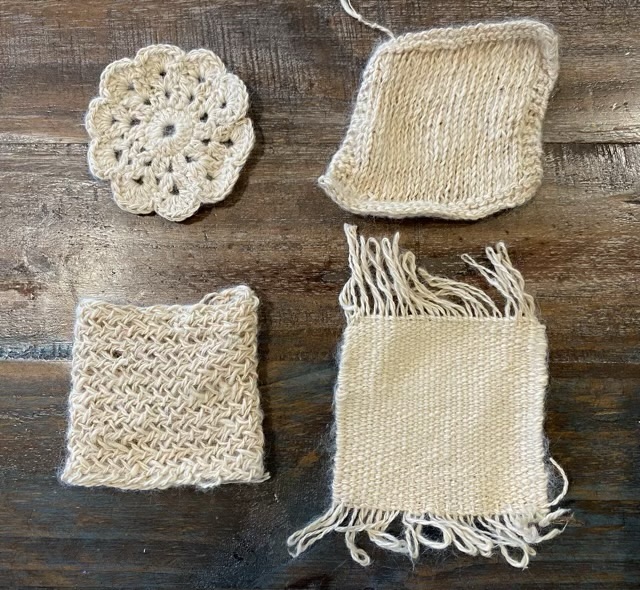
I made four example swatches from my spun soybean fiber: knitting, crochet, weaving, and nålbinding.
Photo description: swatches before blocking, clockwise from top right: stockinette knitting, plain weave, nålbinding Dalarna stitch, and crocheted lace round
The knitting swatch tells the most about the yarn, the obvious skew is because my singles have more twist than my ply. This bias does not have a significant impact on the other swatches. The nålbinding has several small knots because I could not get the fiber to felt together. I used a 1.75mm hook for the crocheted coaster, which was on the small side because the stitching is dense and stiff. The soy yarn is incredibly strong; I can’t break a single strand with my hands, but it is also incredibly soft even with the amount of twist I put in the single. There is good reason that it also carries the name vegetable cashmere. It also blocks well. It was very easy to shape when wet, and kept that shape when dry.
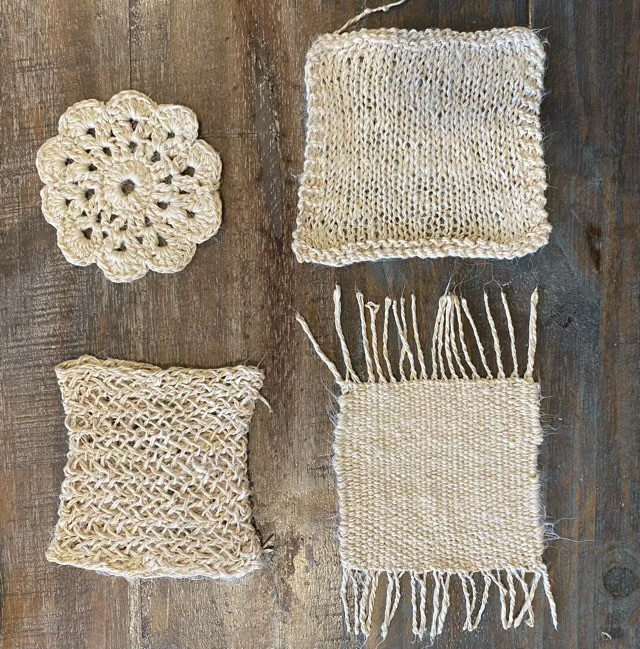
Photo description: same swatches after blocking
I was able to square up the knitting, and give the woven swatch some more twist in the fringe. The nålbinding swatch stitches opened up, but the crochet didn’t have much change, probably due to the density of the stitches.
The next step is to mount the swatches in my fiber book.
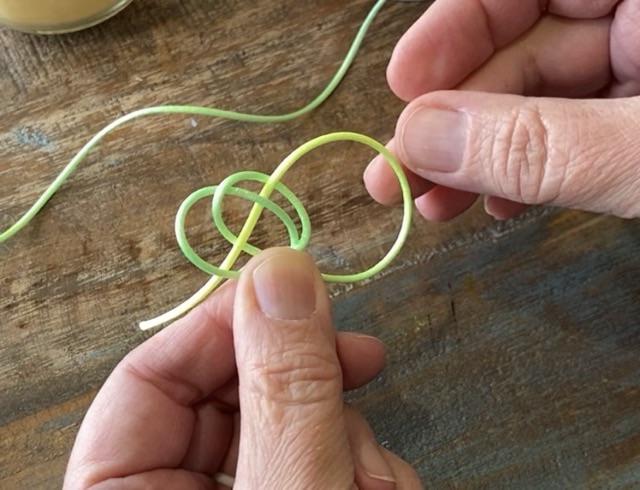
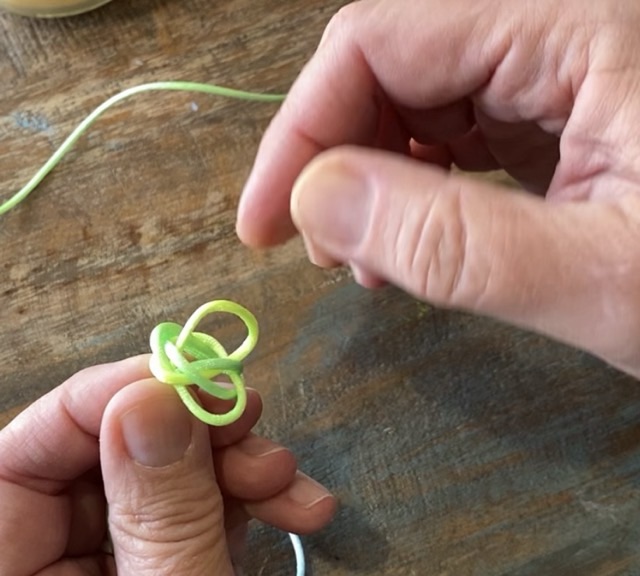
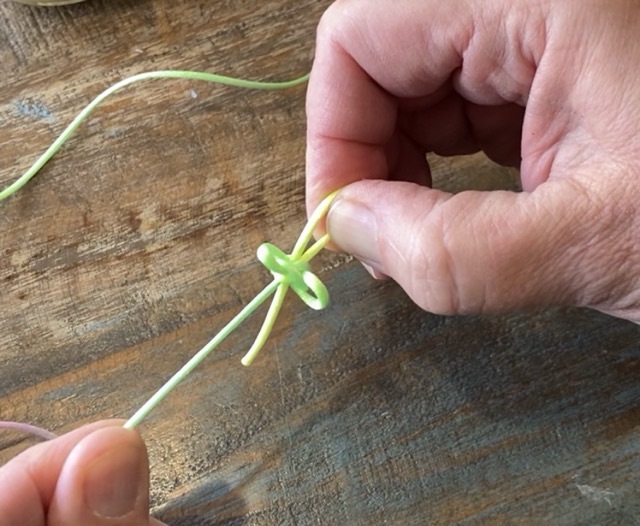
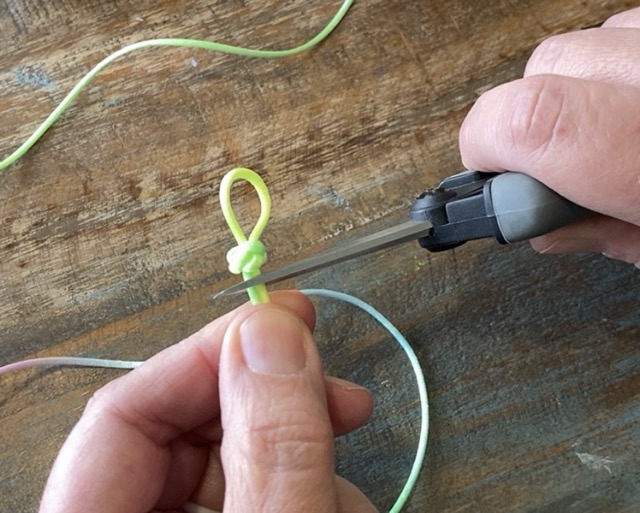
Making Celtic button knots is one of my favorite things to do. I use them for decorative ends, jewelry clasps, and now I have a way of making stitch markers for knitting! It is a great DIY for the stitch marker exchange at your favorite fiber meetup.
Photo description: ten rainbow hued stitch markers made from satin cord, with a decorative knot and a loop.
Here is my DIY video. It is a single take and you can hear my dogs pacing around me in the video, but all the data is there. For those that prefer pictures and words, I’ve provided steps below.
Step 1: With the satin cord, make a counterclockwise loop, pinch with thumb. Make a second loop about the same size, also counterclockwise, laying on top but slightly to the right of the first loop.Step 2: From right to left weave the end over, under, over, under the sides of the two overlapped loops.Step 3: Take the end counterclockwise over the right most loop side, under two strands, and up through the middle. Pull the knot gently but leave the center hole open.Step 4: Put the end through the center hole, but leave a loop. Hold onto the end and pull the knot tight using the cords next to the knot. Step 5: There will be loops in the knot after tightening, gently pull these taught by tracing the cord around the knot. This is the longest part of the process.Step 6: When the knot is tight and neat around the loop, cut off the ends leaving a very short tail. Melt the ends using a candle flame so the ends fuse together. If you are using leather or cotton, glue the ends so they don’t pull out.