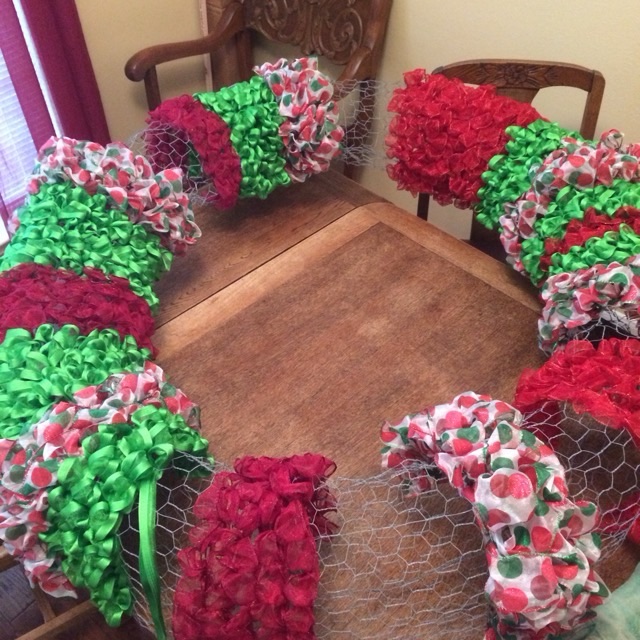
Sometimes things just don’t work out the way I hope. In December 2015 I made a large wreath from poultry wire and ribbon. It took me over a week to get all the loops of ribbon installed, and I had to buy more ribbon because I underestimated yardage. I should have made it smaller, but the thought of undoing it was worse than just pressing forward.
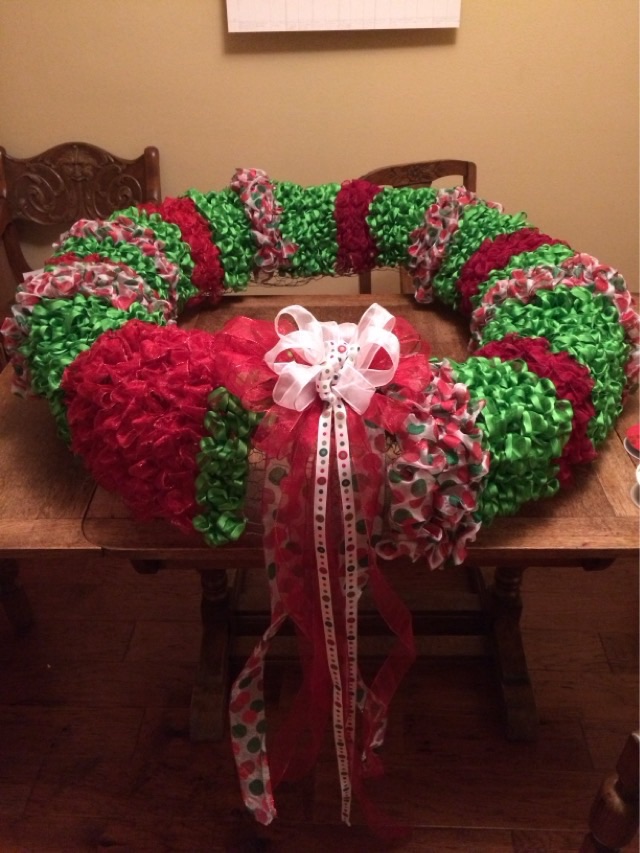
Photo description: hollow tube wreath frame made from poultry wirePhoto description: closeup of how I attached the wired ribbon to the poultry wire framePhoto description: in process picture with looped ribbon work in stripesPhoto description: finished wreath sitting on a table that is three feet deep, the wreath overhangs the tablePhoto description: wreath hung on an outside window because it was way too big for a door
The little bow I put at the bottom was woefully out of proportion to the huge wreath, but at that point I never wanted so see another loop of ribbon, possibly ever. I also didn’t care for the overall look when finished. I did learn from the process. I learned that looped projects take way more material than wrapped (logical). Storing such a large thing is difficult and the poultry wire frame didn’t hold up to rough handling. Ribbon is expensive, especially before the holiday sales.
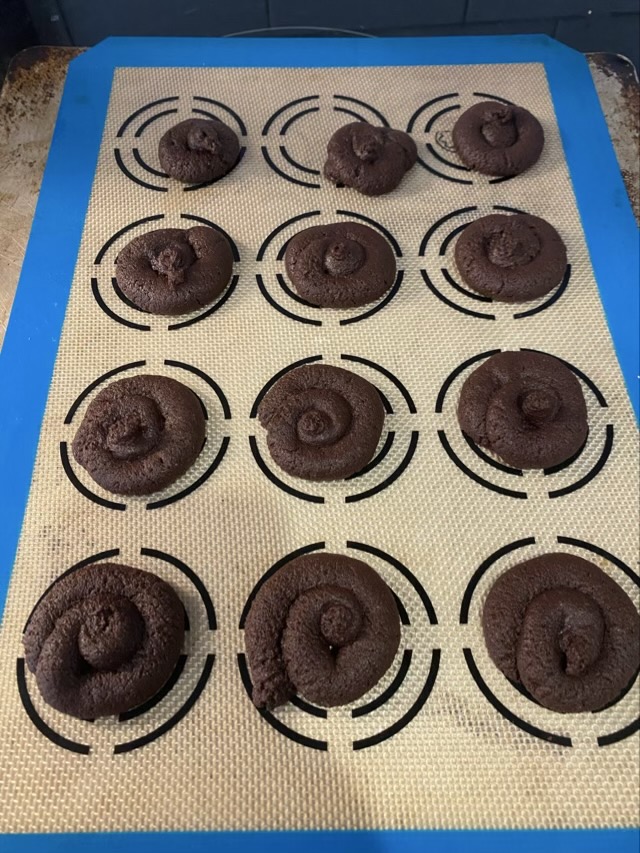
I wanted to make cookies and my youngest wanted to make brownies, so we went looking for a brownie cookie recipe (the cookie brownie recipe will be for another day.) We found a recipe that called for piping the dough onto the cookie sheet to make perfect circles, which seemed intriguing. It was a fail. The cookies did not spread into perfect circles, but stayed in their piped form.
Photo description: brown cooked dough in piped spirals that look more like poop emojis than cookies
I think that I didn’t whip the sugar and egg together well enough. The “cookie” was grainy. They also didn’t taste all that great. Back to the drawing board.
I found a picture from December 2014 that shows how the creative process sometimes works, or doesn’t. I was trying to develop a simple, repeatable wire dragonfly shape and went through many, many iterations.
Photo description: twelve partially formed brass wire dragonfly shapes on a green table
I still wasn’t entirely pleased with the end result, although I did make a few more like the shape in the bottom left.
Sometimes my ideas work right off the bat, but more often they go through a series of trials, with mostly errors. If we aren’t willing to have a few gnarls in the thread, it is hard to achieve much of anything.
I think “Rick Rolls” are hilarious. I loved Rick Astley’s song “Never Gonna Give You Up” when it came out (bass!), and it amuses me that it is now a cultural prank to deliver the ear worm in a sneak attack. I saw that someone used Minecraft blocks to build a QR code that went straight to the YouTube video. Nice. Since I have potholders on the brain, I thought maybe I could weave a QR code if it was a small one, like a Rick Roll. I didn’t want to buy black and white loops for an experiment, so I used the darkest and lightest loops I had on hand.
Photo description: Pro pot holder loom woven with brown and cream (and a couple of orange) loops into a QR code pattern
To get the right color options for each square, I strung all cream for the warp and all brown for the weft. There were some very, very long floats (floats are sections of weft that aren’t woven over under each warp thread). That made for a messy weave, and to lock in the sides I twisted the last loop. It didn’t really matter, the long floats made a messy grid and the picture didn’t scan. Bummer. When I took it off the loom the whole weave collapsed in shame at the audacity. (Ok, so not the impudence, it was the long uneven floats. I’m not a fan of floats.)
Photo description: potholder off the loom that has become a tangled mess due to the uneven and long floated weft loops
I did recover the loops for another project. The idea of weaving a QR code is not dead, I have some ideas on how to attempt future dastardly ear worm traps.
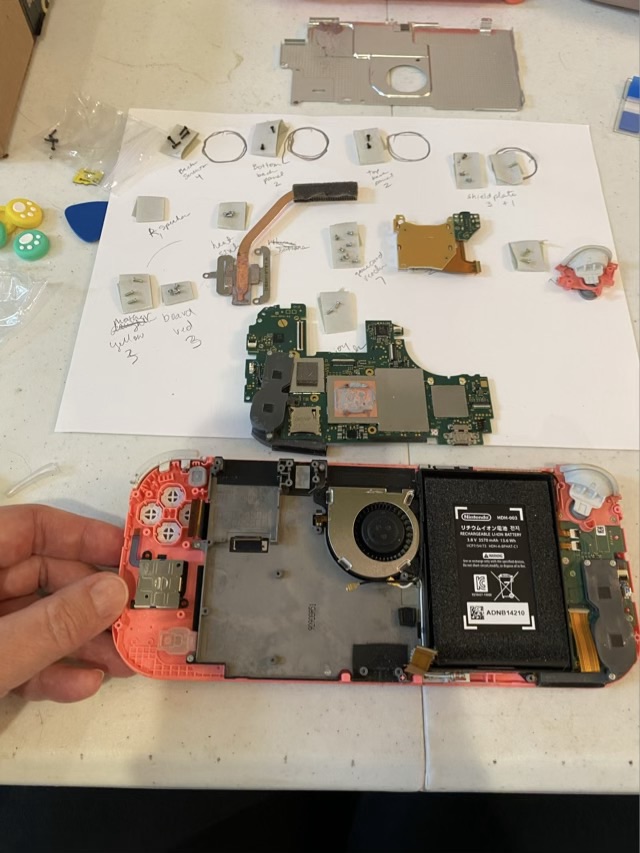
My youngest’s Nintendo Switch lite broke. The left joystick actually flopped around, not just drifted. She received a new to her full size Switch for her birthday, so the old one was a wash. Since it didn’t hurt anything to try, I bought an under $20 joystick repair kit and found directions. The directions had 28 steps just to get the joystick out, then the same 28 steps were retraced to put it back together. The kit came with two joysticks, which looked identical, except for part numbers on the back. There was no indication anywhere which was left, and which was right. I picked one. The disassembly didn’t go too bad for the left joystick, although I did break the left speaker connection because I didn’t realize that the plug was a teeny tiny white part in a slightly larger tiny white socket.
Feeling brave, and while the device was open anyway, I decided to replace the right joystick as well, after all, I had the part. Oh dear. The right joystick is a whole different set of steps, and involves removing a motherboard. I didn’t break the right speaker, and I had to replace the motherboard three times before all the cables were in the right spots, I thought. I missed the fan cable, and when I tried to retrieve it through the motherboard, it tore. Nuts.
Photo description: motherboard removed from a Nintendo Switch lite, all the removed parts placed on a sheet of cardstock and labeledPhoto description: broken end of a fan cable
Things I learned in this process: don’t force it (honestly I really should have known this, this is not my first rodeo). The engineering and durability of these devices is amazing. If I hadn’t been ham-handed, this is a doable repair. Inverted washi tape rings make great holders for tiny screws. Label everything. I saw my eldest set up for a deconstruction this way with wells embossed into card stock and it is brilliant.
The number one thing I was forcefully reminded of in this project: stop when you’re ahead.
The pieces and parts are now marked for a trip to tech recycling.