Cork restore

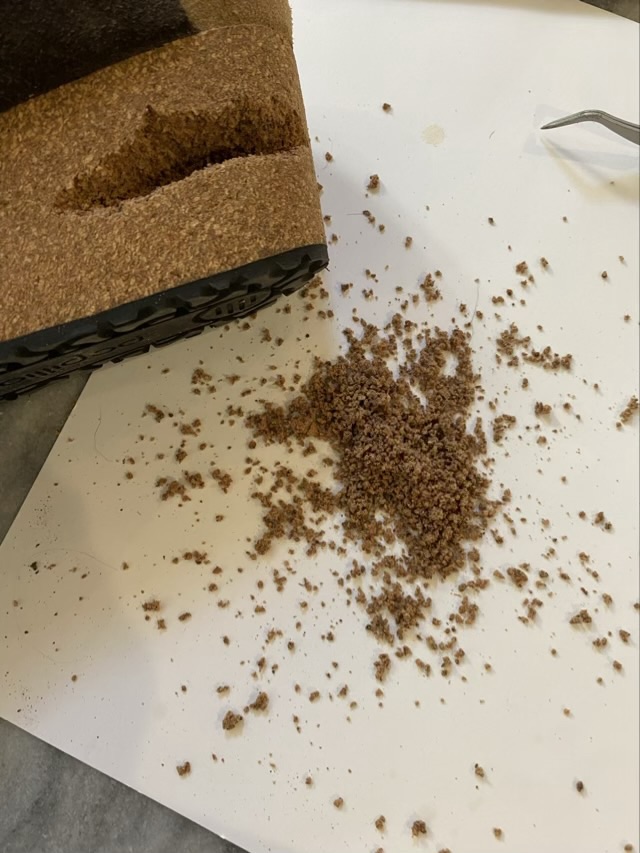
Something happened to the cork sole of my shoes. I’m not sure if it was damaged by something scraping across, or if the cork was already weak in that area, but it definitely affected the integrity of the shoe. I scraped out the soft cork until I reached solid composite cork at the damaged area.

Photo description: cork particles scraped from the heel of a cork shoe, the inside heel of the shoe shows the damage

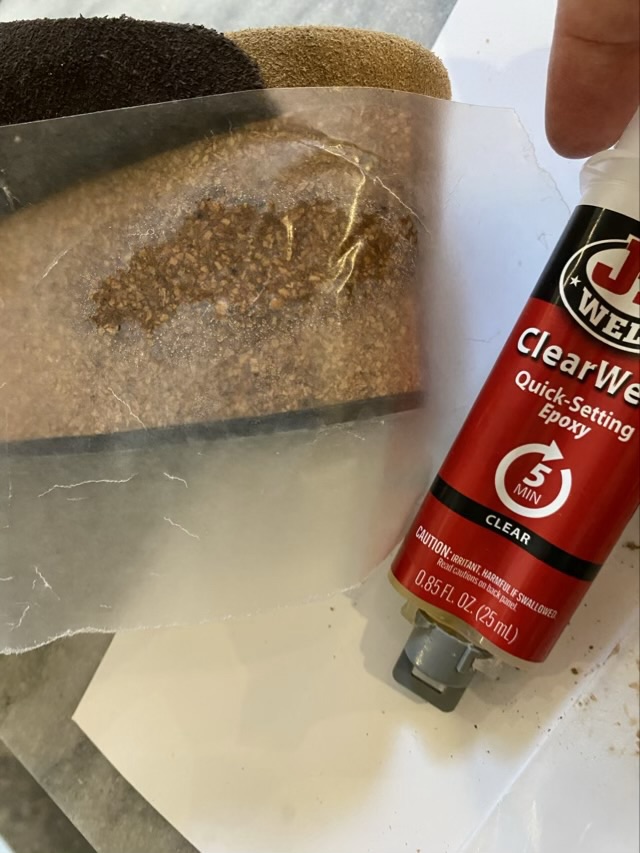
I mixed up some two part epoxy, then mixed the cork particles with the epoxy and filled in the hole with the mixture, smoothing it with a piece of wax paper.

Photo description: fixing the hole with two part epoxy

I let it sit overnight then sanded the area. The result seems to be structurally sound, but time will tell. The patched area is darker, but I could treat the whole corked area with a sealant to help even out the color. I might do that in the future if the patch holds. Since it is on the inside of the heel, I’m not as concerned about it.

Photo description: heel repair complete and smooth, but the color is slightly off

Throwback Thursday: resin earrings

In May of 2013 I was experimenting with circuits and epoxy resin. I made a set of earrings with components striped from a cell phone, epoxy, and sterling silver wire.

Photo description: hand-made, clear epoxy and sterling silver earrings with embedded upcycled phone components

This project did not stand the test of time. The epoxy yellowed and the silver tarnished. I thought I used “non-yellowing” epoxy, but I don’t have a record of the brand or type. I’ve drifted away from epoxy except as an adhesive for this reason.

Photo description: same earrings 12 years later

I have to say that I’m not entirely displeased with the aging of these earrings. The yellow and oxide have a more steampunk look than the newly made earrings. The epoxy is still solid, not cracked or degrading or sticky. I still wear the earrings.

Throwback Thursday: coaster study

In June of 2007 I did a wood and epoxy coaster study for Father’s Day.

Photo description: wood coaster with recessed center filled with symmetrically placed fishing lure, hooks, weights, and swivels covered in clear two part expoxy
Photo description: back side of coaster showing three round carved wooden “feet” and the words “CJH 2007 Coaster Study #1”
Photo description: wood coaster with offset rectangle carved out and filled with a slice of polymer clay in shades of blue and gray of a jumping fish, drawn fly hook on a line, all covered in a thick layer of clear two part epoxy
Photo description: back side of the coaster with three oblong “feet” carved in the wood and the words “CJH 2007 Coaster Study #2”

I used a hand held router setup with my rotary tool to carve the recesses and feet on each coaster.

My Dad sent me a picture of the fish coaster, 17 years later, and the coaster has held up well living in a display case. Interestingly, the blue “feather” I drew on the hook has faded.

Photo description: 17 year old wood and epoxy coaster