My friend gave me some beautiful single-ply, wool blend yarn from Germany (viele Danke!) I wanted my own cloche style hat, so used half double crochets to make a circle, continued without increases to make the sides, then alternated rows of increases and no increases to make the brim. It came out nice and warm!
This is my Oops bag because I started out making a hat, but made it too big, so just kept stitching until the skein was almost gone and finished with a row of 2dc 1ch to make holes for a ribbon to turn my failed hat into a drawstring bag.
Double crochet drawstring bag
I’m still experimenting with the two yarn spiral start, and thought it would be fun to go from both ends of a color block cake.
Crocheting from the inside and outside of a yarn cake
I chose to use a double crochet (dc) stitch because the counting is easier than a half double crochet.
Open drawstring bag showing spiral base
The holes for the drawstring are a little off set, since I was working in a spiral, but it isn’t really noticeable when the bag is closed.
To summarize my process (American notation): In a magic circle, cast on 2 sc, 2 hdc, 1 dc with yarn 1. Cast on 2 sc, 2 hdc, 1 dc with yarn 2 (10 stitches total). Row 1: Yarn 1: inc in each Yarn 2 stitch, Yarn 2: inc in each Yarn 1 stitch (20 stitches total). Row 3: Yarn 1: (1 dc, inc) repeat 5 times Yarn 2: (1 dc, inc) repeat 5 times (30 stitches total). Row 4: Yarn 1: (2 dc, inc) repeat 5 times Yarn 2: (2 dc, inc) repeat 5 times (40 stitches total). Continue adding dc between increases until circle is desired diameter. Then dc round, alternating yarn 1 and yarn 2 (this is more obvious than it sounds when you get going!) until you get to the desired length. To make the eye holes for the ribbon, using yarn 1 (1 dc, 1 dc, chain one and skip dc) go 1/2 way around. Do the same with yarn 2. 1 hdc, 1 sc, then single crochet (sc) around half with yarn 1 and repeat the other half with yarn 2. Fasten off and weave in ends. Weave ribbon through the holes (two strands of ribbon starting on opposite sides makes a secure drawstring).
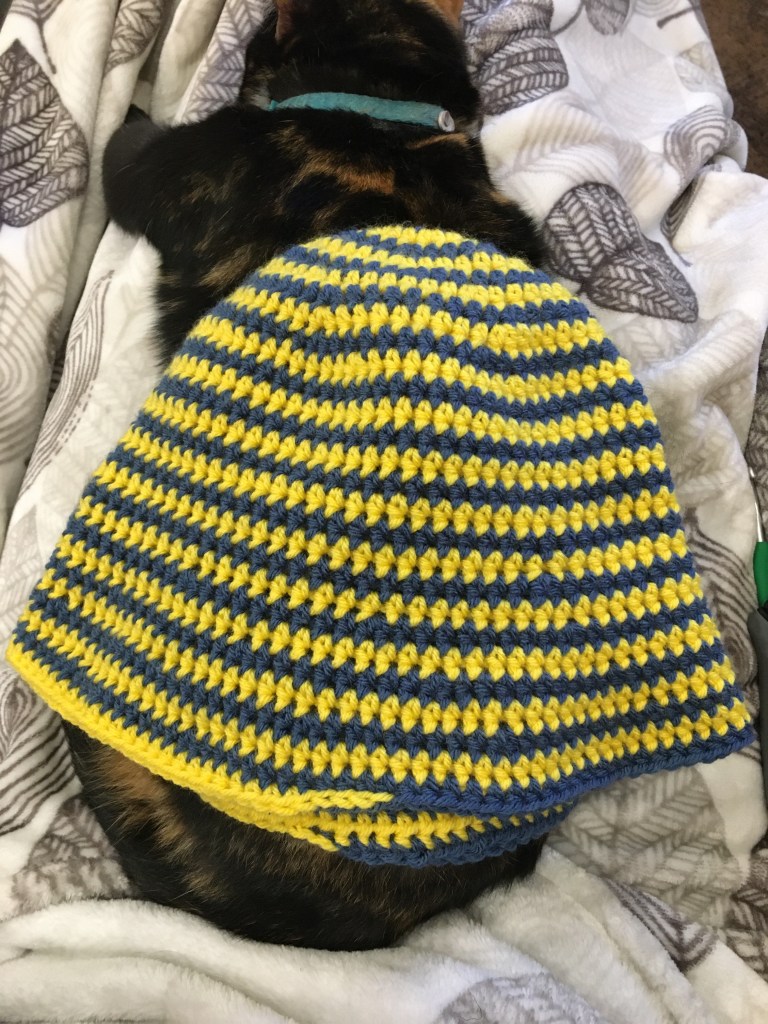
Yes, I’m still stash busting. I had yellow and blue yarn of the same weight, so decided to try a spiral crochet hat. (Yellow and blue are Down Syndrome awareness colors.) I really like the technique! It makes a seamless round, is easier to keep track of the start of a row, and the center looks neat! This particular stripe is rather bold, but I’m definitely going to try this again with other yarns.
Start of two color spiral
For this hat I chose a half double crochet (hdc) stitch because I think it comes out softer and more dense. Crocheting a flat circle with hdc is a bit trickier than with double crochet. I increase by odds, rather than singles, until the circle is larger. Each hat has been slightly different on the count because I’ve used different yarn weights and hook sizes. For this two color hat, I put 2 single crochet and 3 hdc of each color in the magic circle, this helps the center spiral stay neat. The first row (which is half of each color), I did an increase in all 10 stitches. The second row I increased in one stitch, and hdc in the next. This is the same for the start of a double crochet circle. In the third row it deviates: I increase in one stitch and hdc in the next 3. Fourth row increase, then 5 hdc. (See? 1, 3, 5… odds.) This works for awhile, then I usually have to go back to just adding 1 hdc for each round.
Crocheting while tending a fire made to create hardwood ash for the chicken’s dust bath
I finished this hat cloche style. From the circle to the tops of the ears I did no increases, then I increased only in the blue row. Although I stitched the whole hat one color around at a time, I finished with the colors ending on opposite sides of the hat, and decreased stitch size (hdc, sc, sl) to blend in the end.
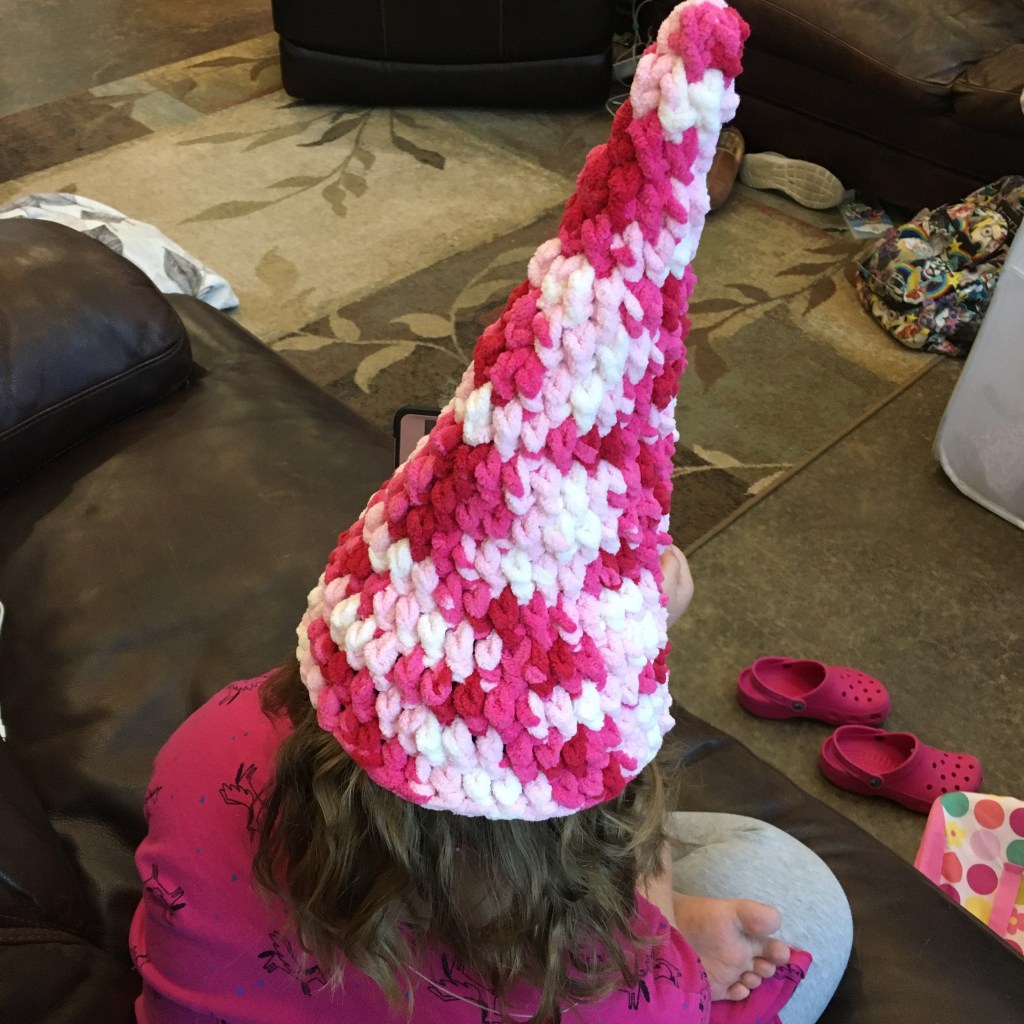
I’m still working through my stash of yarn. I found some left over blanket yarn and tried for one of those long stocking caps, but in double crochet. It did not come out as I expected. It does not lay over, but stands up straight like a gnome hat. Huh. I think this one goes in the dress-up box.
And yes, more hats. These berets are even easier! (American notation.)
Crocheted berets
Use a hook size recommended for the yarn you are using. Row 1: Crochet 10 double crochet (dc) in a magic circle. Slip stich (sl) in first dc. Row 2: Chain (ch) 2, dc in same stich, 2 dc in each stitch around, sl in first dc. 20 stitches in round. Row 3: ch 2, dc in same stitch, dc in next stitch, 2 dc in following stitch, repeat, sl in first dc. 30 stitches in round. Row 4: ch 2, dc in same stitch, dc in next X (X=2) stitches, 2dc in following stitch, repeat, sl in first dc. 40 stitches in round. Repeat Row 4, increasing the X number each round. Make rows until the diameter of the circle is 2-3” larger than the hat size. (A size 7 hat has a 7” diameter. For hats for me, I found that my handspan is also my hat size.)
Return: berets should lie flat when not worn, so now we will work in a similar manner but with decreases. Next Row: using the X value from the last row, ch2, dc in next X stitches, dc 2 together, repeat, sl to join. For each following row, decrease X by 1. Continue to add rows until the circle is slightly smaller than the desired hat size. Bind off.