I have finished a new fiber page for my spinning book! I mounted all my samples from hand spinning soybean top (top is the description of the fiber preparation, involves combing, and produces parallel fibers) on prepped black card stock. I would definitely use this fiber again, it is very strong, yet so soft.
Photo description: Soybean top fiber page. Clockwise from top left: original card from Hearthside Fibers reading “Soybean Top Developed in the USA in the 1930s by Henry Ford Used in Ford car upholstery pre-1940”, single spun, 2-ply, and 4 ply yarn samples, woven swatch, nålbinding swatch, crochet swatch, knit swatch, combed fiber.Photo description: same page with swatches flipped up to show the writing underneath: plain weave on Clover mini loom, nålbinding Dalarna O/U O:U O, crochet 1.75mm hook, Stiockinet size 2 needle knit.
I made four example swatches from my spun soybean fiber: knitting, crochet, weaving, and nålbinding.
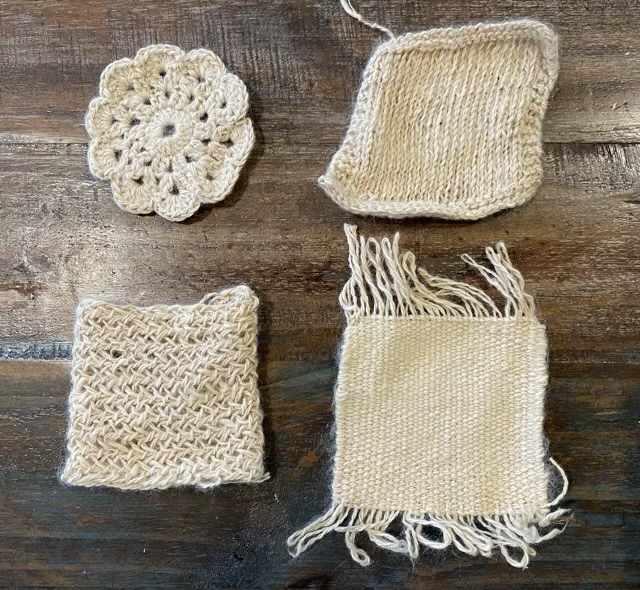
Photo description: swatches before blocking, clockwise from top right: stockinette knitting, plain weave, nålbinding Dalarna stitch, and crocheted lace round
The knitting swatch tells the most about the yarn, the obvious skew is because my singles have more twist than my ply. This bias does not have a significant impact on the other swatches. The nålbinding has several small knots because I could not get the fiber to felt together. I used a 1.75mm hook for the crocheted coaster, which was on the small side because the stitching is dense and stiff. The soy yarn is incredibly strong; I can’t break a single strand with my hands, but it is also incredibly soft even with the amount of twist I put in the single. There is good reason that it also carries the name vegetable cashmere. It also blocks well. It was very easy to shape when wet, and kept that shape when dry.
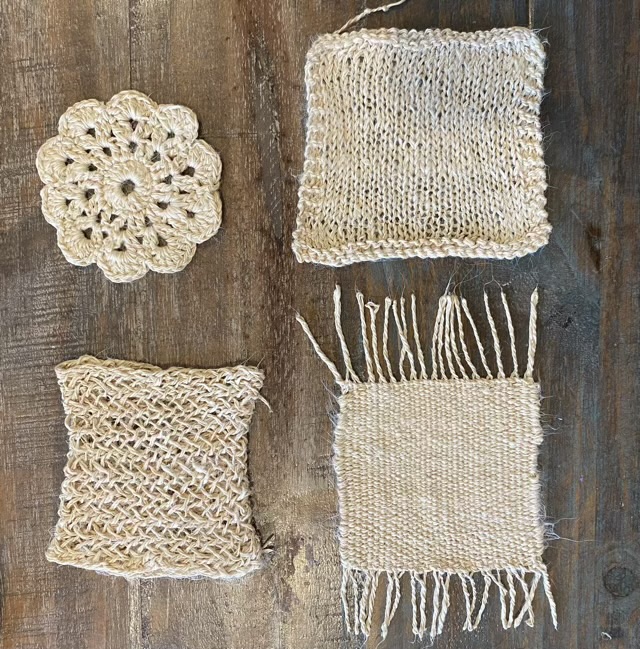
Photo description: same swatches after blocking
I was able to square up the knitting, and give the woven swatch some more twist in the fringe. The nålbinding swatch stitches opened up, but the crochet didn’t have much change, probably due to the density of the stitches.
The next step is to mount the swatches in my fiber book.
I’ve been thinking about doing some throwbacks to projects I did before I started this blog. Here is a crocheted and embroidered Roman style helmet that I made for my sister in 2016. Yes, I’ve always been a serial crafter.
Photo description: yellow crocheted helmet with red yarn crest and gold embroidery. Visor is secured with buttons and is able to lower over the mouth.
Awhile ago I made my Dad a nålbound wool cap with ear flaps. He recently had a haircut and found that sleeping in the wool was too hot, so requested a lighter version of the cap to be on his gift list. Nålbinding is inherently warm, and works best with wool or easily felted fiber, so I changed not only the fiber, but the method of construction. I had some very soft 100% cotton yarn, which is difficult to nålbind, but very easy to crochet. My favorite cushy crochet stitch is a half double crochet, so this is what I used to make a spiral round cap with ear flaps. The yarn was self-striping, and I used a shell stitch above the ears to start the flap then decreased before the flap, and increased around the flap. This was very much a stitch by feel construction.
Photo description: Striped crocheted hat with ear flaps on a table.
I had more yarn, so decided to make a second hat. I tried for a smaller size, but half-double crochet hats don’t narrow as quickly as double crochet hats, so the crown size needs to be significantly smaller. I forgot this fact, and ended up with a hat the same size, just without ear flaps. So I sent both to my Dad to try as after haircut sleep caps.
Photo description: Striped beanie style cap on a counter.
I wanted my owl bag to have a zipper, so I took a zipper from my stash and made a line of chain stitches a yarn needle and matching yarn on each side of the zipper.
Photo description: Purple invisible zipper with one side done with a line of embroidered chain stitch, in front of the bag to be zippered.
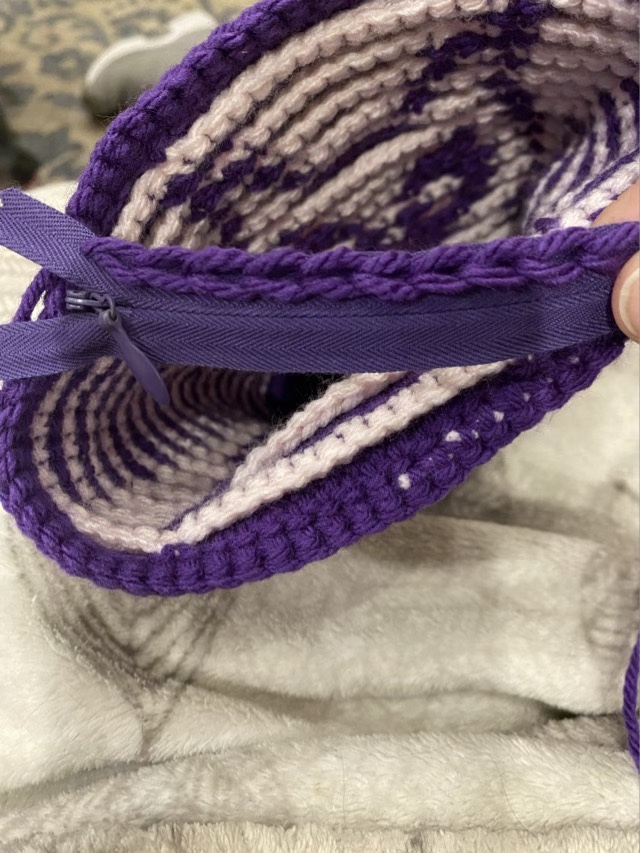
I then used a slip stitch to crochet the zipper to the inside of the bag, leaving one row as a lip at the top (mainly to help hide the zipper and stitches.)
Photo description: Finished zipper installation shown from the top of the crocheted bag.