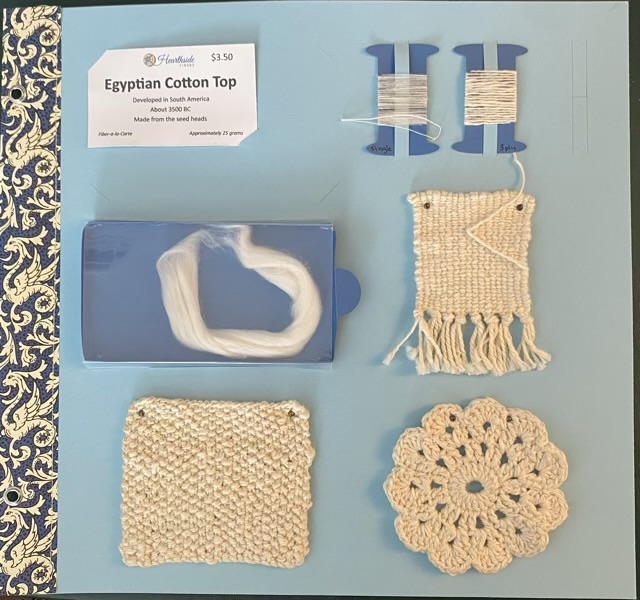
Photo description: scrap book page with an Egyptian cotton card from Hearthside Fibers upper left, single spun and chain ply yarn upper right, unspun fiber middle left, twined weaving swatch middle right, knit moss stitch swatch bottom left, crochet lace round bottom right
I spun this Egyptian cotton sample on an Ashford Traveller spinning wheel fitted with a high speed whorl. Egyptian cotton has a longer staple length so is less inclined to form pills. It was nice to spin and worked up into the swatches well.
I enjoy spinning cotton, but is definitely a sitting activity, either on a wheel, or with a tahkli spindle. I also avoid wearing black, as the small fibers accumulate everywhere.
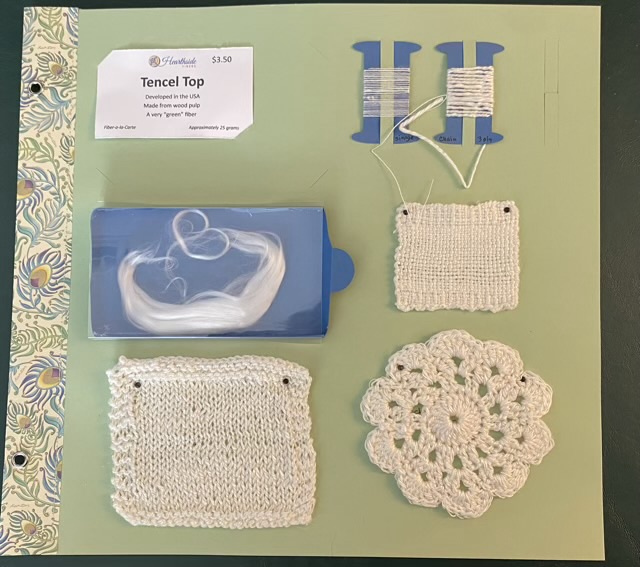
Photo description: scrap book page with a Tencel Top card from Hearthside Fibers upper left, single spun and chain plied samples upper right, unspun fiber middle left, plain weave swatch middle right, stockinette knit swatch lower left, and crocheted lace round lower right
The next completed fiber study page is for Tencel. Tencel is made from wood pulp and the combed fiber is shiny and silky looking, but it is not easy to draft consistently. I want to like it because it is made from waste product, but it fought me when I was spinning. Maybe it would be better if it were blended with something. Blending fibers is another whole rabbit hole.
Despite the difficulties spinning, my swatches are more rectangular and less skewed than with other fibers. I block most of my swatches, but the Tencel really benefitted from being wet and reshaped.
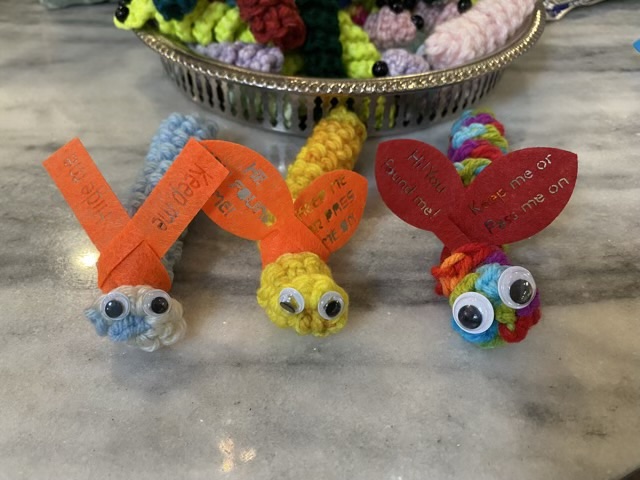
When we hide rocks for the Kindness Rocks project, we put some simple instructions on the back. I wanted to put something similar on my worry worms. I started with a scarf idea, with a simple slit for the attachment and words burned into man-made felt. After a couple tests, I thought the scarf looked more like wings, so changed my design in Adobe Illustrator, saved it as an SVG, and imported it in my laser cutter’s program.
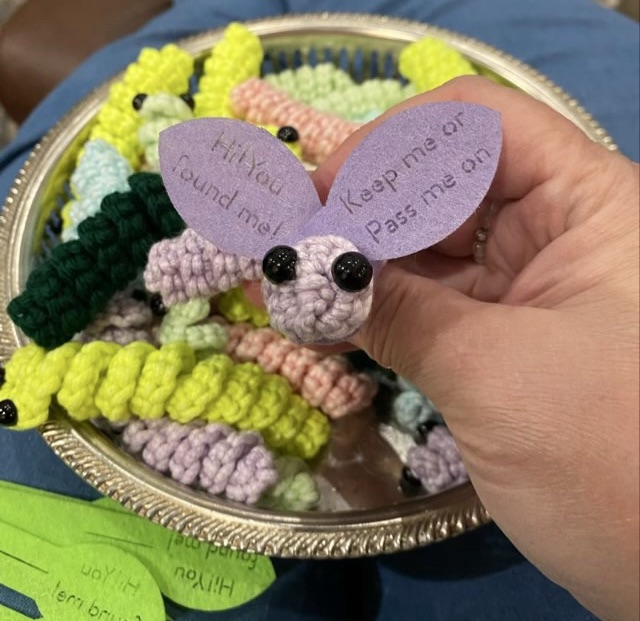
Photo description: three worry worms with a scarf (left), wings with a bold font (middle), and wings with a thin stencil font (right)Photo description: yellow and orange felt in the laser cutter, there were definite cutting differences between colors, in this photo the orange cut much cleaner than the yellow with the same settingsPhoto description: purple glow worry worms with a with purple wings that say “Hi! You found me! Keep me or pass me on” with more worms and wings in the background
I just love their little wings! I did find it interesting that the thin stencil font was easier to read than a bold stencil.
I took these to my regional chorus competition and my chorus had a great time “hiding” them for other competitors to find.
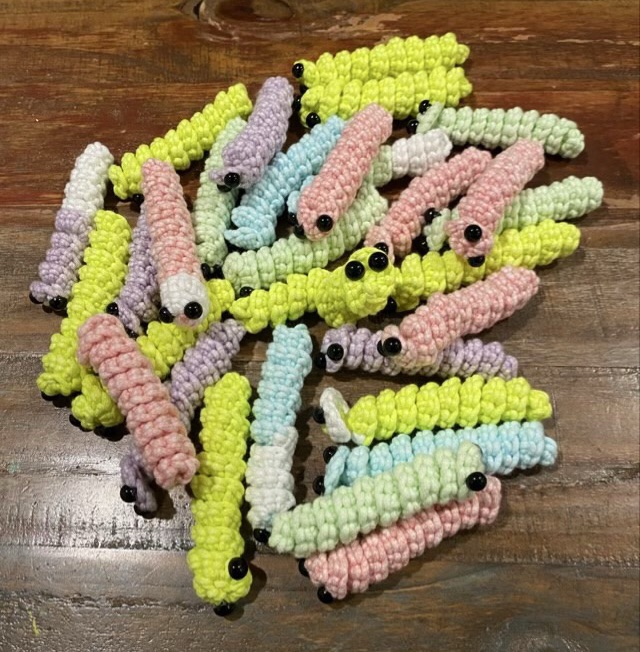
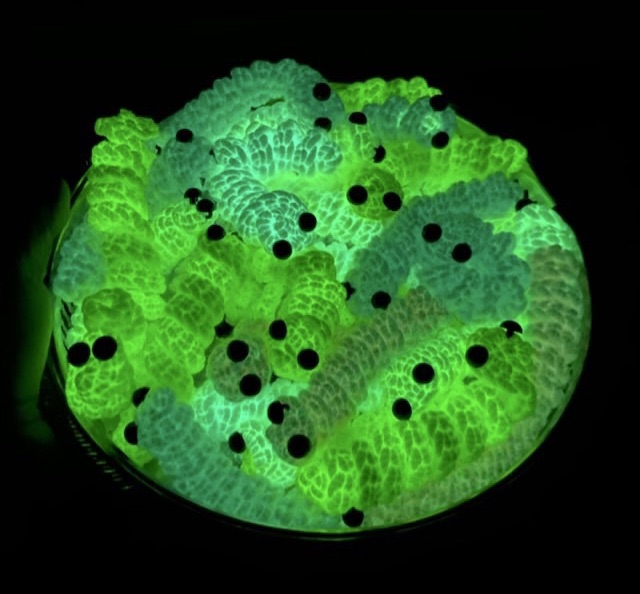
I had left over yarn from my glowing jellyfish hat, so I made glow worms! These are a glowing version of my worry worms.
Photo description: worry worms crocheted with five colors of Lions brand DIY Glow Cozy yarn with black sew on eyesPhoto description: glow worms in a dish, in the dark, glowing shades of green
I did enter them in the Lion brand Show us your Glow contest by tagging the picture in Instagram, but did not do a social push because I wanted my friends and family to vote for the jellyfish. Neither made the top 10, but there were some spectacular entries with serious time investment and large social backing. I do have my patterns available for free for the worry worm, and the jellyfish hat!
Here is a fun project! A glow in the dark jellyfish that you can wear. Just think of all those lovely floating jellies in the park on a cold night! I’m happy to provide my pattern for free, please tag me on instagram @carynjhall if you make the hat, and be kind, don’t sell my pattern, but do share the link to this blog post.
Lion Brand Yarn is doing a Show Us Your Glow contest, so if you want to pop over here, you can vote until March 19th, 2025.
Materials:
one skein each of DIY Glow Cozy Lion Brand Yarn #LionBrandYarn, in white, pink, lilac, aqua, neon green, and neon yellow
size I-9 crochet hook
yarn needle
Terms:
ch – chain
sl st – slip stitch
sc – single crochet
scbl – single crochet in the back loop
sc2tog – sc two stitches together
dc – double crochet
CDCS – Chainless Double Crochet Start (I like Moogly’s method)
Row 1: with white ch 2, 20 dc in magic circle, sl st to first DC
Row 2: CDCS, dc, ch 2, *dc, dc, ch 2* repeat ** 9 more times, sl st to start (10 ch 2 spaces)
Row 3: Sl st to ch2 space, CDCS, dc, ch 2, 2 dc, *in next space 2 dc, ch 2, 2 dc* repeat ** 9 more times, sl st to start
Row 4: CDCS, *in next space (2dc, ch 2, 2dc), skip 2 dc, dc in next dc* repeat ** 8 more times, in next space (2dc, ch 2, 2dc), sl st to start
Row 5: CDCS, dc in same st, *in next space (2dc, ch 2, 2dc), skip 2 dc, 2 dc in next dc* repeat ** 8 more times, in next space (2dc, ch 2, 2dc), sl st to start
Row 6: CDCS, ch 1, dc in next st, *in next space (2dc, ch 2, 2dc), skip 2 dc, dc in next dc, ch 1, dc in next dc* repeat ** 8 more times, in next space (2dc, ch 2, 2dc), sl st to start
Row 7: sl st to 1 ch space, CDCS, ch 1, dc in same space, *in next space (3dc, ch 2, 3dc), in next ch 1 space, (dc, ch 1, dc)* repeat ** 8 more times, in next space (3dc, ch 2, 3dc), sl st to start
Row 8: sl st to 1 ch space, CDCS, dc, ch 1, 2dc in same space, *in next space (3 dc, ch 2, 3 dc), in next ch 1 space, (2dc, ch 1, 2dc)* repeat ** 8 more times, in next space (3 dc, ch 2, 3 dc), sl st to start
Row 9: sl st to 1 ch space, CDCS, 2dc, ch 1, 3dc in same space, *in next space (3 dc, ch 2, 3 dc), in next ch 1 space, (3dc, ch 1, 3dc)* repeat ** 8 more times, in next space (3 dc, ch 2, 3 dc), sl st to start
Row 10: in neon green sl st to 1 ch space, CDCS, dc, ch 1, 2dc in same space, *in next space (3 dc, ch 2, 3 dc), in next ch 1 space, (2dc, ch 1, 2dc)* repeat ** 8 more times, in next space (3 dc, ch 2, 3 dc), sl st to start, do not cut yarn
Row 11: in aqua sl st to 1 ch space, CDCS, dc, ch 1, 2 dc in same space, *in next space (2dc, ch 2, 2dc), in next ch 1 space, (2dc, ch 1, 2dc)* repeat ** 8 more times, in next space (2dc, ch 2, 2dc), sl st to start, do not cut yarn
Row 12: in liliac sl st to 1 ch space, CDCS, ch 1, dc in same space, *in next space (2dc, ch 2, 2dc), in next ch 1 space, (dc, ch 1, dc)* repeat ** 8 more times, in next space (2dc, ch 2, 2dc), sl st to start, do not cut yarn
Row 13: in pink sl st to 1 ch space, CDCS, ch 1, dc in same space, *in next space (dc, ch 2, dc), in next ch 1 space, (dc, ch 1, dc)* repeat ** 8 more times, in next space (dc, ch 2, dc), sl st to start, do not cut yarn
Band: Don’t break yarn with color changes, pick up the floats and carry them along in the stitches. In pink ch 8, turn. 7 sc. *In lilac sc2tog, turn. 7 scbl, ch 1, turn. 7 scbl. In aqua sc2tog, turn. 7 scbl, ch 1, turn. 7 scbl. In aqua sc2tog, turn. 7 scbl, ch 1, turn. 7 scbl. In neon green sc2tog, turn. 7 scbl, ch 1, turn. 7 scbl. In pink sc2tog, turn. 7 scbl, ch 1, turn. 7 scbl. * repeat ** until beginning is reached. Stitch sides of band together, weave in ends.
Tentacles: In neon yellow, join yarn to the bottom of the band, chain 50. Join neon green, ch1, 3sc in each of the next 13 chains. Join aqua, 3sc in each of the next 13 chains. Join lilac, 3sc in each of the next 12 chains. Join pink, 3sc in each of the next 12 chains. Bind off, weave in end. Note: I changed the number of stitches of each color on my tentacles to give some more interest, and made one tentacle per two color stripes. Make shorter tentacles near the face.