This is more of a craft Throwback, rather than a picture from the past. The potholder loom was a craft I did when I was young. All those loops! I bought two sets for my kids years ago, and they sat unused. I was recently scrolling Pinterest and saw a diagonal design that used a technique I had never seen. I had to try it. I dug out a kit from the craft closet and set to work figuring out how to do it.
Photo description: laying out brightly colored knit cotton loops on a standard potholder loom, laying on loose loops.Photo description: weaving started on the potholder loom with purple and red loops that twist around each other and are hooked at a 90 degree angle instead of straight across. Harrisville Design box as the background.Photo description: weaving finished and showing a strong diagonal line with green, blue, and purple on one side, and red, orange, and yellow on the otherPhoto description: same potholder with the edges finished and removed from the loom showing a definite cup effect from the extra tension added by the 90 degree twist. This potholder later relaxed and laid flat.
This is a neat technique. I did learn that I need to pay attention to which way I twist the two colors around each other and keep it consistent. I switched directions a couple times in the project and it can be seen in the final product as an inconsistent line.
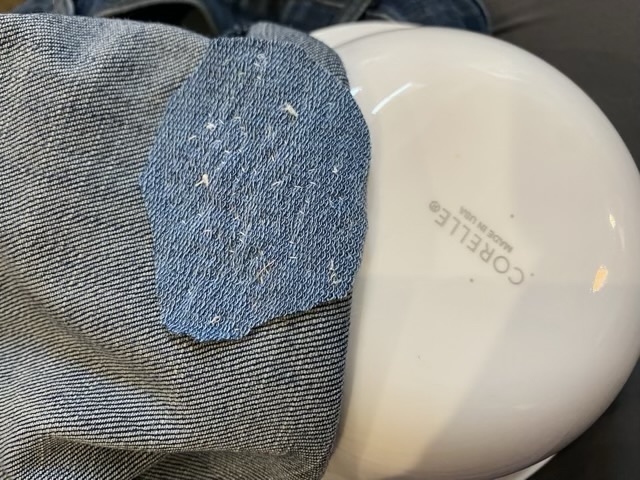
I’ve been collecting visible mending pins on Pinterest, so when my eldest tore her jeans, I sent her to my Pinterest board to pick a pin.
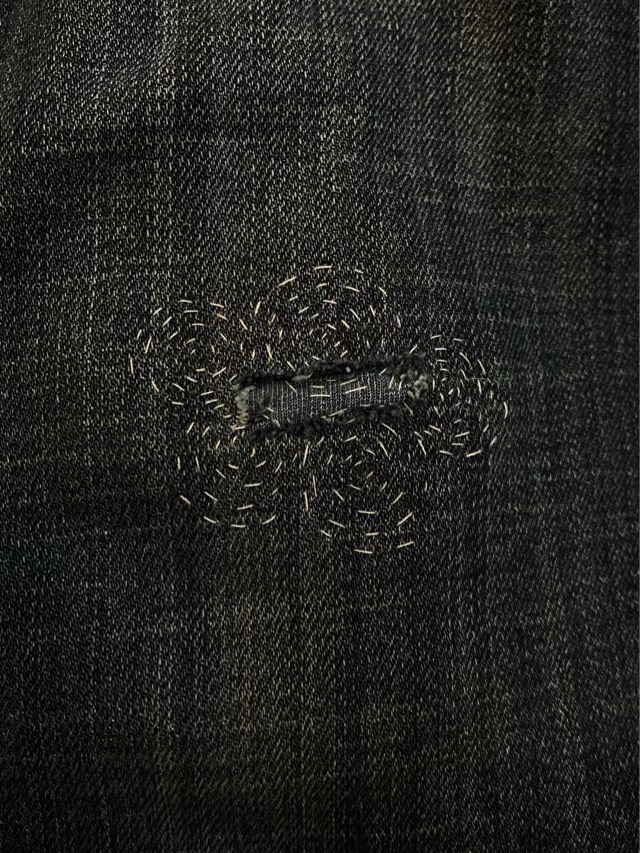
Photo description: preparing to mend the hole in the knee of a pair of jeans with a scrape of knit denim colored fabric, white thread, needle, and scissorsPhoto description: back side of the sewn patch after trimming shown next to a white cereal bowl that I used as a sewing supportPhoto description: front side of the jeans with five stitched spirals holding the patch
I quite like visible mending, it is a chance to add a little flair and do good.
Now we are getting into the children years for Throwback Thursday, at least digitally. Maybe someday I will flip through my pre-digital era, but for now now, we’ll just move forward. In January of 2006 my first child had started to crawl, so I attempted a large play mat with animals, tracks, and habitats.
Photo description: large cotton sheet with drawings of a bear, beaver, deer, duck, rabbit, and squirrel on the left, and corresponding tracks leading to drawings and f habitats on the right
I took some unbleached cotton fabric and made iron-on images with my printer. The idea was cute, but the thin cotton didn’t hold up well to a new crawler, and all of the images washed out when I laundered it. I still have the fabric, it became a drop cloth for art projects.
As an interesting note, my eldest is now in college with a major in wildlife. Hm.
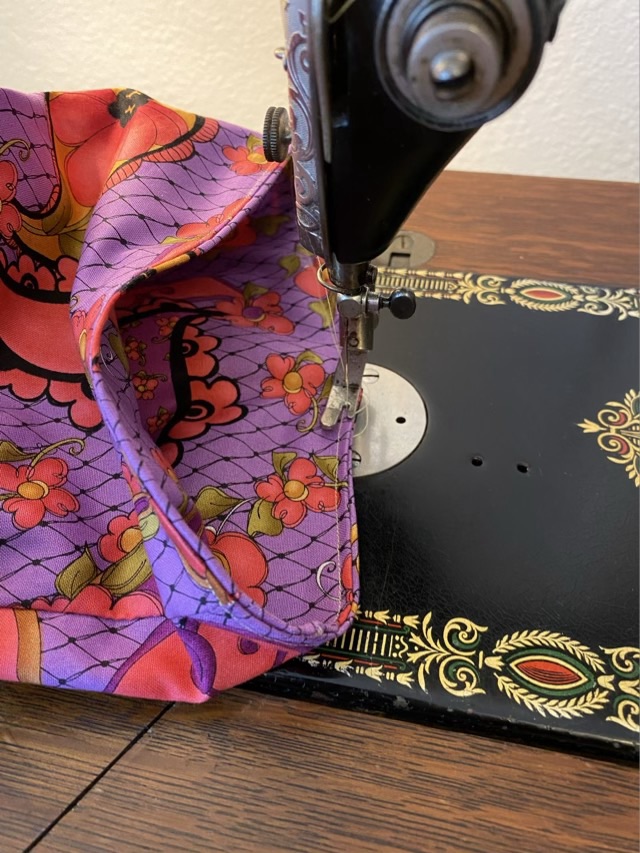
Last year’s Easter baskets are being used for storage. I needed something to put the candy and eggs in that wasn’t going to be then thrown away or contribute to the general clutter. Fabric baskets to the rescue. I used fabric and stabilizer from my stash, and sewed on the Singer model 66 treadle machine.
Photo description: finished bag with the top folded down to make a basket, sitting on the table of the treadle sewing machine.Step 1: 14×20 fabric with iron on interfacing on the bottom 2/3, sewn on the short end, right sides together, then the seam moved to the center.Step 2: 2.25” squares cut from the lower corners of the fabric tubeStep 3: bottom edge sewn togetherStep 4: box corners flattened out and sewnStep 5: Steps 1-4 repeated for the lining, then the two bags put right sides together and the top sewn, leaving a gap to turn the bag right side out, then the gap sewn closed by making a seam along the top edgePhoto description: another bag with fabric with a definitive direction. To get the fold to work, the inside fabric is upside down, so the crows on the fabric stay upright when folded.Photo description: unfolded bag, showing the full height
These bags came out quite tall, but since I didn’t put interfacing on the top third, they fold down easily. The interfacing I used did not stay fused to the fabric, and was quite papery, which would be great for a cat basket, but is slightly unwieldy for a treat bag. I recorded my steps here, but would not repeat these exact parameters. Future projects will involve experimenting with dimensions, and trying a softer interfacing, or maybe even batting and quilting. Hmm.
I purchased a bag of quilt scraps from my local quilt store. I love the owner’s eye for color, and it gives me something to exercise the Singer model 66 treadle sewing machine. I know that the scraps I sew together will eventually be used to make something purposeful, and this time I didn’t have to wait long.
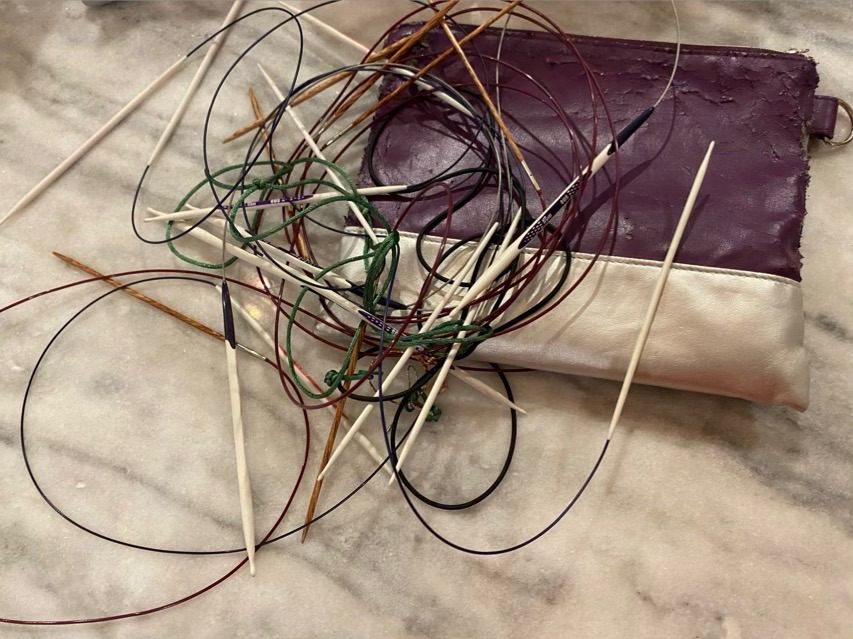
The free bag I was using to hold my circular knitting needles disintegrated, literally. The outer coating was peeling off. Storing circular needles in a pouch is also problematic as they tend to tangle and be a right mess.
Photo description: tangle of knitting needles, cable, and cord, laying on a purple and silver ragged bag.
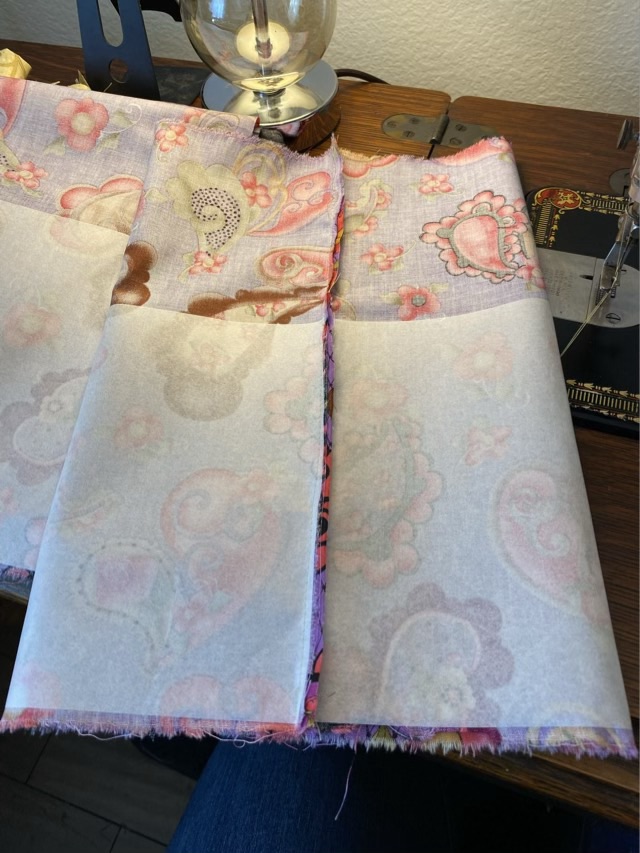
I decided that the long strips of fabric that I have been sewing together would do well for the base of a knitting needle case. I paired it with coordinating fabric from my stash (yes, I had matching fabric for the quilt scraps), and layout a folded design that will create 12 inner pockets and two outer pockets.
Photo description: long red and cream strips of fabric sewn together matched with an ivy print fabric laid out right sides together and double folded at each end to make pockets.
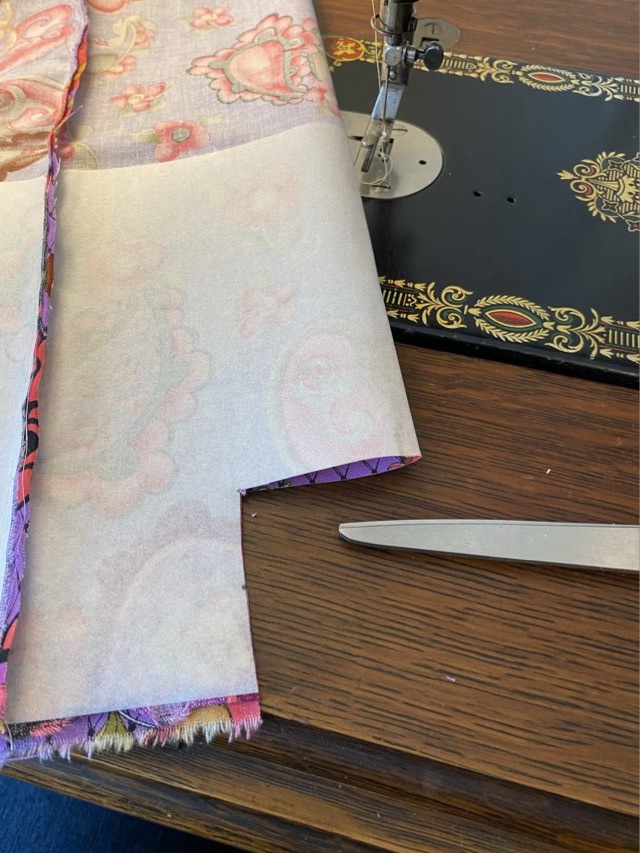
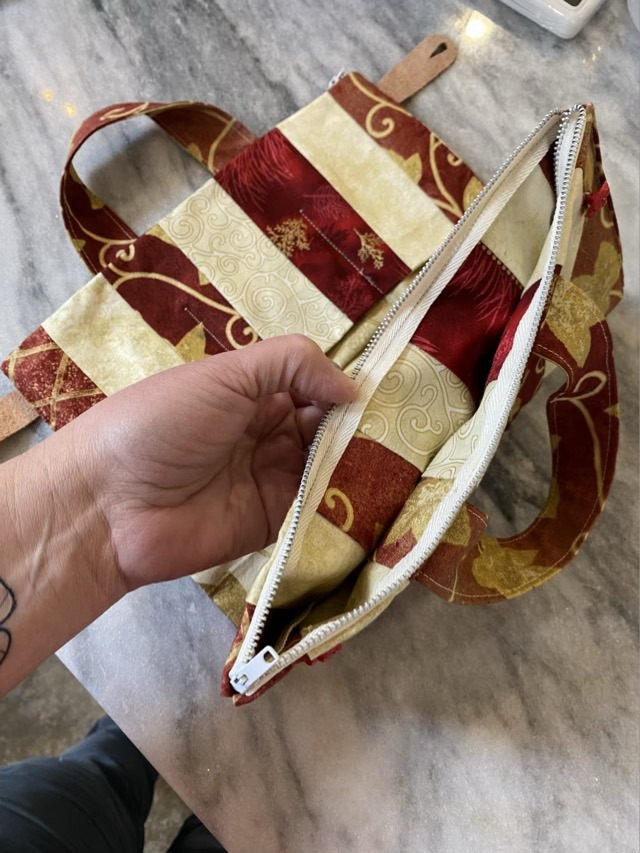
I sewed the two base pieces of fabric together using the treadle sewing machine, leaving a small gap, then turned the case right-side out. I pressed the whole piece, then laid out the side pocket folds. I sewed zippers across the edges of the outer pockets using oversized vintage zippers.
Photo description: two zipper halves, sewn facing away from each other on a flat piece of fabric will create a pocket when zipped together.Photo description: two zippered pockets shown closed and laying on the table top of my treadle machine.
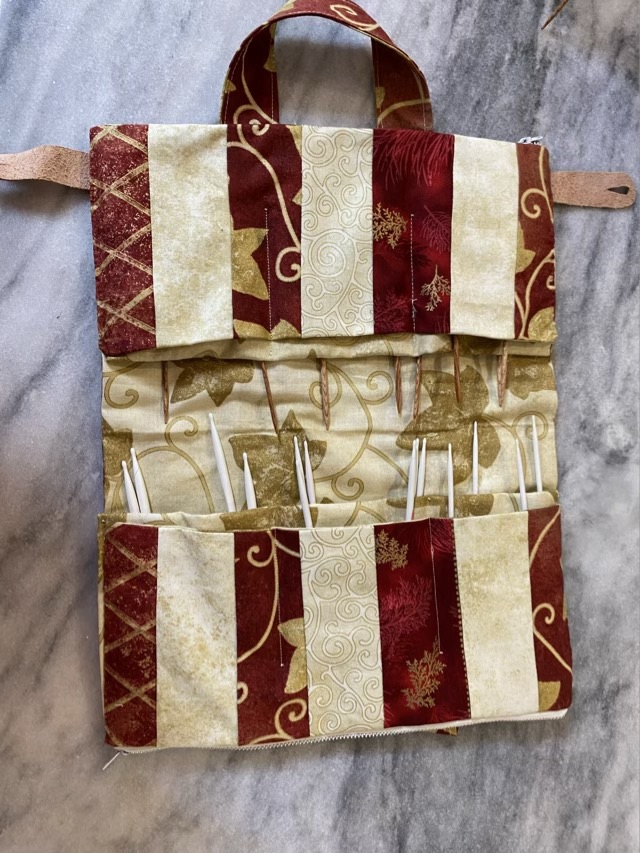
To make the inner pockets, I measured out three sections on each side and sewed from the top of the inner pocket down to a couple inches shy of the zipper. This is so when accessing the pockets from the zippered side, the bottom is closed, but the pockets aren’t too deep to reach the bottom. This took some experimentation. And seam ripping.
Photo description: 12 inner pockets shown with circular needles tucked inside and the dividing seam stopping two inches from the bottom.Photo description: zippered pocket open to show two inches of clear space.
I hand-sewed the sides of the pockets together because there were 16 layers of fabric at the edge. None of my machines can handle that fabric load. A simple straight stitch with teeny tiny outside stitches did very well to pull the fabric together neatly.
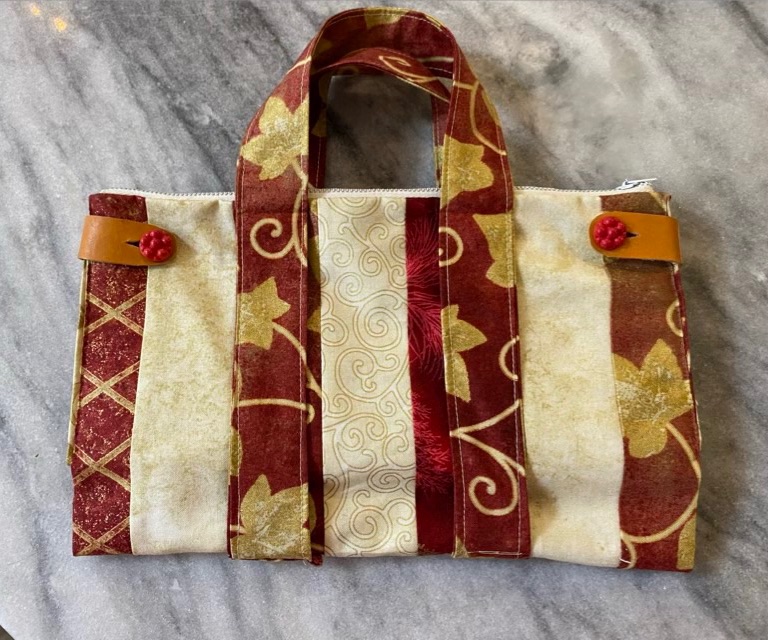
I used the treadle machine to sew two long strips of fabric together, turned it right-side out, stitched along the edges, then sewed it into a circle to make the handles. I machine sewed the handle to the bottom of the bag, then hand sewed the handle to the top of the bag. To keep the bag closed, I cut some thin pieces of finished leather, cut in button holes, and sewed them to the sides of the bag. I found vintage red buttons in my button stash and hand sewed them on.
Photo description: finished knitting needle case
All done! All the sewing was done either by hand or with the 1916 treadle sewing machine. The zippers and buttons are vintage, and the whole project cost me only time, since the fabric was sourced from my stash. Now my circular knitting needles are neatly stored and organized, with space for stitch markers, rulers, and other knitting necessities in the zippered pockets.