Masking tape

Some people who use laser cutters advocate for using masking tape to reduce the smoke stains on the surface of the wood. I tried it as I redesign my dishwasher magnet. I don’t like it.

Photo description: after the laser cut project using blue masking tape, small areas of tape are left behind, and the image didn’t fully burn

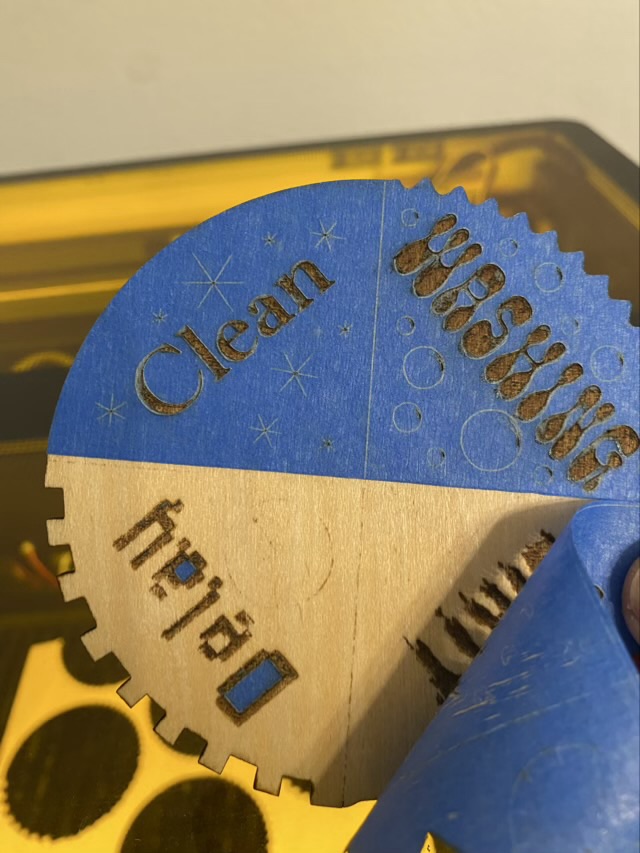
With the addition of the tape, the laser settings have to be increased because of the thickness of the tape. After burning a design there are also small bits of tape left behind that need to be picked off, and in the fill areas the obliterated tape leaves a sticky residue. Yuck.

So how to deal with those smoke marks? A little bit of sanding with 400 grit sandpaper works wonders and takes less time than removing sticky tape.

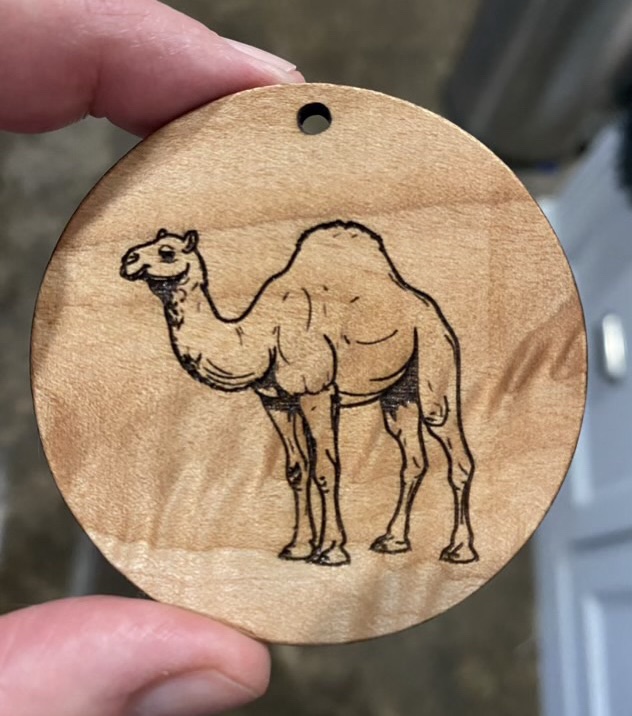
Back to the beginning: Why am I redesigning? I didn’t like how the bit map engrave of the previous design was a little messy and took a long time to engrave, so I redrew the art and made an SVG file, which cut the processing time almost in half. Depending on settings, the previous bit map design took 11 minutes, where the new SVG takes 6.

Confession

My content is getting a little thin because I’m currently obsessed with the new update of the Stardew Valley video game. I should be knitting, but instead I’m planting virtual crops and spinning fabric (the “loom” in the game takes raw wool straight to fabric on a device that looks like a spinning wheel). I did the game to perfection before the update, but all the new content from Concerned Ape was worth replaying the game. Like this giant powder melon that grows in winter.

Photo description: screen shot from my Stardew Valley farm with a large blue melon amongst smaller blue melons on a field of snow

I’m getting to the trudging part, where the goal is to get enough money for perfection (either the true game way, or buying it 1% at a time). This is not as fun and I will get easily distracted by real life things, which is good for my blog content.

Of course, the first thing I get distracted with is picking out a harmony part for Bill Grogan’s Goat and singing it through the house. Hm.

Chain ply cotton

Since I had more spun cotton single than I needed for my crepe yarn, I tried chain plying it to make a three ply yarn sample. It did not go well. The cotton single was difficult to handle and kept breaking if the strands rubbed together. The resulting yarn is very haphazard with sections that coiled mixed in with the smooth ply.

Photo description: three ply cotton yarn on a wood bobbin

The chain ply and the crepe yarn don’t look that different on casual observation because of the irregularity of the single spin. The variations in width cause more visual texture than the plying techniques. I will have to try this comparison with a different fiber preparation.

Photo description: crepe yarn (left) and chain plied yarn (right) on a PVC niddy noddy

Bird bath

Our last ice storm broke all my ceramic and glass bird baths. Some of the old pottery had been outside for years. We must have had hail because they were all just shattered. I ordered a hanging water container made of wood and plastic rather than risk breakage again.

Photo description: wood and blue plastic water basin added to the hanging array of foodstuffs for squirrels and birds

Really the water is for the squirrels, who quite liked the other water basin.

Desert ornament

I had a request for a camel laser cut ornament, so took a slice of flame maple and line engraved an SVG camel image. I like a line engrave of SVG files better than a bitmap engrave for JPG type images.

Photo description: camel laser engraved on a circle of flame maple, finished with Howard’s Feed-N-Wax
Photo description: other side of the same ornament with the camel image reversed and done with a faster speed resulting in a lighter burn

I like the way the flame maple looks like shifting desert sands, especially when it catches the light on the move.