A matter of angle

I am still testing the newest spindle design, even though I had a batch run, something was still off, but I couldn’t put my finger on what bothered me. I was having trouble getting a good spin. I thought maybe it was weight, but it didn’t improve as the cop of yarn increased. So I looked at the head, and decided to thin down the top. I used my oscillating drum sander, and with the curve of the drum was able to make just the top of the spindle concave rather than convex.

Photo description: Closeup of the head of my 3D printed spindle, showing a convex surface from tip to midline.
Photo description: Same spindle after some sanding with an oscillating drum sander to make the tip to midline concave.

This small change made a huge difference. My fingers now had more contact with the surface of the top of the spindle and I could get it spinning much easier. The grooves left by the rough sandpaper also aided my grip, so I think I will not sand that part smooth. I now need to be careful not to spin the spindle so fast that it flies up sideways, unwinds itself, and falls to the ground. I probably dropped the spindle a dozen times on my walk; there are a couple marks, but it did not break, even when hitting asphalt.

Photo description: 3D printed spindle with a ball of blended single spun yarn on the shaft, held in my hand with the road in the background.

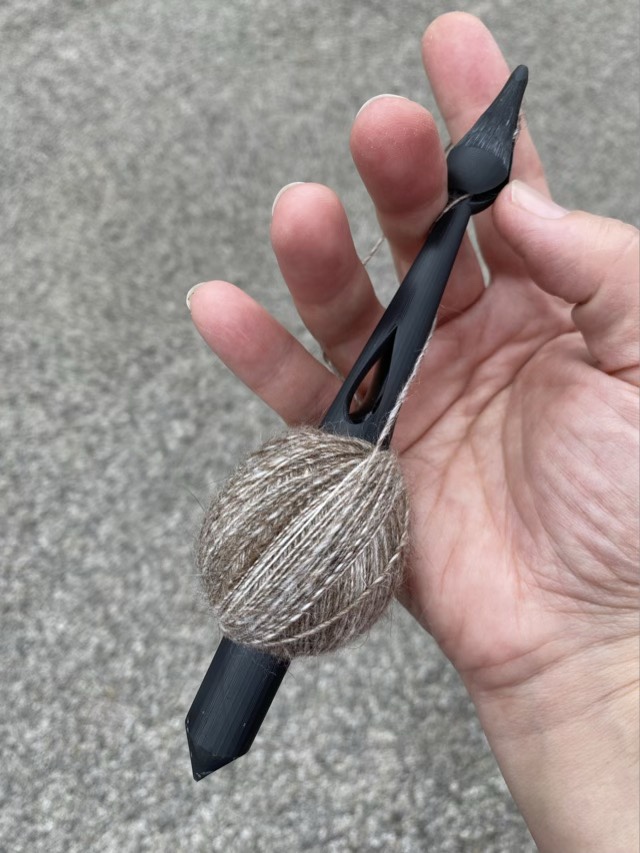
I will sand down the rest of the spindles, then before posting them to Etsy, I still need to develop a decoration and packaging. Development is slow, but inching forward!

Toy field trip

Thor the technical kitten (since he is still under a year old), likes to carry around his toys. One of his favorites is a wrist warmer that I nålbound from home spun bison down. Materials alone make it a pricey toy, but if time invested is considered, it vaults into precious territory. Apparently he took it on a field trip to the catio, then back inside, because I found it on the rug covered in dried grass.

Photo description: Brown wrist warmer made from American Bison fiber, covered with bits of dried grass. There is some felting, and a couple pulled loops in the fabric.

Allowing the wrist warmer to become a toy was a calculated event. The one donated to the cat was a tight fit and I wasn’t wearing the pair. Now it becomes a test of how durable I made the spinning and nålbinding. I’m actually quite amazed that it is holding up to kitten attentions as well as it is.

Eclipse

What a beautiful day to observe a solar eclipse! The temperature here in Texas was in the 60s, and the sky was clear. I made the word “eclipse” by poking holes in black card stock, essentially making a series of pinhole cameras. I held this above a white sheet of card stock to get the images of the moon moving between us and the sun.

Photo description: “eclipse” written in script in pencil on black card stock with the top and bottom edges folded. In the background a white paper is held down with a branch.

We had some wind, so I found the best way to get my pictures was to use a branch to keep the white paper still on our mailbox, and fold the edges of the black paper to keep it rigid. I also snapped some pictures of the shadows of the trees, which made their own “pinholes” between layers of leaves.

Photo description: The shadow of leafy branches cast upon the siding of the house, overlapping crescents making an unusual pattern.
Photo description: Result of the serial pinhole camera, with the word “eclipse” written in script with tiny crescents of light.

Alas, we did not experience totality at our location. The picture above was taken when totality was predicted to occur.

Chicken pumpkin carving

I saw another chicken tender helping her hens carve Halloween pumpkins and loved it, so followed suit. This time, rather than poking holes, I just skimmed off the pumpkin skin in eye and mouth positions using a sharp knife.

Photo description: Small orange pie pumpkin with the skin removed in the shape of triangle eyes and a tear drop mouth.

To hang the pumpkin, I used a gimlet to drill a hole through the stem, then split the end of a bamboo stick to push cotton twine through the hole.

Photo description: In the foreground, the bit section of a gimlet on the right, and on the left the split point of a bamboo skewer. Pumpkin with cotton loop through the stem in the background

I then hung up the pumpkin in the chicken run. By the afternoon, the pumpkin had a decidedly gory countenance.

Photo description: Same pumpkin with the flesh pecked out of the eyes and the entire bottom gone, leaving a gaping hole.

The result is definitely creepy.

Restoration update

I’m still regularly oiling the Singer 27 treadle machine and attempting to remove more parts for cleaning. My husband has been helping, and he was able to free several bolts! I did take a tool to a thumb screw for the back plate; I figured if it was going to break, better that I’m the one that breaks it. I wrapped the knob in leather, then used an adjustable wrench, and slowly turned the screw. Success!

Photo description: Large adjustable wrench on the bottom, next to a very rusty back plate, next to a small knurled knob that held the plate in place on the machine, and at the top, a 1/2” strip of tooling leather

I photograph all the removed parts and put them in a labeled ziplock bag with a spray of PB blaster. When I get all the parts free, I’ll clean everything before putting it back together (fingers crossed).