Mosaic crochet chart

Next for my mosaic crochet experiments is to attempt a chart of an image rather than a repeating pattern. I used the knitting chart app to plot out an owl, with the goal of making a small bag. I used a smaller hook to produce a dense fabric, and made the base as a long oval with increases on the ends in each row.

Photo description: Densely crocheted long oval in the foreground with calico cat and iPad in the background. The oval has been started with a chain, then four rounds added with increases on the ends only.

To make the walls of the bag, I worked in rounds of back loop single crochet, alternating colors, and dipping down with double crochet to block out color in the previous row. My original chart was close, but I had to make some adjustments as I went due to technical aspects. Here is the final chart.

Photo description: 25×28 grid with purple and white owl graphic.

And here is one side of the bag.

Photo description: Mosaic crochet bag on its side showing an elongated owl pattern with pink and purple stripes on the side.

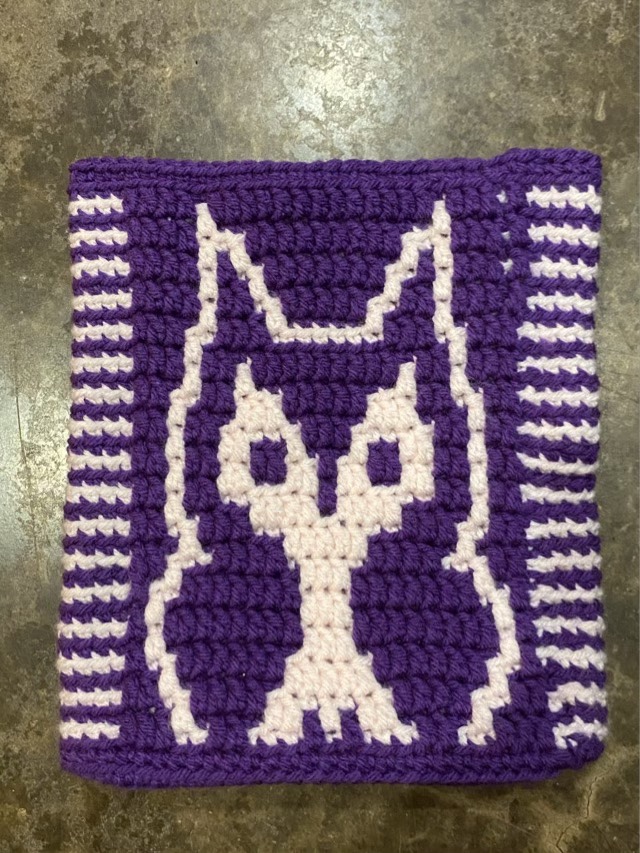
It is still recognizable as an owl, but does have a different look since the mosaic crochet does not produce perfectly square color blocks, at least at my current level of understanding. This phenomenon occurs in charted knitting too. I found the reverse side of the crochet intriguing, as it was almost a negative of the front.

Photo description: Inside out bag with the light pink predominant rather than the purple, and the color blocks are split by row.

Since I worked in the round, I didn’t cut my ends, but took them up to the next row as I circled. This way I had less yarn ends to weave in (yay!)

Santa hat sparkle

To be festive, I added a string of colored led lights to a sequined Santa hat. The cool part? The lights show through the white faux fur brim. The battery pack fit inside the brim in the back, and I wrapped the lights loosely around, then used white thread to make a basting stitch around the brim to hold everything in. The long stitches will be easy to undo, should I need to remove the lights, and I left a gap just large enough to slide the battery pack out.

Photo description: Santa hat showing a gap in the basting stitch between the hat and brim, with the corner of the battery pack visible.
Photo description: Red and white Santa hat with silver sequins on the brim, and colored lights showing through the faux fur, next to a spool of white thread and a needle.

Holiday sweater

My youngest had a home-made holiday sweater contest at school. She drew up her design, and I sewed it into a red long sleeved shirt using felt and embroidery floss.

Photo description: Original art by my youngest with a snowman and multi-colored snowflakes.
Photo description: Snowman art rendered in felt and embroidery.

I also harvested a small led switch from a holiday decoration and sewed it in behind the snowman’s face, so there would be flashing lights.

She won.

Scrap hats

I have worked my way through the entire bag of acrylic scrap yarn. Here is the lineup of hats I was able to put together with the multitude of colors.

Photo description: Six crocheted hats overlapped in an arc with variations of stripes, some with scalloped edges, some without.

This was actually a good color experiment. I combined colors I never would have picked originally, and I think they turned out well. Looking around a pile of yarn and deciding which colors to put together and in which amounts is a good brain exercise as well. Plus it is an excellent stash buster.