This is not the first time I have found this Roomba “out of charge” next to the trash can. Like it knows where it gets its bin emptied. (I admit I don’t empty it every day and it can get full up.) The remarkable thing is that it also broke through an invisible wall to get here. This is not its regular cleaning area.
Missy the dog is also confused by the developing AI.
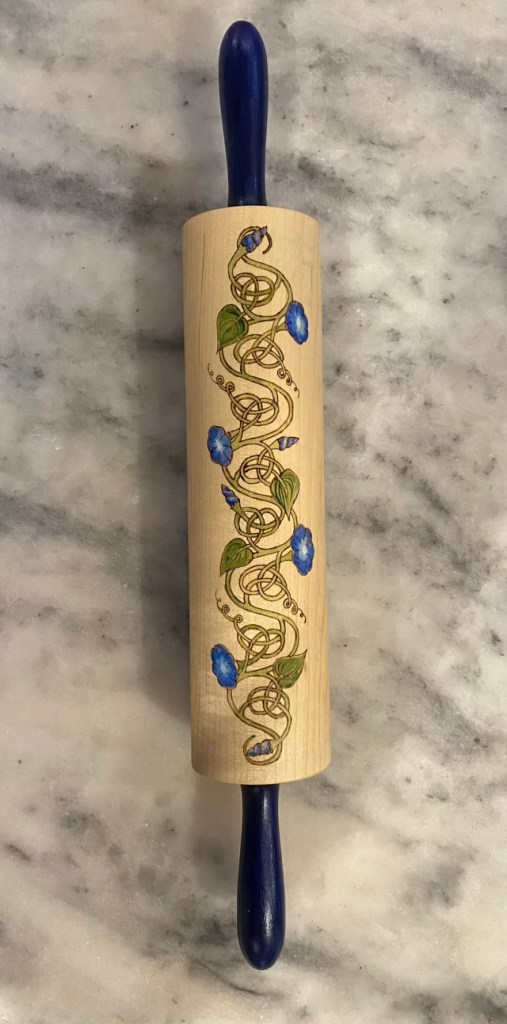
I have a new rolling pin! After several coats of tung oil, my rolling pin is done. I will probably wait about a week to use it to make sure the tung oil is solid, but I’m very excited to get back to making sourdough discard crackers, and maybe some pie crusts.
Finished repaired rolling pin
I hope you enjoyed this series. I did draw it out quite a bit, but decided to run it sequentially, which I don’t normally do, so the thread is easier to follow for those that stumble across it later.
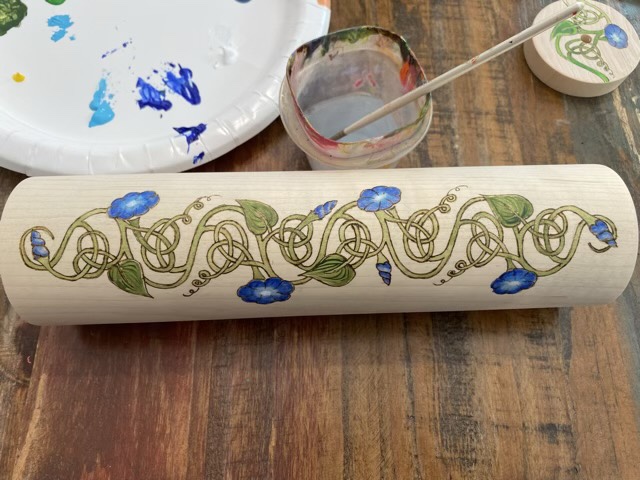
I love, love my wood burned Celtic knot morning glories on my rolling pin, but I feel it could use some color. With the lines solidly established, I felt confident adding some diluted acrylic paint to make the design pop.
Adding acrylic paint to the wood burned design
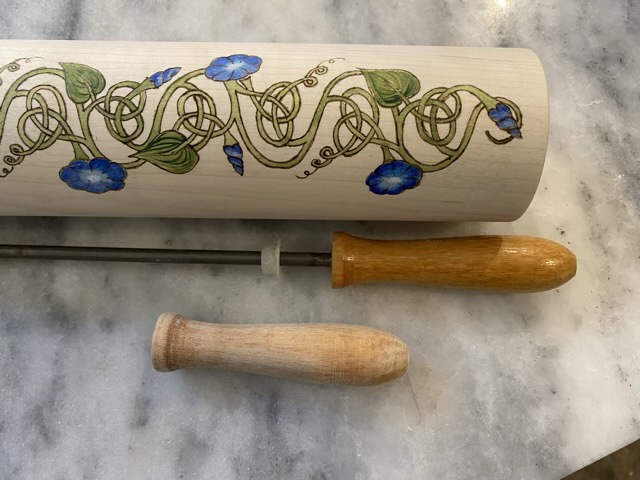
I know from experience that acrylic paint does well under coats of tung oil, so I am not in fear of losing this design to mineral spirits. But I have a new problem. The old rolling pin handles are a different wood and thus a different shade than the new rolling pin center. Not pleasingly, either. Paint to the rescue. I sanded down the old finish on the handles to prep for paint.
One handle in the original color, one sanded down before painting.
I used the darkest blue acrylic paint that I used in the design to paint the handles. Next step, finishing!
I was gifted a professional wood burner setup last December, and it has been waiting for me to clean up my craft space and find a project to burn. The wait has ended. I liked the pencil drawing on my wooden rolling pin so much I thought wood burning would be the best next step. I read through my instructions and flipped through a detailed book, then practiced on one of the rolling pin’s cut off ends.
Practicing with my new wood burner
I am in love. The wire writing tip for the wood burner is absolutely fantastic. There is a bit of learning curve with temperature settings and speed of burn, but I am loving the results.
Partially wood burned rolling pin
The writing tip burns the line I want without making deep marks that would transfer to dough. The burn is deep enough, though, to hold up to light sanding to remove stray pencil marks. But not so deep that I can’t use a blade to lightly scrape away mistakes.
Wood burn complete
So exciting! This opens up a whole new world for my wood work.
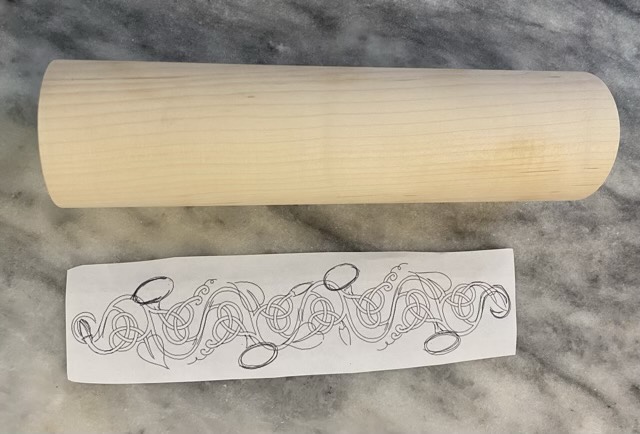
After the disastrous incident with colored pencils (see yesterday’s post), I redrew my Celtic knot morning glories using digital tools (iPad, Adobe Fresco, Apple Pen). Eventually I will make a clean graphic, but for transferring onto my rolling pin, a printed rough sketch works fine.
New design sketch, printed then cut out
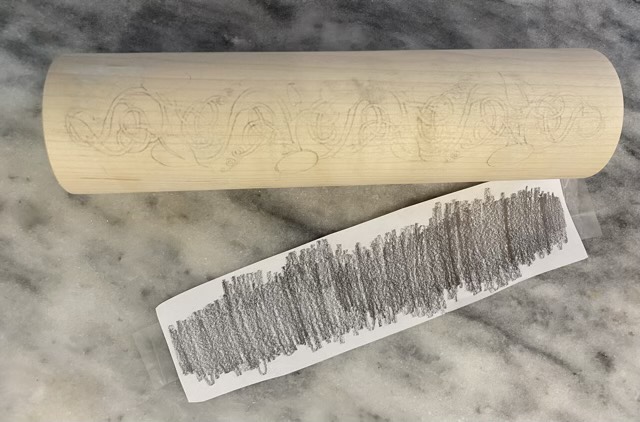
My transfer paper was rather worn out, so I rubbed a #1 pencil across the back of the design to do the transfer.
Pencil lead rubbed on the back of the paper does a fair substitution for tracing paper
The transfer wasn’t as clear as I’d like, so I went back over the design directly with pencil, using my sketch as a guide.
Transfer clarified with direct pencil marks
This design pleases me, and I quite like the look of the pencil lines. Painting directly with acrylic is still quite intimidating. Hm.