Mystery hook

In one of the drawers of the Singer model 66 cabinet, there was a metal wire hook. Very strange.

Photo description: Inside of a wood drawer from a Singer treadle cabinet, with a wire hook attached to the screw for the wood knob.

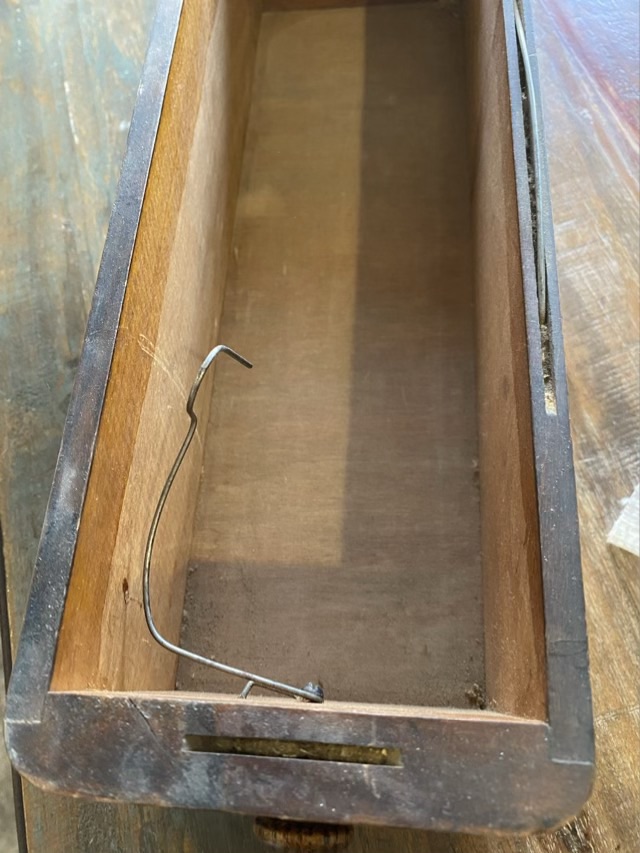
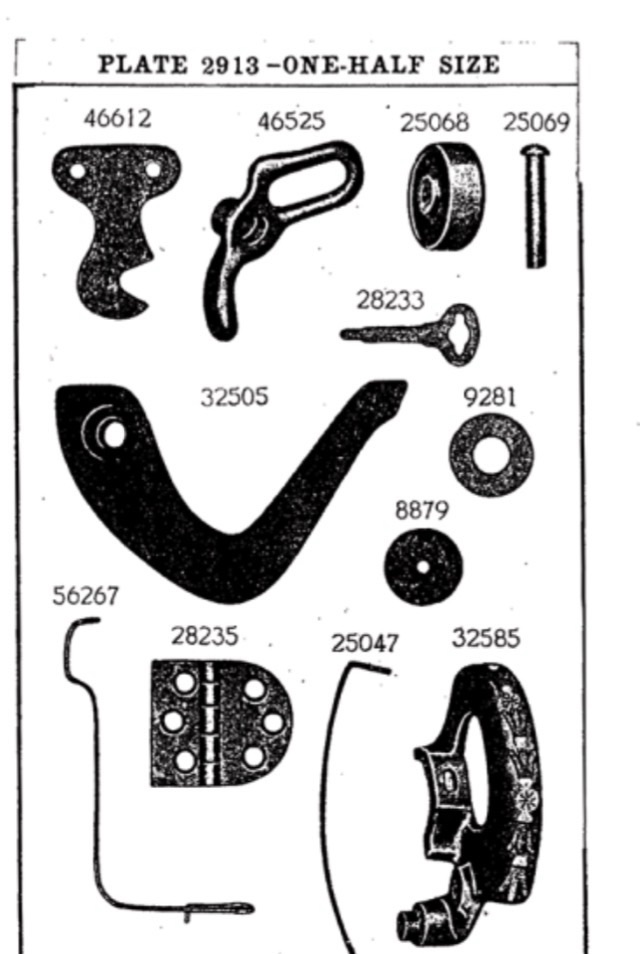
I asked on a couple FaceBook groups what the purpose of this hook was, and had many guesses, but no firm knowledge. I also signed up for the email list for TreadleOn.net, which talks exclusively about people powered sewing machines. It took a few days, but then a couple people chimed in with their informed guesses. From what I can piece together, this was intended to hold bobbins, and was an original Singer part 56267, as pictured in an illustrated plate (shown below) from MillardSewing.com.

Photo description: Illustrated plate of Singer sewing machine parts.

From what we could gather, this part was only produced for a short time. Users found it annoying and often removed it. Many people answered my question with better solutions for bobbin storage.

My hypothesis, as a long time crafter and person who sews, is that the hook was intended for bobbins, but not for storage. It is mentioned in the Singer manuals, frequently and with urgency, that bobbins should not be wound with additional thread. The old thread should be removed before winding on a new color. I have personally seen evidence that the sewing machine users blithely ignored this advice, because ALL (yes, all) of the bobbins from my model 27 and model 66 had multiple colors of thread. I believe the Singer engineers fashioned this hook to make unwinding the bobbin easier. I tested with this in mind, and it works beautifully for that purpose. A single bobbin can be threaded on to the hook, it holds the bobbin securely while letting it spin, and while unwinding the thread, the bobbin does not jump across the room and hide under the dresser, as happens every time I have unwound a bobbin previously. Maybe users found the need to not waste thread more urgent than the smooth operation of the machine. I don’t know. The modern solution is to have a plethora of bobbins, minimizing the need to unwind. I will be keeping the wire as is, and will use it for unwinding. I do appreciate good engineering.

Cleaning

I’m still picking away at the model 27 sewing machine, removing small bits of dried on oil and dirt.

Photo description: Singer Manufacturing Company trademark in bronze, covered with a thick patina of oil
Photo description: Same seal after cleaning with a bamboo stick and sewing machine oil, with only a slight patina left in the crevices. Photo also shows a shiny stitch regulator knob.

My friends and family are probably getting tired of hearing a “scritch, scritch” noise when I’m on the phone. But it helps me focus. I’m not cleaning all the patina off; getting it back on in artful amounts can take years. I did figure out that I can clean the parts that are stuck in place, and continue to soak them in oil until the threads release. A thin strip of nylon netting is great for getting into the screw threads.

Photo description: Top of the machine, one hand is holding a dirty length of nylon netting along the threads of the pressure foot tension knob.

I’m not sure what I am going to do about the gold decals. They are quite delicate and are already flaked off to the silver base, or rubbed off entirely in areas. I do feel I need to remove all the loose paint, because I don’t want it flaking off onto my fabric. Experiments continue.

Sewing machine update

It is hard to be patient. I have read over and over on posted threads and in books to soak old seized machine parts in oil, let it sit, and eventually the part will unscrew. I have been doing that with sewing machine oil and PB Blaster, and each time I sit down with the machine something new comes loose, one or two on a lucky day. Don’t ever wish for patience.

I did discover that the balance wheel I was trying to unscrew was actually friction fit. Huh. Bob Fower has a video on taking apart a 127 Singer sewing machine where he uses a harmonic puller to remove the wheel. I picked one up at an auto store, but I didn’t notice that the kind I grabbed needed screw sockets on the wheel to be removed. Blast. So I jury rigged it by looping heavy duty cable ties to the holes of the puller. It worked. (Cable ties outrank duct tape in my book.)

Photo description: Side view of a model 27 Singer sewing machine with large black cable ties holding a piece of metal with four holes to the balance wheel. A long screw sticks out of the center of the piece of metal.

As I wait for the oil to do its magic. I’ve been picking off layers of ancient (literally) dried oil from the parts I can reach. Bamboo sticks are awesome for this. I did a short on YouTube showing what I’m doing. Pack your patience and enjoy 58 seconds of Vocal Spectrum’s “Go the Distance”. Oh the harmony!

Getting better

Our back door deadbolt started to stick (most likely with how incredibly dry we are this summer). The bolt was rubbing on the top of the strike plate. I’ve dealt with this many times since owning a home, and it usually takes me half an hour of swearing and adjusting and fetching tools I forgot. This time I grabbed my 1/2” chisel, mallet, and the electric screw driver and had the plate off, a few millimeters chiseled out of the wood, and the plate back on in about five minutes. I’ll take it.

Photo description: Strike plate for a deadbolt moved up a fraction of an inch

The fix isn’t gorgeous, but it is functional. The deadbolt now slides smoothly into place.

AI

Roomba parked next to trash can

This is not the first time I have found this Roomba “out of charge” next to the trash can. Like it knows where it gets its bin emptied. (I admit I don’t empty it every day and it can get full up.) The remarkable thing is that it also broke through an invisible wall to get here. This is not its regular cleaning area.

Missy the dog is also confused by the developing AI.