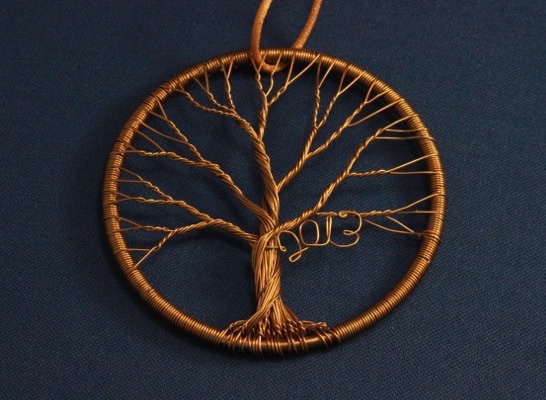
I love trees. I have made many wire trees, and I feel I have a flare for them. In December of 2013 I made an ornament with copper wire and a brass loop with “2013” done in wire along a branch of the tree.
Photo description: copper wire tree in a circle ornament with “2013” on a lower branch
I like this style of tree. Larger versions do well as wall hangings, which, for me, is preferable to sculptures that take up horizontal space. The market for wire trees fluctuates, for while every craft fair and mall had a wire tree booth. So anymore I mostly make these when I want one, rather than to sell.
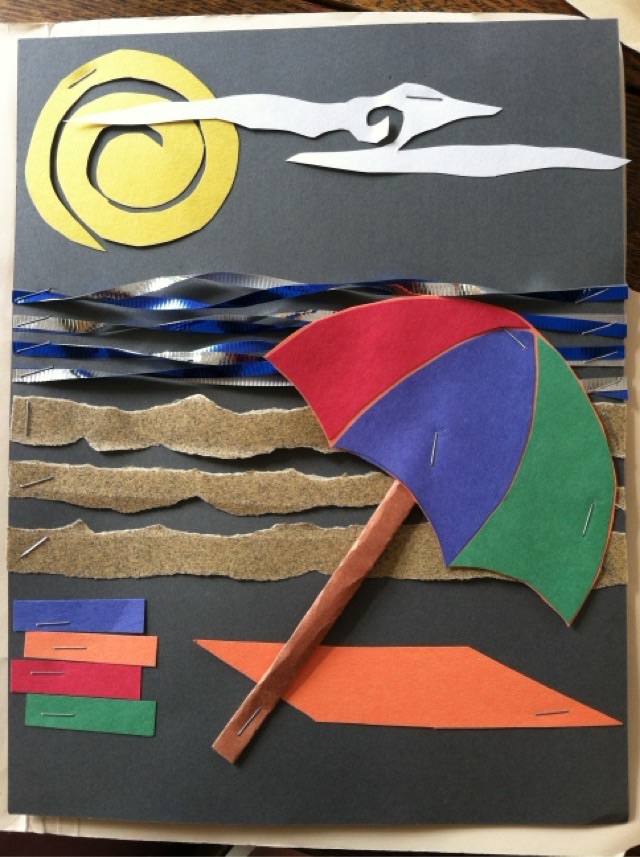
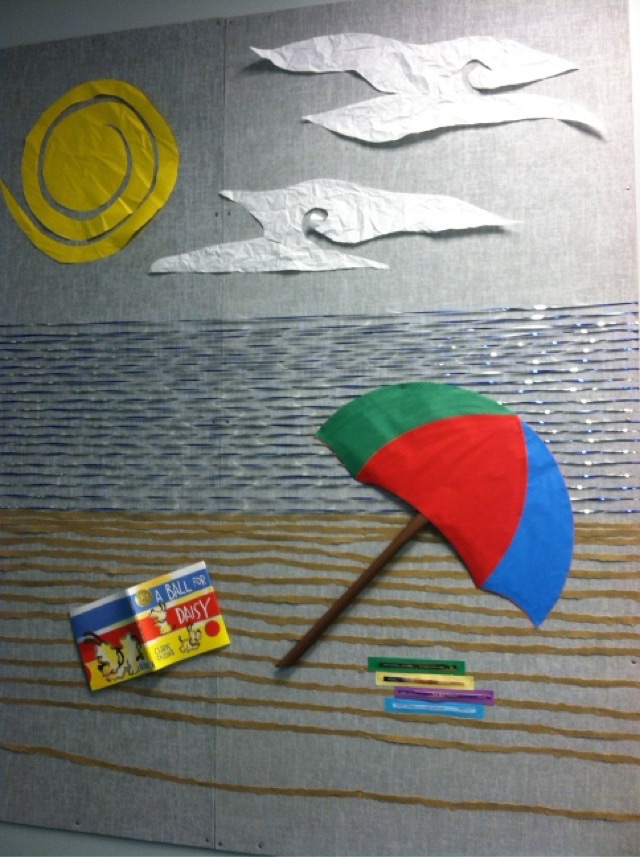
Today we look back at August 2013 and the library bulletin board to welcome kids back to school. I did a concept test on a regular sized sheet of paper, using strips of sand paper for sand, and ribbons for water. The kids love running their hands on the bulletin board, so I thought the sand paper would give them something nice and tactile.
Photo description: beach scene on black paper with paper umbrella, paper book stack, strips of sand paper, twisted ribbons, and paper sun and cloudsPhoto description: full sized bulletin board with a bonus book cover and I added a crumpled texture to the sun and clouds
The fun part of the full board is that there was a vent that blew air across the surface, making the ribbon move and giving motion to the ocean. I did not use backing paper; I was still fire shy after the previous year’s board was deemed a hazard by the fire marshal.
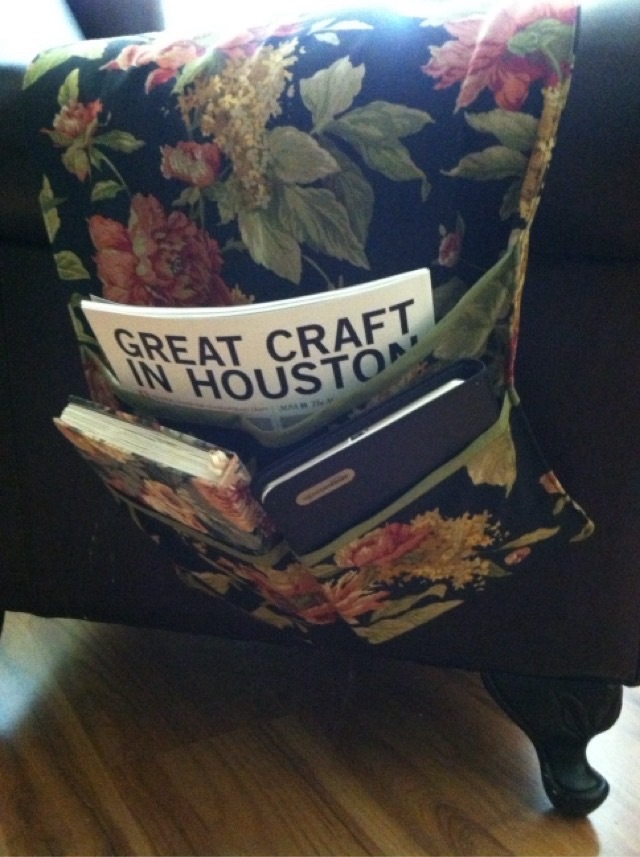
In May of 2013 I made this arm chair organizer that has pockets on the side for magazines and notebooks. I’m not sure why I didn’t sew on something to hold it down on the seat cushion, instead relying on butt power, but I am pleased how nicely I trimmed out the pockets using bias tape.
Photo description: floral fabric with a black background sewn with three overlapping pockets trimmed in green and filled with booksPhoto description: other side of the organizer with different sized pockets to hold different books, electronics, and magazinesPhoto description: over exposed photo of the chair from the front and the organizer stretched across the arms of the chair, no butt anchor
If I were to remake this project, I would add fabric to tuck down on the sides of the cushion, or maybe even go all the way around or under the cushion. Hm. Maybe I didn’t have enough fabric so had to rely on butt power. It would have made more sense to run the center section under the cushion.
In May of 2013 I was into making sculptural wood and wire photo frames.
Photo description: oak wood photo frame with wire tree and Mother of Pearl buttons as leaves
I cut the frame from hardwood, sanded and finished it, then put a peg hole and dowel in the back to function as a stand. I drilled holes for the wires, epoxied them in and shaped them. I added tabs to the back to hold the photos in. Did I take a picture of the back? Not of this one.
Photo description: back of an owl photo frame showing peg stand, metal tabs, and hanging hardware. The eyes of the owl were fused glass with iron oxide pupils that matched the tone of the wood. the back of the eyes can be seen in the photo.
My photo skills took a slip back at this time. Many of the photos for the other frames were blurry, or at a strange angle, and others were taken with photos in them. Some of the photos of photos were decent, but since I don’t post faces on this blog, it made them unsuitable for future use. In my past-self’s defense, I had two young children and I’m frankly lucky to have remembered to take pictures at all.
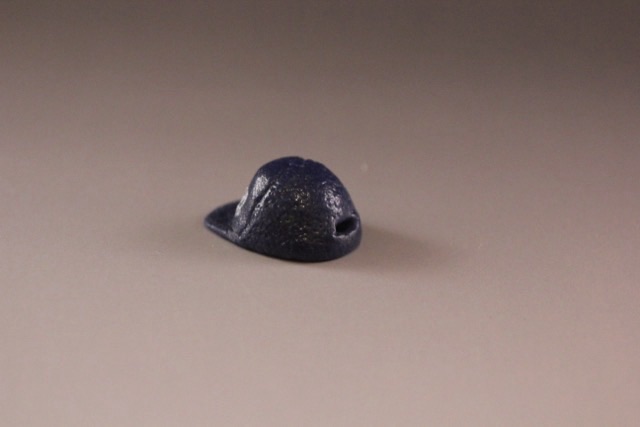
In February 2013 I made a small glass baseball style cap from glass clay and painted it with pearlescent powder before firing it in my kiln. It is a very wee object, measuring at less than an inch in length.
Photo description: small glass hat next to a plastic rulerPhoto description: inside of the hat with my maker’s markPhoto description: back of hat showing some detail work that remained after firing