In February 2013 I made a small glass baseball style cap from glass clay and painted it with pearlescent powder before firing it in my kiln. It is a very wee object, measuring at less than an inch in length.


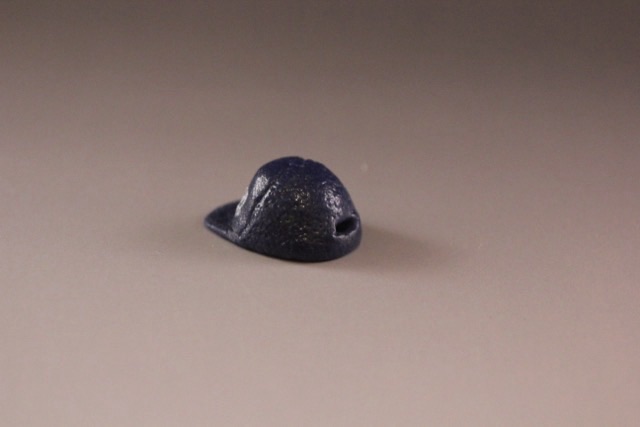

In February 2013 I made a small glass baseball style cap from glass clay and painted it with pearlescent powder before firing it in my kiln. It is a very wee object, measuring at less than an inch in length.
Here is an example of a picture without a thousand words from January 2013. As I was going through my album looking for Throwback posts, this almost didn’t make the cut because I didn’t leave myself enough information.
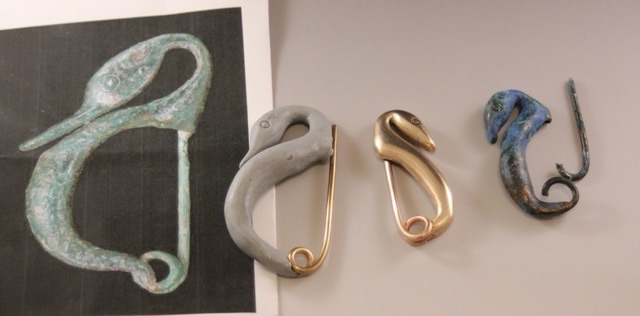
At the time of the photo I was still experimenting with metal clay. My sister is an ancient historian and I suspected this was a project for her, so I pinged her for confirmation. She provided the name “fibulae” and an interesting article about their findings and use.
I can tell from my photo that I had a museum photo as reference, and I made a model with less expensive polymer clay, that looks more swan-like than my reference photo. The middle polished bronze clay fibulae I obviously spent more time on, but I’m not sure if I fired the clay with the wire in place or epoxied it in later (I’m already not using ancient foraging techniques, since I’m working with modern metal clay.) The last fibulae on the right is what raises the most questions. Did I not polish it? It is the same shape and style as the bright bronze, so I’m sure it is my work (my replication skills are not finely honed, especially then.) Did I try to antique it by adding patina, or is this how it came out of the kiln? Did I make this before or after the bright bronze fibulae? I have a feeling that I fired it with the wire in place and either the firing or the antiquing weakened the metal, causing the breakage. Did I do it on purpose? So many questions.
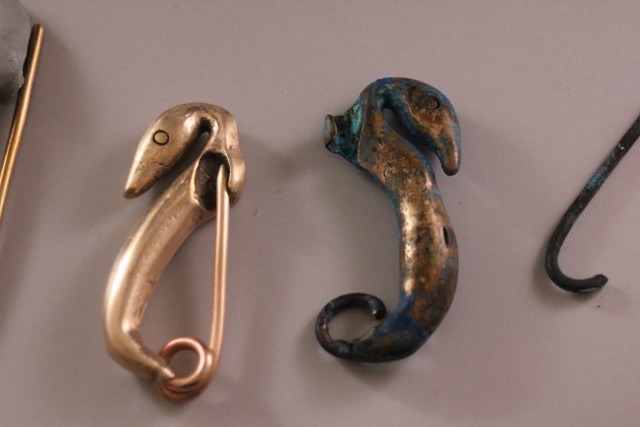
Here is a picture of the back, which answers the question of how the pin fastens.
Back in December of 2012 I was into cutting up wine bottles and heating them up to melting in my kiln. I made an ornament from the base of a green bottle, cut a groove in the side with my wet grinder, and wire wrapped it. Using an engraving tool I wrote the first verse from A Visit from St Nicholas by Clement-Clark Moore in a spiral out in tiny lettering.

As I scroll my photo history, I don’t take every craft project for a throwback post. When I look at a photo, if there aren’t enough words in my head, it doesn’t get picked. There are some projects where I don’t remember what materials I used, or don’t have any in process photos to remind me how I constructed it. So I keep scrolling. Since I’m still picking projects from 13 years ago, I figure I have some leeway.
In August 2012 I helped finish a crocheted rope project. Unfortunately I didn’t write down details. I remember that the woman who commissioned me to do the work received the started pieces from a loved family member that passed before finishing the necklaces. She wanted something that she could wear, not just sit in a box. The original intent of the work was to make a long rope with looped beaded tassels on the end. That didn’t suit my client, so we decided they should sit near the collarbone with a magnetic clasp. The original maker had threaded the beads, made the first tassel, and started the crochet with a size 13 steel needle. There was one pink seed bead project and one with white seed beads.
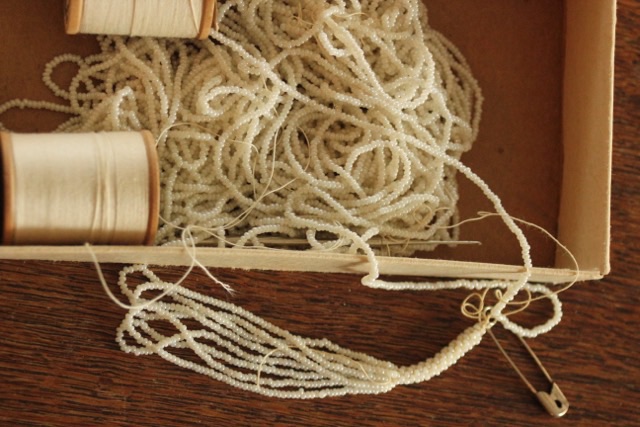
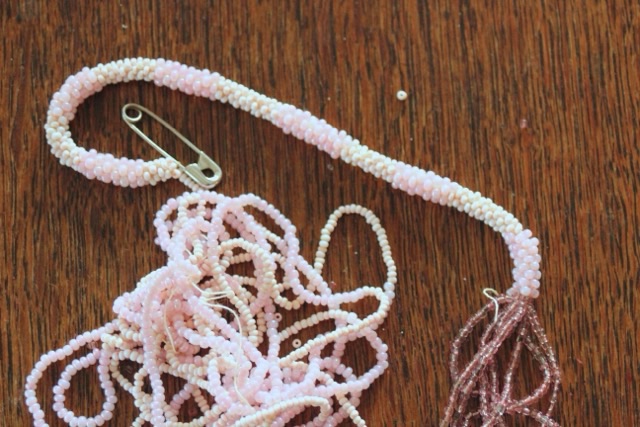

I removed the tassels and finished the crochet to the desired length, then ran a piece of 49 strand beading wire through the tube. I attached the magnetic clasp to the wire so that no pressure was applied to the bead work.

I love the feel of crocheted seed beads ropes, but it is small detailed work that is not fast. The client was pleased and I enjoyed helping a project reach completion.
This was before I learned about the Loose Ends project that matches unfinished projects with volunteer finishers.
Back in June of 2012 I was still making jewelry to enter into the Fire Mountain Gem contest. I was just starting to put my head toward marketing and using purchased elements rather than components made from scratch. The contest really is to motivate buyers to purchase from the company, so the designs that win need to have a wow factor and inspire makers to buy. Custom sculpted elements aren’t usually in the standard beaders repertoire.
I fell short of the mark on this design. I love it, but it did not make the short list in the contest. I used a purchased wire knit chain and braided it, used purchased ribbon ends and clasp, and built a daisy pin using plated button and pin findings, crystal petals, crystal beads, and seed beads.

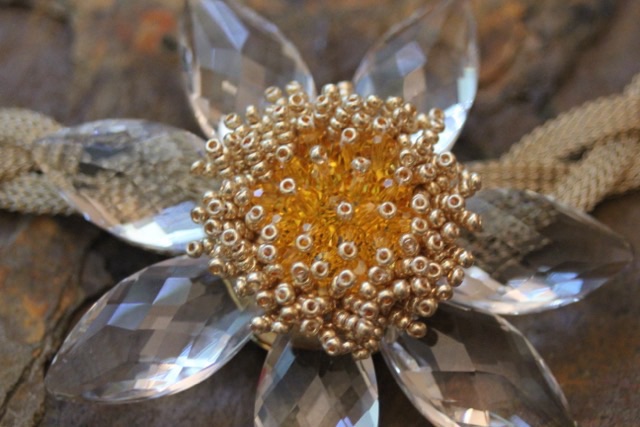

I certainly had a long list of purchased elements, but maybe my color scheme didn’t fit what the judges were looking for, or I used difficult to decipher techniques. Hard to tell. I was getting better taking project photos, though.
