DIY bathtub drying rack

I needed a flat space to dry wet items, so I made this drying rack that sits on top of the bathtub. When I’m not using it, it can be disassembled and stored!

Bathtub drying rack

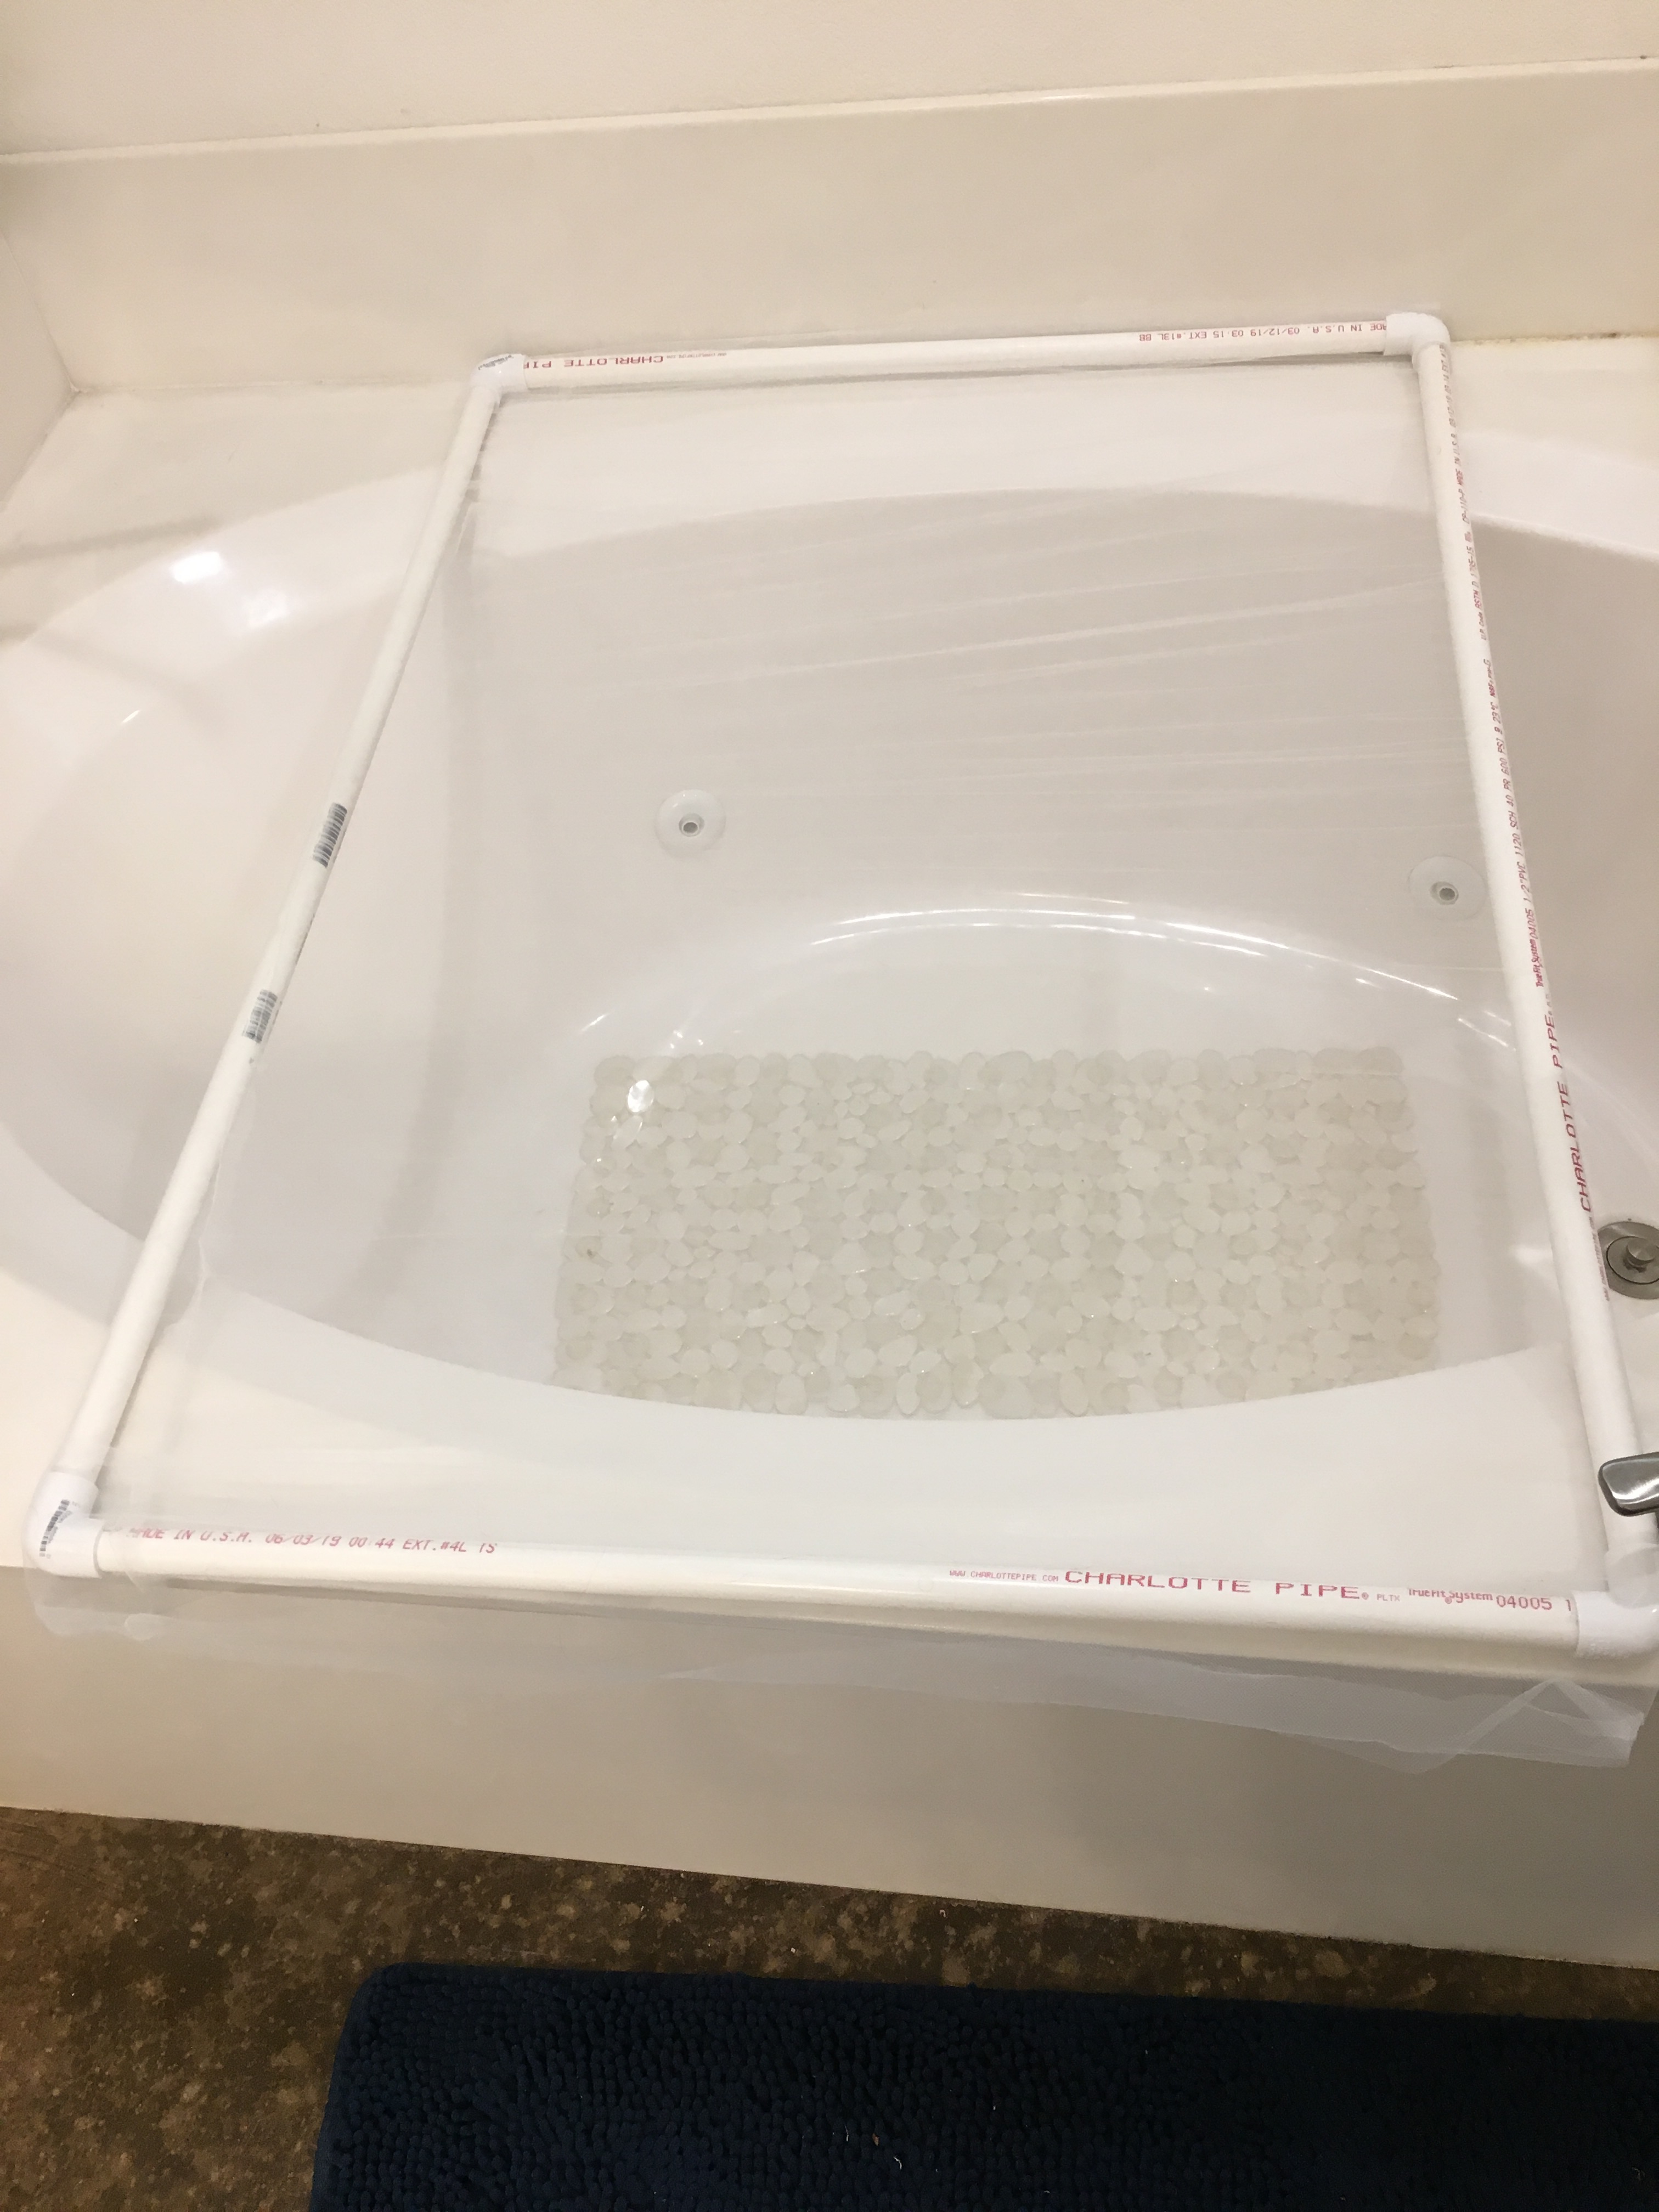
I purchased 1/2 inch PVC pipe and four 90 degree elbows (always make sure all your elbows fit your tubing before purchasing!) I measured the clear area on the tub and cut lengths of pipe to fit. My area was 41×30, and my PVC elbows were 1.5 inches, so I cut two pipes at 38 inches (41-3), and two at 27 inches (30-3). I used a compound miter saw, but PVC cuts easily with hand saws as well. I assembled the frame with the PVC elbows. I did NOT use glue.

I had some nylon mesh in my fabric stash, and sewed a long, wide tube out of the fabric as wide as the PVC frame, then slipped the tube over the frame. If you have a mesh laundry bag, you could make the frame to fit the laundry bag for a similar effect.

Drying rack with shirt

Mind the gap

at the top of the bottles before you freeze them.

Water in jugs and bottles with a good air gap

Two of my water jugs developed leaks because the expansion of the ice popped the seams on the bottom. I learned the hard way to leave a sufficient air gap when filling them with water so the ice has room to expand. So I am now doing an experiment with different plastic drinking bottles to see which ones hold up to freezing. (It just happened that I am out of water jugs, and I had a variety of plastic bottles in the car. This is not really a planned experiment, but we will make the most of what we have.)

I like freezing the gallon jugs because the ice lasts a long time, even in the Texas heat. The smaller drinking bottles won’t be frozen as long, but they will last longer than regular sized ice cubes.

Another use of the red Solo cup

Red Solo cup chick grit holder

It is not sophisticated, but it works. I cut off the bottom two inches or so of a red Solo cup, punched two holes with a paper punch, and used poly twine to tie it to the leg of the work bench. It works.

When I find the right fancy bottle (ok, when I empty the right fancy bottle), I’ll try making a grit dispenser like Lisa’s, but until then, this works.

Alumnium recycles

I switched to buying sparkling water in aluminum cans. As much fun as it is to make plastic string from bottles, I now have more string than I know what to do with (I have ideas, but not the time yet!) But aluminum is one of the few recyclables that actually make money (it is easier to melt recycled aluminum than it is to mine and process bauxite and recycling reduces the need to strip mine for bauxite). We don’t have recycling where we live, so the choice of containers makes a big impact on the amount of trash we produce.

I have some ideas on things to make with aluminum cans, but again, the time to process and make has been thin (chickens). I took a large bag to the middle school science teacher for a high/low pressure experiment (and the school has recycling, yay!), but it didn’t take long to build up another big bag. I called around and the local scrap yard takes aluminum! And pays for it. What? Not much, but still, it made me rethink my bag of uncrushed cans. A 33 gallon bag full of empty cans weighs about 7 pounds. Crushed we can at least double that, and reduce the amount of space taken up in the house while the cans are waiting for recycling.

So I looked up DIY can crusher and the first hit was a good one. I gathered some 2×4 scrap, a spare gate hinge, and two pint canning jar lids. All from around the house.

Materials for a can crusher

Then my kids and I made it a project. We set the hinge on the ends of the 2x4s, and used 1 inch screws to set the jar lids as guides between the 2x4s. They each took turns using the drill to set screws, then they took turns putting in cans and stepping down to crush the cans.

Canning jar lid on each 2×4 makes a good guide for holding the cans

We started off with the screws that came with the hinge, and after a few cans, changed to 1 inch screws, then to 2.5 inch screws. I think in the original video the guy used lag screws, which would be even better (but I was out of those). The jar lids took a beating, but still worked well!

Styrofoam cooler

My young chickens are panting. The “feels like” temperature has been regularly reaching the 100s in the afternoon here. Their coop today was 88 (which is at least cooler than the 94 actual temperature outside the coop). There is a fan in the coop (which I regularly dust to remove buildup). I put out ice water foot baths (which my chickens love). I give them watermelon straight from the fridge.

My Mom mentioned a DIY project using a fan and a styrofoam cooler to make an air conditioner. I did it. I had a styrofoam cooler from a medicine delivery, used an extra accessory for our shopvac as the air outport, and bought an inexpensive clip-on corded fan for the air intake.

Styrofoam cooler DIY air conditioner

I cut holes in the cooler to fit the tube and fan (here is a decent youtube tutorial), and put ice packs (also from the medicine delivery) in the cooler.

Ice packs in the cooler

I could definitely feel the cool air when I turned on the fan! I started with the cooler in the enclosed section of the work table in the coop, so the chickens couldn’t pick at the styrofoam, but felt like the cool didn’t reach the chickens. So I put the the cooler in a plastic storage bin (it fit! Phew!), which has a fold down, two-part lid.

Plastic bin for chicken protection

Sliding the plastic bin under the work table keeps the chickens out, and off, but allows the cool air to blow near ground/chicken level.

Cooler plastic bin tucked under the work table

The chickens were all lined up in front of the cooler, so I think they appreciated the relief. It certainly didn’t lower the temperature of the whole coop, but just made an area of slightly cooler air.