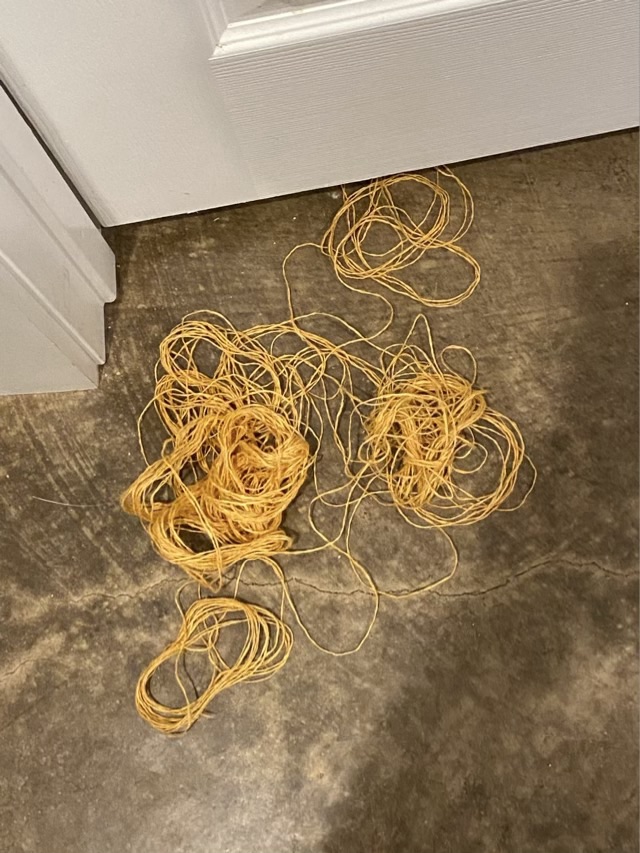
Well, I thought Thor the cat was mostly interested in wool, but I found this former ball of linen yarn out of its bag and in another room from where I left it.
Photo description: loose tangle of orange colored hand spun linen yarn on the concrete floor in front of a closed door
Here is the culprit, looking pleased with himself on Griffin the dog’s bed.
Photo description: large gray tabby cat in a larger brown faux fur pet bed
I don’t believe he ingested any yarn, and I was able to wind the tangle back into a neat ball without any knots. The yarn ball is back in the project bag, and hung up where the cat can’t stick his head into it. Yeah, I love yarn and I love cats and cats love yarn. It is a timeless love triangle.
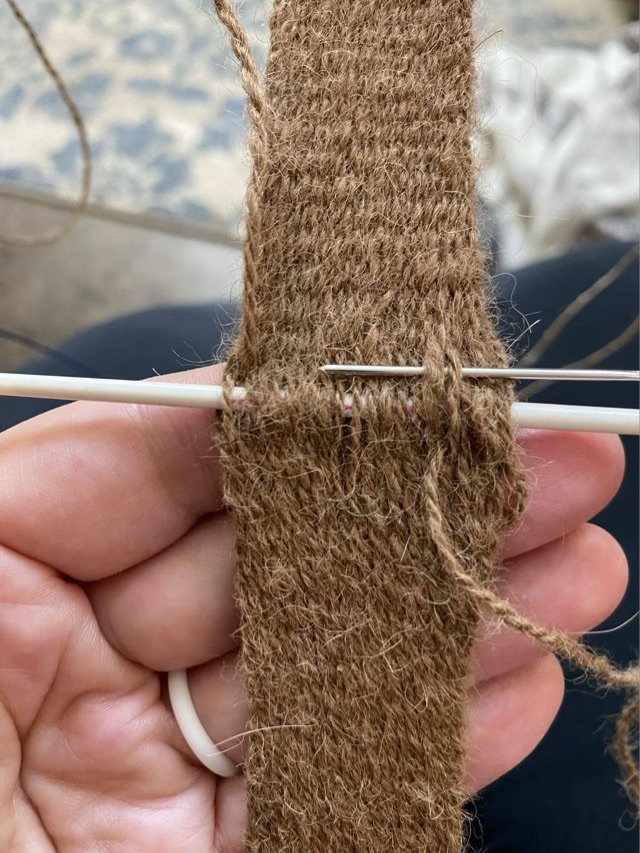
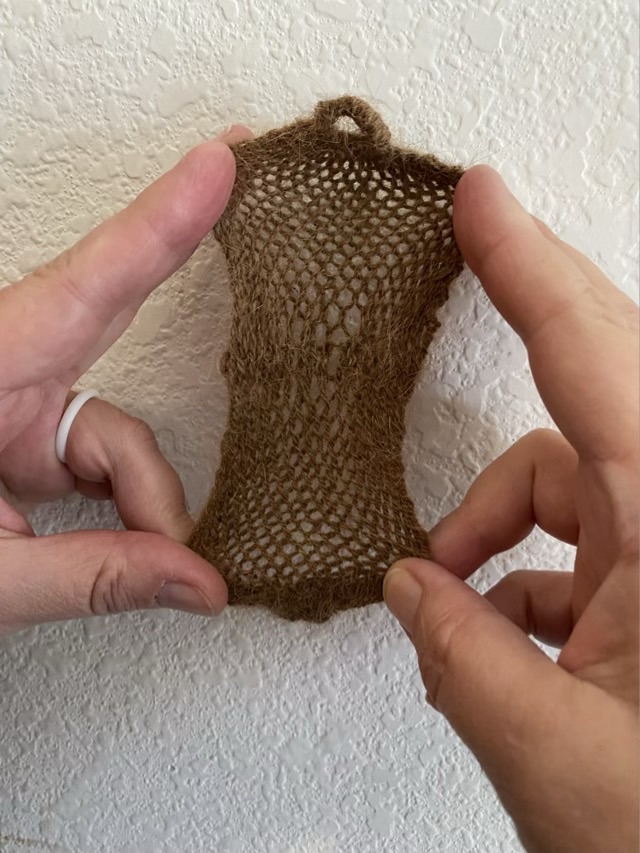
I used my small sprang loom to make a swatch with hand spun camel yarn.
Photo description: bent branch Sprang loom with interlinked 2 ply camel yarn nearly completed
To finish the middle, I tried a method I saw in a Sprang group that uses an Kitchner-like stitch to secure the warp threads. In knitting, the Kitchner stitch is a grafting method that takes the yarn in a winding path under and over two alternating strands at a time.
Photo description: binding off the Sprang by stitching
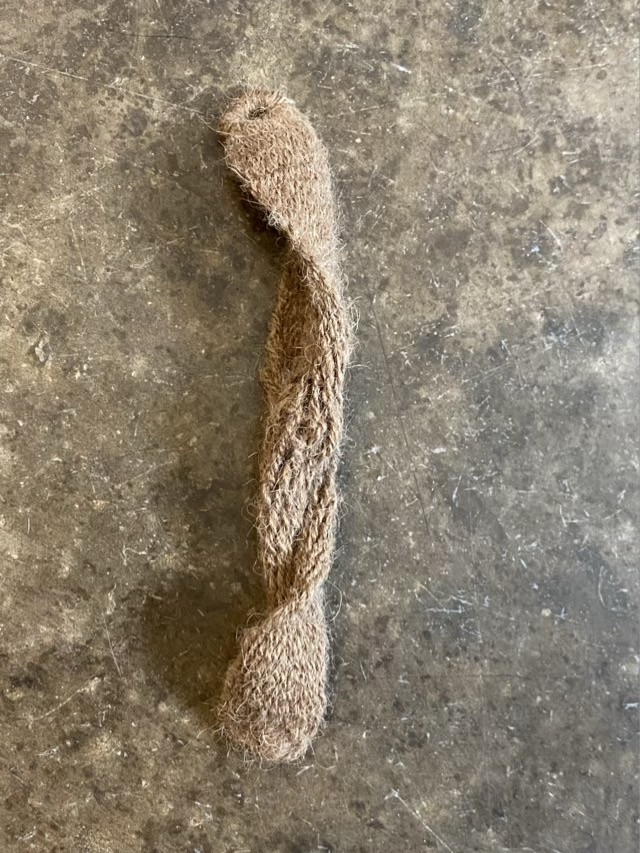
I finished the ends by pulling a section of yarn through the loops, doubling it, then wrapping the resulting circle with more yarn, forming a grommet.
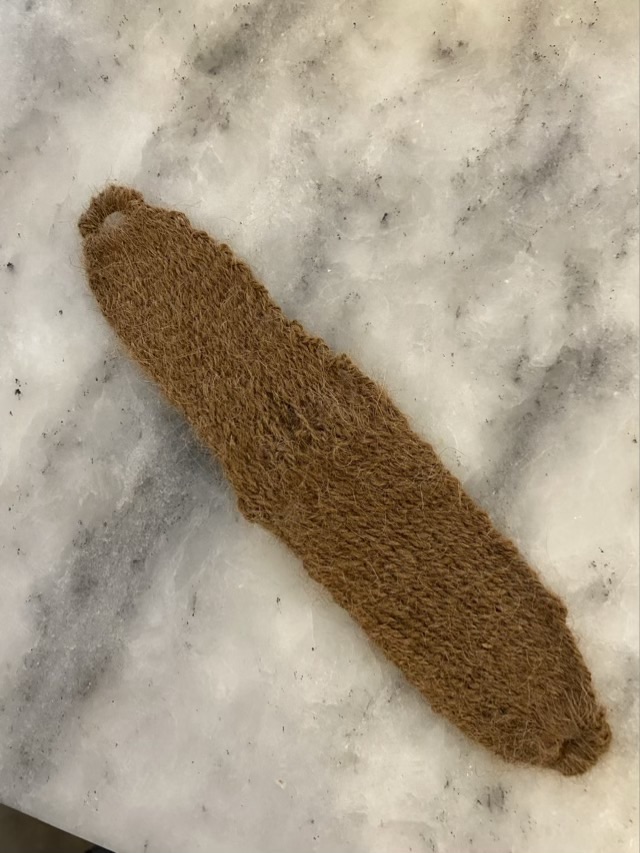
Photo description: the end of the sprang swatch formed into a yarn grommetPhoto description: fresh off the loom unblocked Sprang swatch showing the tendency to twistPhoto description: same Sprang swatch laying flat after blocking (getting it wet and pinning it to a drying rack)Photo description: Sprang swatch pulled horizontally open to show the interlinked warp strands
I quite like the grommet finish for the ends, I’m sure I’ll think of a use for the structure eventually. I don’t care for how messy the center stitches look when the fabric is stretched. I like the chain method less, though. Experiments will continue.
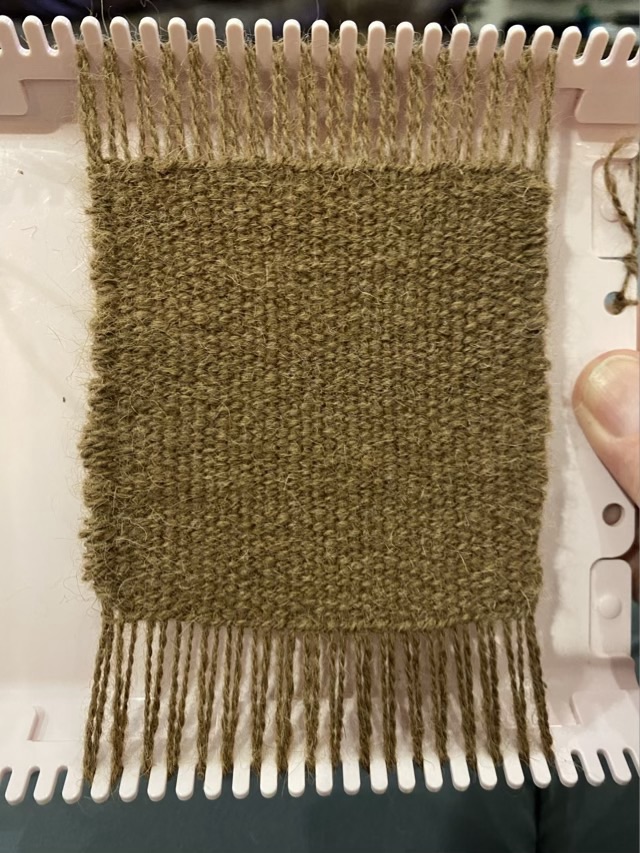
I used my Clover mini loom to weave a swatch of my two ply hand spun camel yarn. I like to double the warp and I chose a plain weave this time. I start and end my weaving with a twined row to help keep the ends in place.
Photo description: 2 ply camel yarn warped onto a Clover mini loom
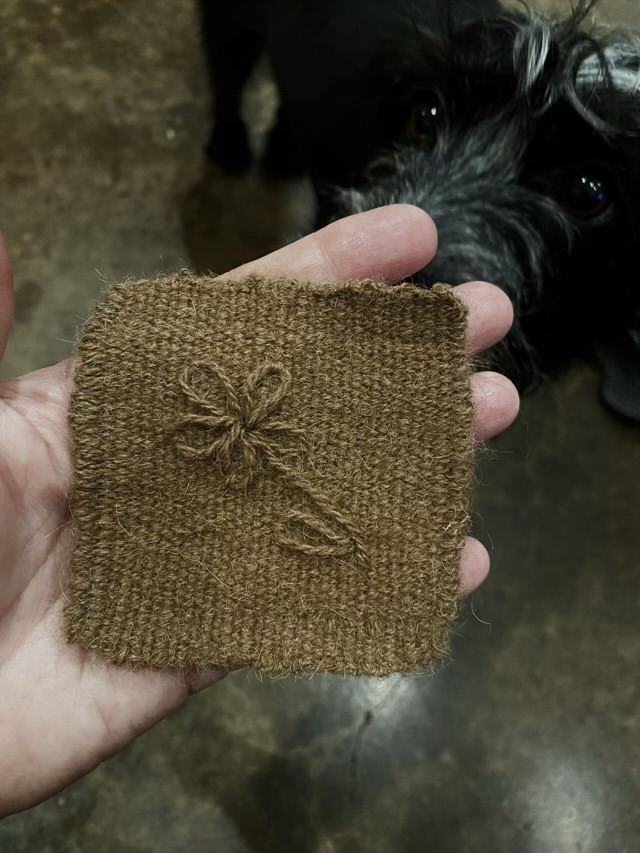
To finish, I used an embroidery needle to run the looped warp ends back through the weft on the back. I rather like the ribbed edge created by doing so. I added an embroidered daisy with a stem and leaf because the front looked rather plain. The daisy and leaf are done with a lazy daisy stitch, and the stem is a stem stitch, which amuses me.
Photo description: back of the small woven swatch showing the woven in loops and the back of the embroidery Photo description: front of the small weaving swatch done in hand spun camel yarn with five petal daisy, stem, and leaf, Missy the dog looking on in the background
It is interesting that the color of the yarn looks different in each picture. In real life, the color is a soft brown quite like milk chocolate. I did try to color adjust the final picture. I suspect the radical difference in backgrounds is the primary suspect for the color shift.
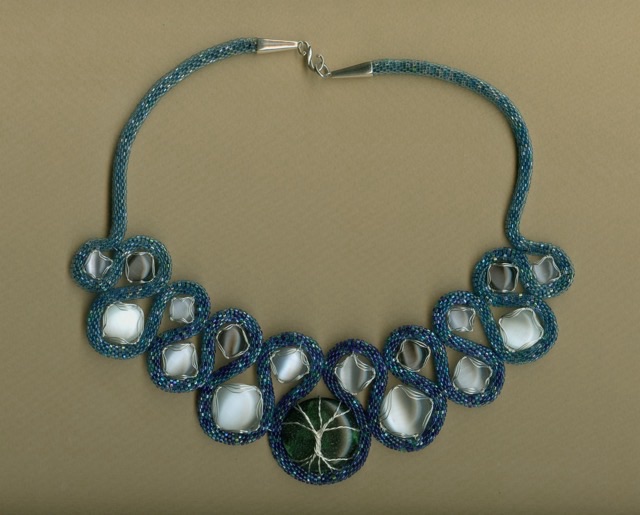
In May of 2008 I took a picture of a finished necklace for which I really should have tracked my hours. The main element is a beaded crochet tube that winds around wire wrapped cats-eye cabochons. I would work on the tube while my eldest was in preschool or napping, and I believe I could obtain an inch an hour at my fastest. It is very tiny work done with a very small crochet hook using silk thread and Delica seed beads, which are high quality and more uniform and also very small.
Photo description: Statement necklace with variegated blue beaded crochet rope wound around 17 glass cats-eye cabochons wire wrapped with the center cabochon featuring a wire tree
I still marvel at the amount of work that went into to that beaded rope. I strung the beads on the silk thread, then crocheted the rope, waxing the thread as I went. The finished strand feels very nice, has a nice weight and a pleasant feel, but it is truly a work of passion.
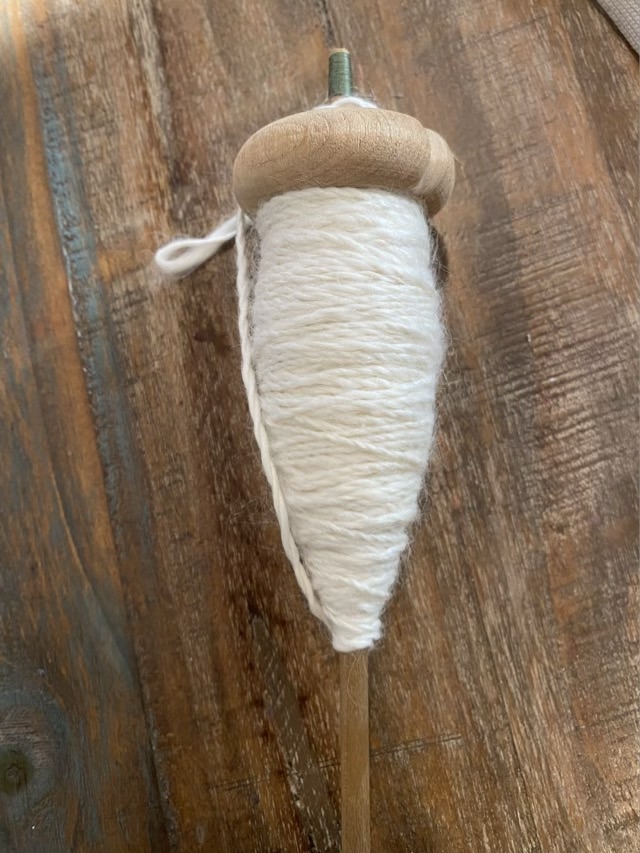
I have finished spinning and plying my banana fiber sample from Hearthside Fibers. I’m still using the drop spindle with the lost hook because I haven’t had the spindle and a new hook in the same room yet. The yarn came out less even than usual because I was trying to spin thicker and push myself out of my comfort zone. It should give some interesting texture once it is worked up, though. The texture of the yarn is cottony, even though it is a long stapled plant fiber (cotton has a short staple, or fiber length).
Photo description: banana fiber (made from banana leaves) two ply yarn on a well used drop spindle