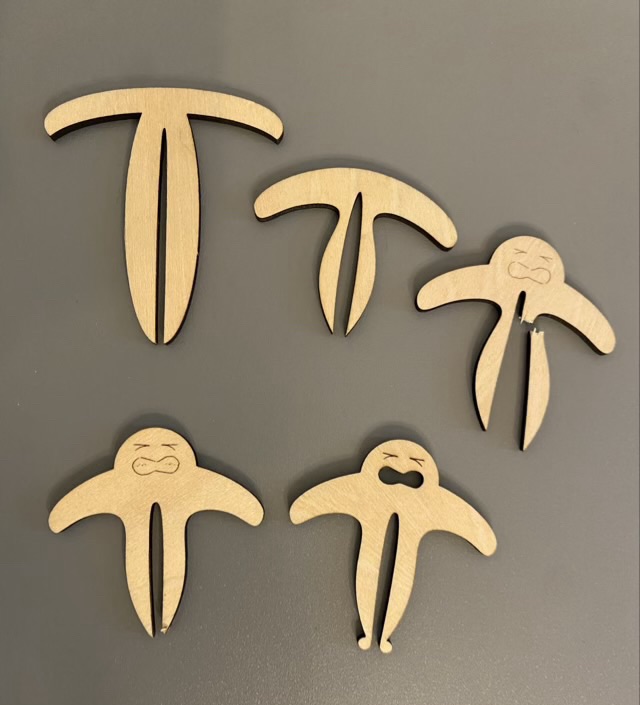
I saw a hint about making clips to hold down material in the laser cutter. The tip was for a different brand than I have, with a different grid, but I thought I could design my own clip.
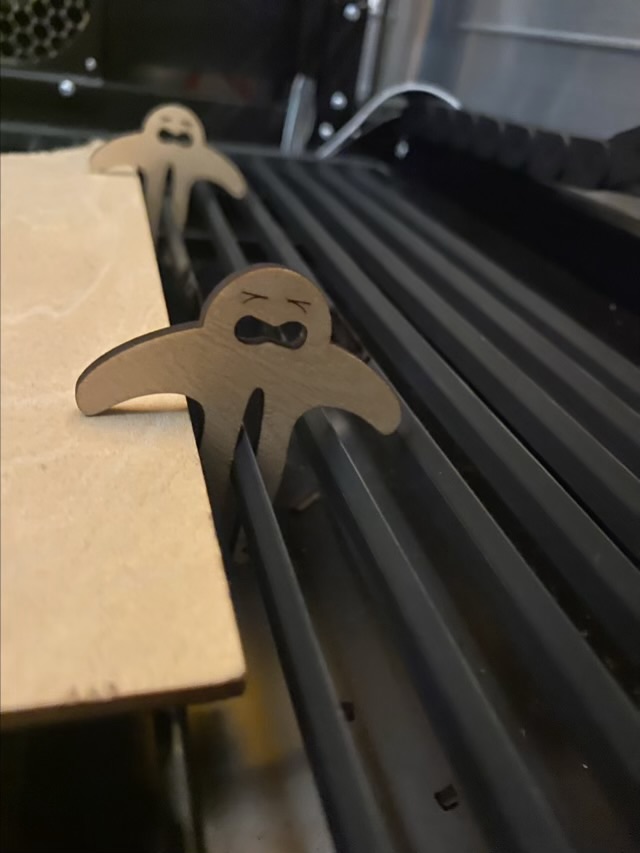
Photo description: clip design evolution: top left was too narrow to fit my tray, top middle needed a tab to make placing easier, top right got a face because the tab looked like a head, bottom left the tines were delicate, bottom right is a functional and personified clipPhoto description: laser cut plywood clip person in use
I find the little straining strongman amusing, but it does stick up above the material, so has to be placed away from the path of the laser. I may design something more streamlined later, but the current version is functional so it might be awhile before need demands a redesign.
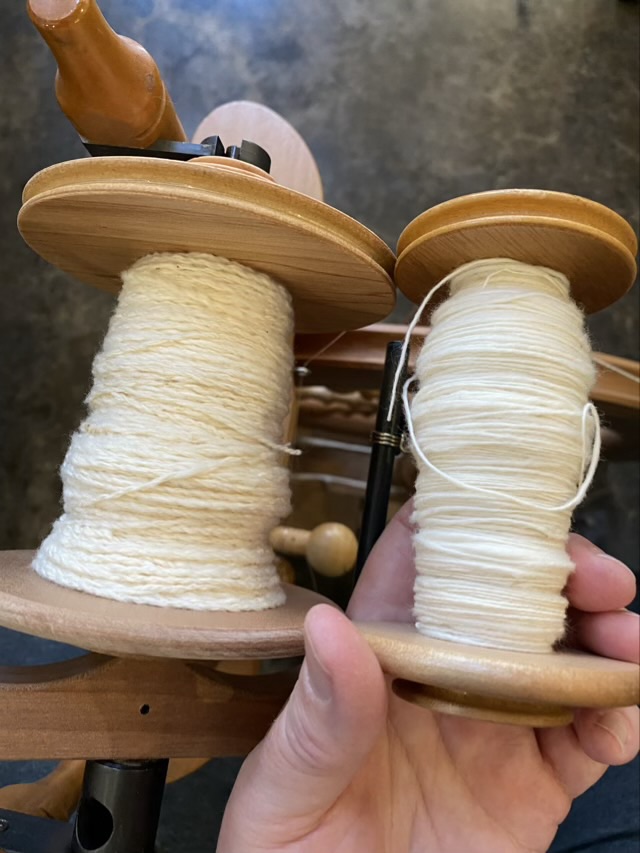
I found out about crepe yarn, which is a three ply yarn with a different construction. A single is spun in the S direction, then two plied in the Z direction. Then another single is spun with a Z twist, the plied with the two ply in an S direction. The resulting yarn has an interesting texture. I decided to try this method with the natural cotton I am spinning on the Ashford Traveller wheel.
Photo description: two bobbins full of spun cotton, the top is a Z twist two ply, then bottom a Z twist singlePhoto description: three ply crepe yarn on a jumbo bobbin on the left, and leftover Z twist single on a regular bobbin on the right
I grossly misjudged the amount of Z twist single and ended up with way more than I needed to ply the three ply. Sigh.
It will be interesting to see how the yarn knits up. It does have more texture than a standard three ply, but because my cotton was spun from raw bolls that had not been carded, the yarn already had a variations in the spin.
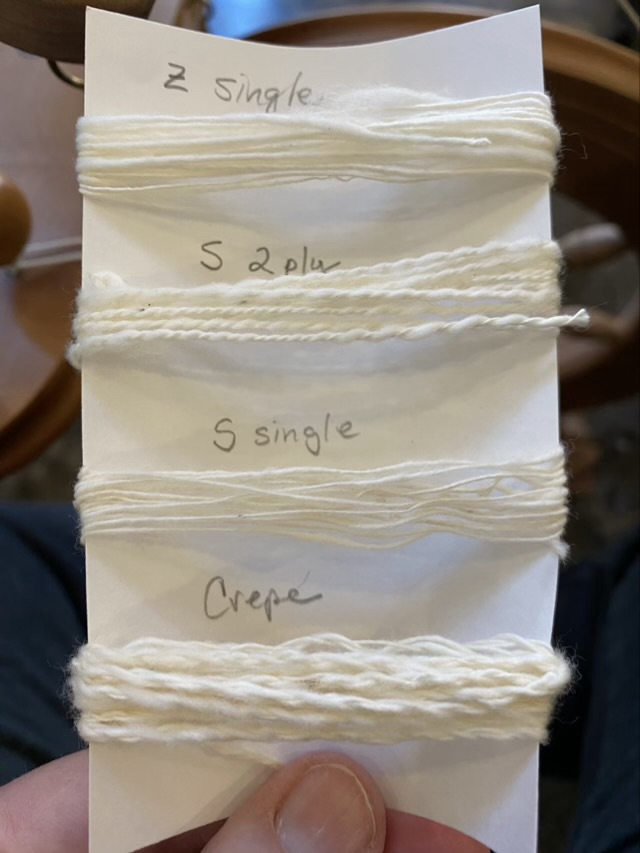
Photo description: four hand-spun cotton yarn samples, from the top down: Z twist single, S twist 2-ply, S twist single, crepe three ply
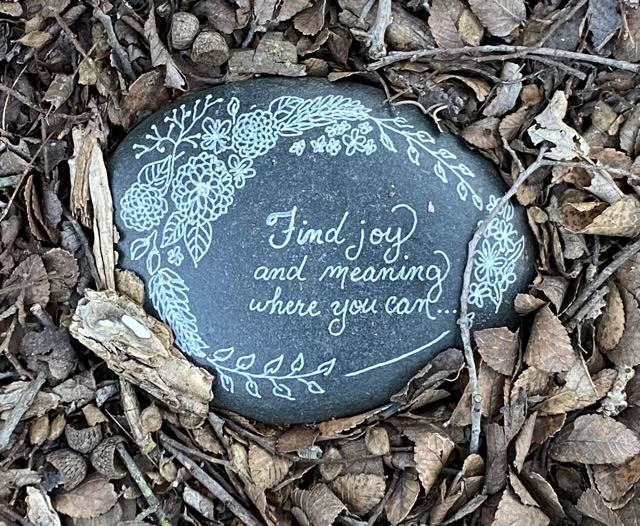
In August 2023 I painted several rocks using a line painting tool, then finished them with a clear UV spray coat. One of the rocks I put out in the garden with a collection of other painted rocks. A year and a half later, this is the only rock that looks as good as new. The others’ designs cracked and flaked off since they had layers of paint, sometimes quite thick.
Photo description: dark rock painted with thin white lines with floral designs and the words “Find joy and meaning where you can.”
My takeaway for this is that if you make or find a rock completely covered in paint, keep it inside. If you want to be super clever and hide your rock in a place it might take someone years to find, apply the paint sparingly. I think some of my planted painted rocks may have returned to their natural color waiting to be found. Those freeze thaw cycles and UV rays are hard on paint.
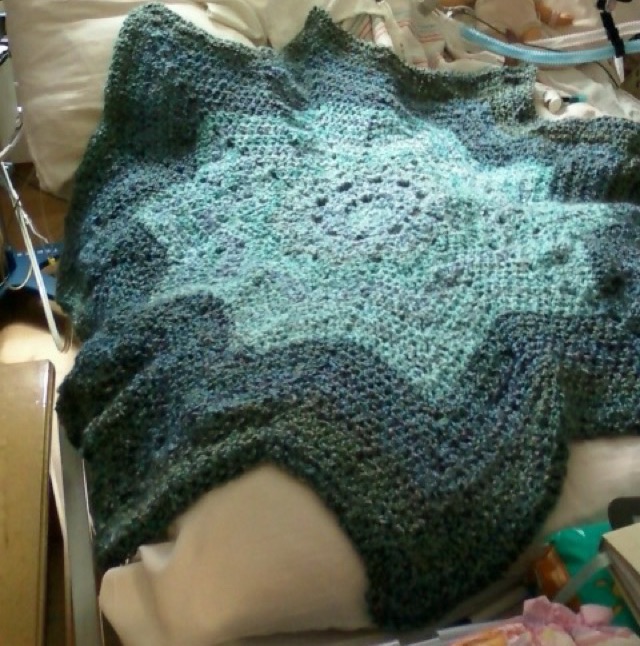
In 2012 my youngest was hospitalized for a total of 33 days with pneumonia and complications. I was a wreck. To maintain sanity I asked my family for yarn and sat in the PICU crocheting. I learned how to make star blankets and made two (I don’t have pictures of the first).
Photo description: green eight pointed crocheted star blankets and laying on a hospital bed
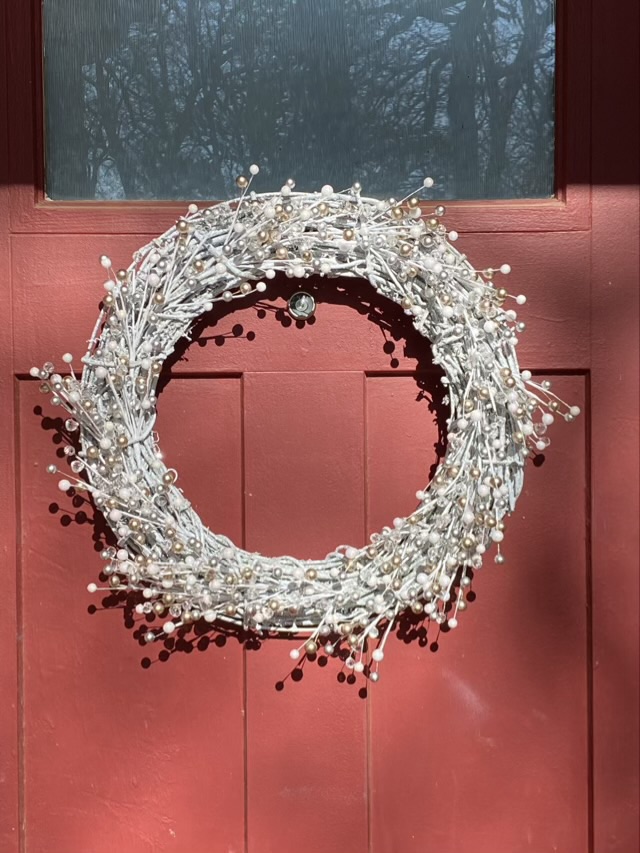
I wanted a winter wreath on my front door that didn’t have red or green, so I wandered over to a craft store, and because it was after the holidays, all of what I wanted was on super clearance. I found a painted and glittered vine wreath that has a wire base, and 27 picks that are silvery gold with crystals for under $20. Before the holidays the same wreath parts would have cost $160.
Photo description: winter wreath hanging on a red door
The pre-painted vine wreath was heavily covered and it was difficult to get the picks wedged into the shape, so I used heavy wire cutters to snip off half the length, which helped. My eldest thought I bought it as pictured (I should have taken a before picture!)