This week I found out that sparkle paper works in my button maker. Nice. I designed an “All Star” graphic in Cricut Design Space and cut it out with the electronic cutter.
Photo description: silver vinyl cut into the words “All Star” over a star outline, one of three designs weeded
The vinyl doesn’t stick well to the sparkle paper, at all, so positioning the decal was tricky, but not impossible.
Photo description: glitter stuck to the back of the silver vinyl
Including the mylar cover was a must, both to keep the decal in place, and prevent glitter from shedding.
Photo description: completed button with blue glitter background and silver “All Star” script with star outline
I quite like the finished button, it has flash and glitter, without shedding flash and glitter. Leaving trails of glitter is on my “very rude” list.
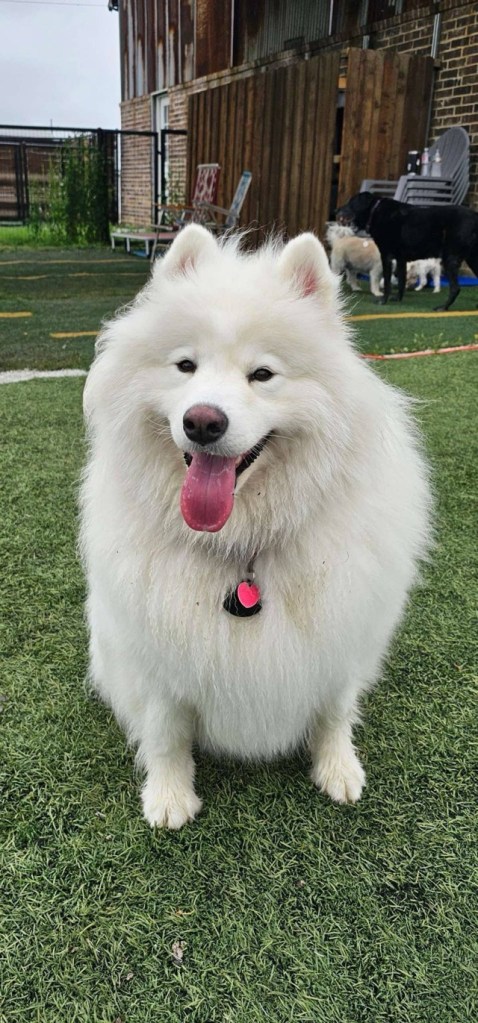
In May I received a mysterious fiber package. There was a tickle in the back of my brain, a shadow of a memory from the previous summer, when I talked with a woman who said her dog’s fur looked just like the Shetland sheep roving I was using for a spinning demonstration. She said she would send me some dog fur, and I gave her my address. I reached out to confirm, and yes! My mysterious package did contain the results of numerous brushings of her Samoyed dog, Sugar.
Photo description: Ziplock gallon bag full of Samoyed dog furPhoto description: Sugar the Samoyed photo from her owner
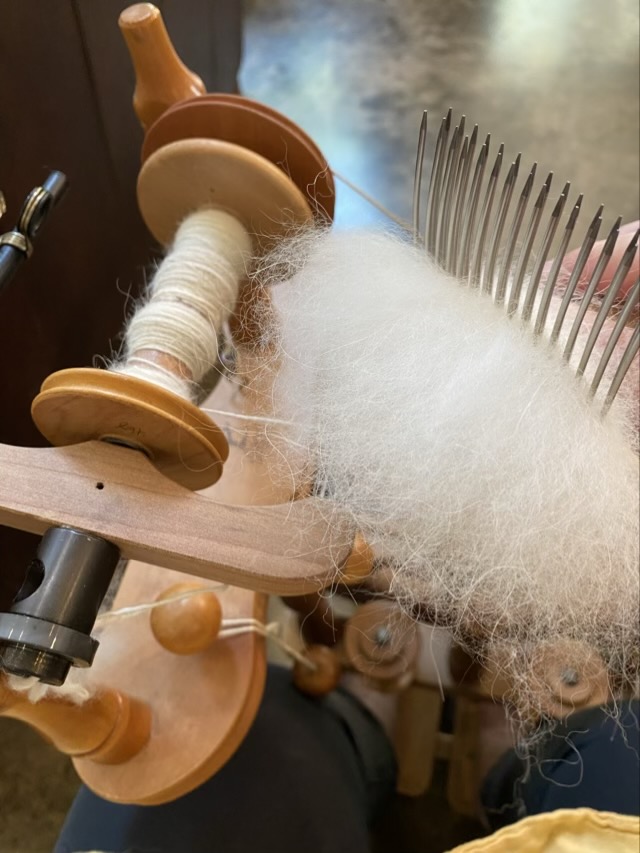
Samoyed dogs have a thick double coat that is usually white and naturally dirt repellant with very little smell. The fiber was very clean, and did not have much VM (vegetable matter), so I decided to comb and spin it straight from the bag, without washing or scouring. The staple length of the undercoat wool is about 2-3 inches, but the guard hairs can be much longer, I measured one guard hair at 9 inches long. I did not attempt to de-hair the wool.
Photo description: using wool combs to align the fibers for spinning on my Ashford Traveller spinning wheelPhoto description: Missy the dog is very interested in the smell of the dog wool, she can smell what I cannot!
The Samoyed wool was very easy to spin, and I was able to get a relatively consistent single. Combing produces more waste than carding, but the results are worth it. The waste fiber goes outside for the birds and squirrels as nesting material.
Photo description: single spun Samoyed dog wool
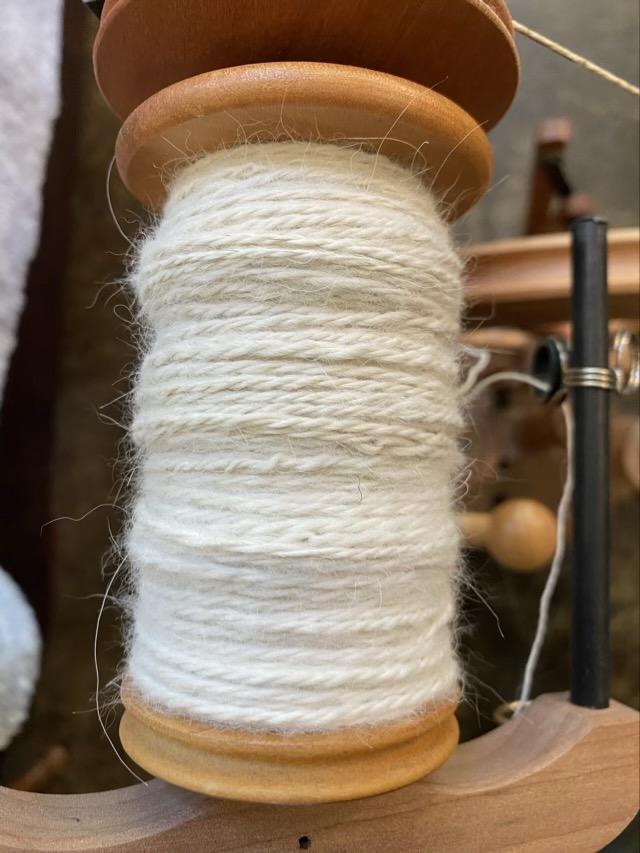
I chose to chain ply my singles to make a three ply yarn. The Samoyed wool also performed well in plying and I didn’t have any breakage.
Photo description: Samoyed dog wool three-ply yarn on the spinning wheel bobbin
I’m going to give the three ply yarn a gentle wash and hang it up to dry!
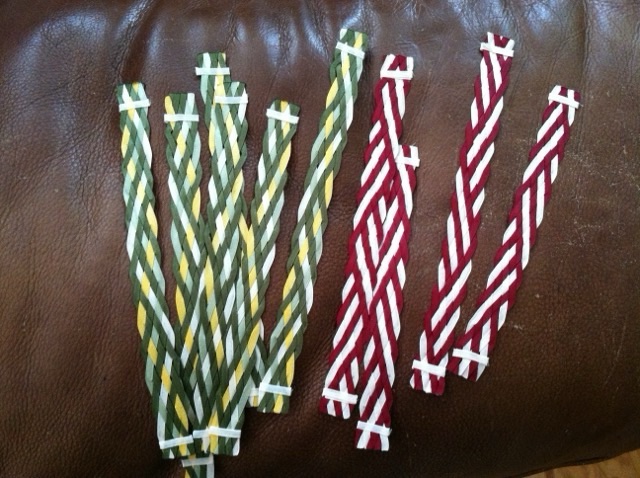
Here is a great throwback for Thursday! I used to make so many of these braided bookmarks. This picture is from December of 2014, and I love the way the red and white book marks have a secondary pattern effect.
Photo description: six green and yellow braided bookmarks, and four red and white
I make these with 1/4” flat ribbon and usually braid a long length, then iron the long ribbon before applying more ribbon as a band with some white glue and cutting sections a good bookmark length, usually about 8”. The trick to these is that the ribbon is never folded as I braid. The seven-strand plait stays flat and the bias weave of the ribbon lets it lay in smooth curves.
It is a fun braiding project, and inexpensive. Materials needed are: 1/4” satin ribbon, scissors, white glue, parchment paper (to protect the ribbon while ironing), and an iron.
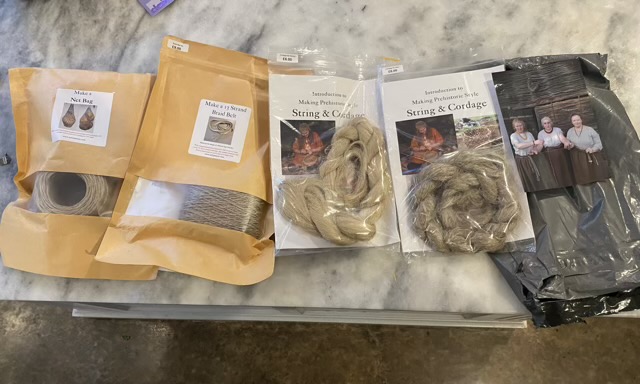
I read that Sally Pointer, an expert in Heritage Education in the UK, had developed a new pamphlet on making cordage and although I know how to make cordage, I wanted to see how she recommends construction. Since the kit is coming from the UK, with air mail prices, I maximized my kit to mailing cost ratio and bought four kits for the same mailing cost as one kit. So excited.
Photo description: string bag kit, braided belt kit, flax cordage kit, and hemp cordage kit from Sally Pointer
I follow Sally on Facebook and YouTube and thoroughly enjoy seeing the historic recreations she makes and appreciate her dedication to education.
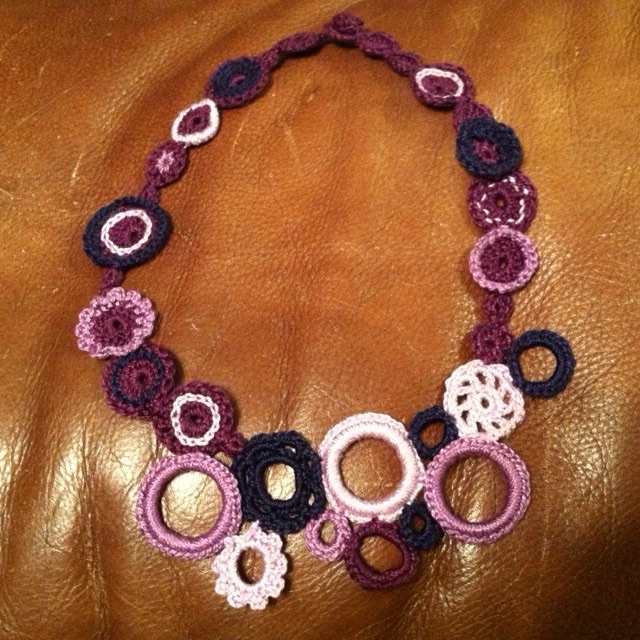
Back in December of 2014 I decided to combine crochet and jewelry making to create a light weight but bold necklace with pearlized cotton in shades of purple.
Photo description: crocheted circle necklace with hand made button clasp using four shades of purple pearlized cotton on a leather couch cushion
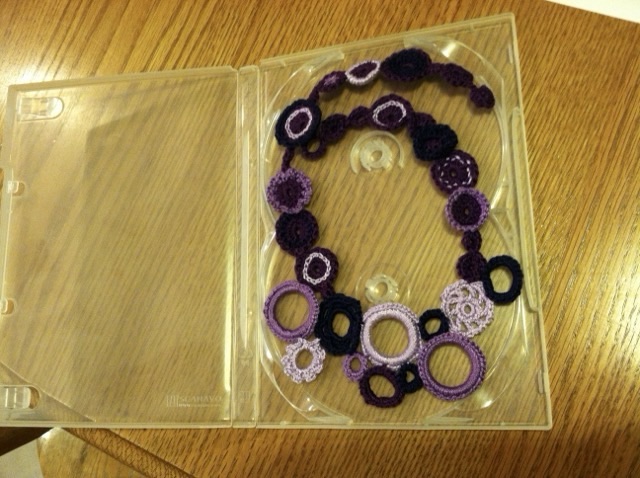
In 2014 I really had started to embrace taking pictures of my creations. I even took a picture of the CD case I repurposed into a guess-thwarting jewelry box.
Photo description: same purple crocheted necklace in a clear double CD case to keep it flat and give the recipient a moment of “hm?” before opening
I’m pretty sure since this is purple it went to my Mom. I’ve done more crocheted jewelry since. It is much lighter than traditional bold jewelry pieces, but does have to be laundered, starched, and laid flat to dry on occasion. I can personally tolerate a crocheted necklace for a little longer, if it isn’t too tight.