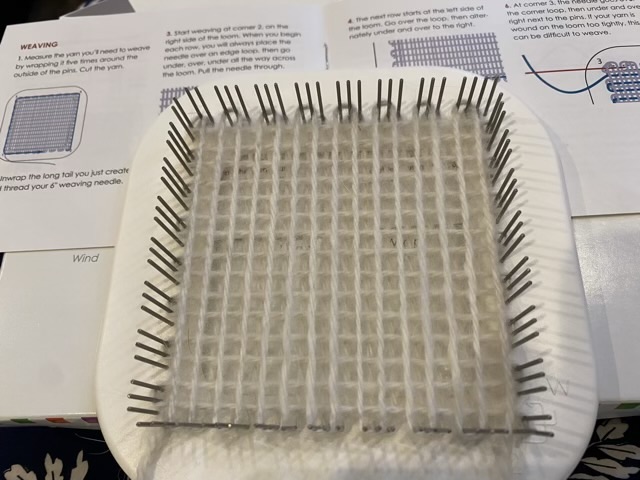
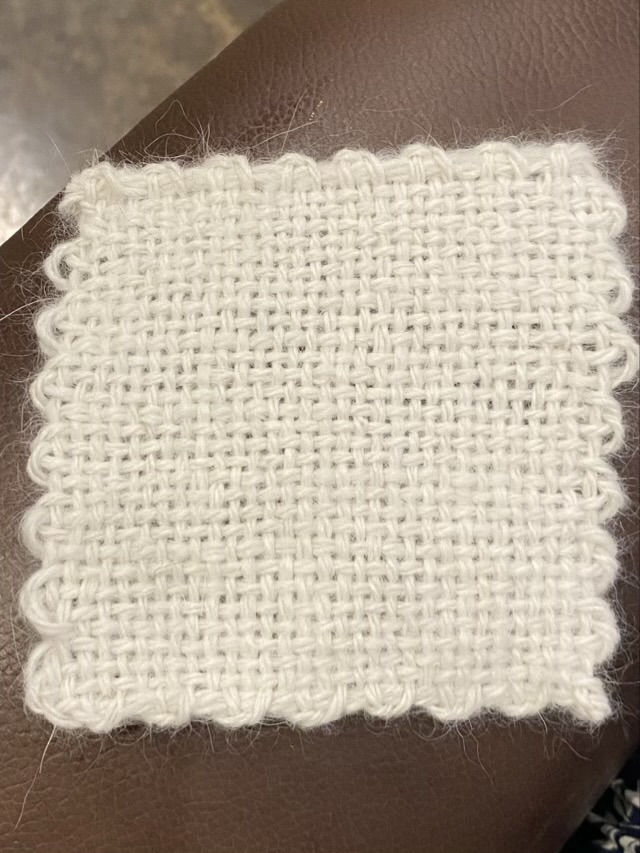
I have had a Zoom Loom on my wish list for a couple years. I finally purchased it and am so glad I did. This is an ingenious little loom that makes a 4 x 4 inch, four selvage woven square by wrapping three layers and weaving a fourth to achieve a plain weave.
Photo description: 4”x4” Zoom Loom by Schacht with the first three layers wrapped with hand spun Samoyed three ply yarnPhoto description: weaving started on the Zoom LoomPhoto description: finished woven square
This just made my weaving swatch the fastest swatch, outpacing both knitting and crochet. I use the swatches for my fiber book pages for each fiber I spin, but this went so fast I’m intrigued by the design possibilities that are now open to me!
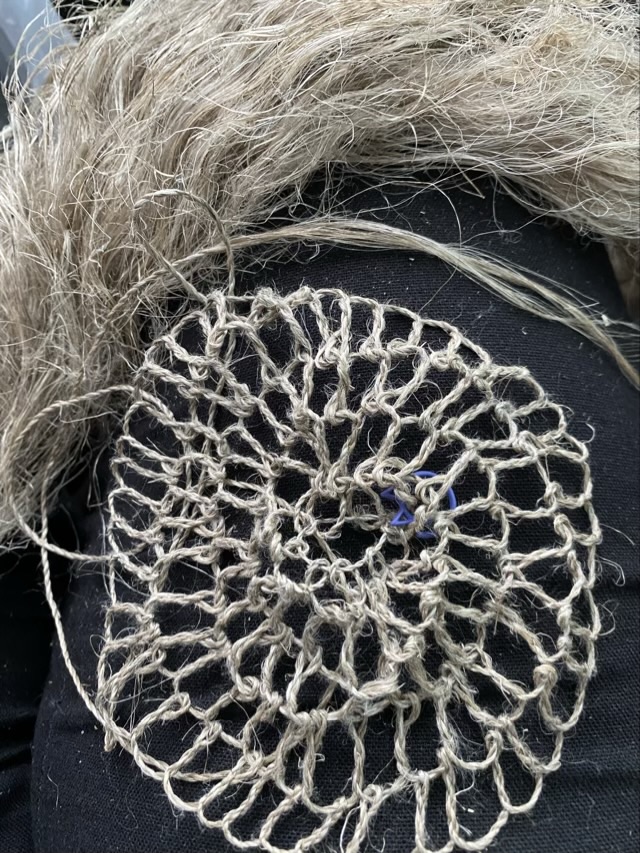
I’ve started a new project using the processed flax fiber from Sally Pointer’s twine kit. I’m making a twisted loop bag and twining the cordage for it as I go.
Photo description: two strand twined cordage made from flax fiber (in the background)Photo description: the start of a twisted loop bag made of flax cordage, approximately six hours of worktime
I started the project as a car riding diversion. I like the twining because I can do it mostly without looking, which allows me to watch the scenery going by.
I learned to twine with a Z twist, which is opposite of the S twist that Sally Pointer demonstrates for beginners. This is fine, but when I went to start the twisted loops for the bag, the technique makes Z twists for each loop. I thought my bag would be happier (less twisty) if I made S twists to balance the Z cordage, so had to adjust the way I made loops by going in the opposite way from the video. It took some brain power, and I’m going to have to be careful going forward to keep the same stitch direction, but I think it will be worth it.
I’m not using a needle for this project, just flax and my hands. I started with a nalbinding needle, but it kept slipping off, which was irritating, but the newly made flax cordage is stiff enough that if I fold the end, it is easy to thread through the loops.
Last thought on this post: flax cordage is strong. The line I’m making is fairly thin, about four-five strands doubled, but I cannot break it with my hands.
In February 2015 I finished a crochet project for my Dad that has a basket weave looking texture for a hat and scarf.
Photo description: black scarf and hat crocheted with black wool yarn
The technique uses front post and back post double crochet stitches in sets of three. It is actually an easy texture to achieve, but I recommend not using black yarn while trying to learn to count the stitches and rows. Also, size up any wool hats, as wear causes light felting, which shrinks the hat.
I sent my Dad four reed coasters for Father’s Day. He sent back data on preferences for hot and cold drinks.
Photo description: from left to right, #2 round reed with braided edge, reed and hemp string with braided edge, reed with tucked loop edge, reed and plied hemp string with braided edge
Dad reports that his favorite coasters for hot drinks are ranked left to right, and for cold drinks, right to left. The shades of orange coaster on the right made with several plies of hemp string absorbs the most condensation, so is best for cold drinks with condensation.
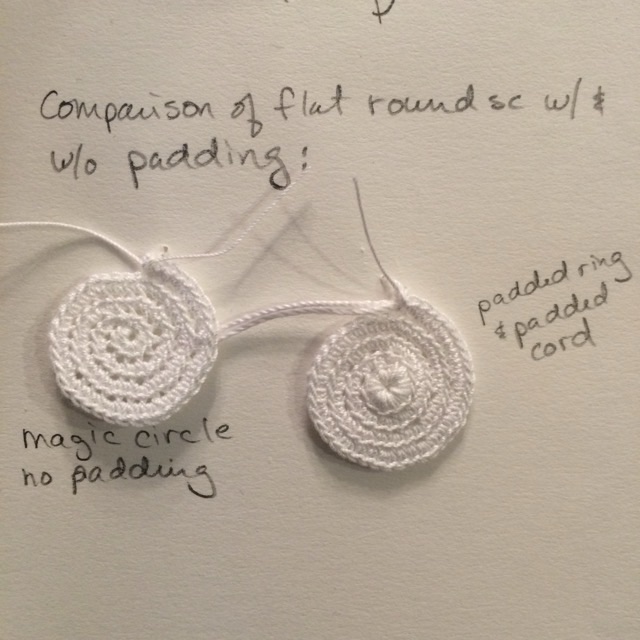
In January of 2015 I was examining the construction techniques of Irish crochet, a type of free form lace that has a rich texture.
Photo description: two crocheted circles, one without padding (left), one with padding (right)
Padding in crochet is carrying a thicker cord, or multiple cords, along inside the crocheted stitches. The padding cord also gives more control of the shape of the crochet because it can be pulled tighter and lock in curves.