Soapstone

I wanted to make something special for my Dad’s 75th birthday. I had a piece of soapstone in my stash, and I know he likes small things to go in his shelves, so I pulled it out and stared at it for awhile, willing it to tell me what it wanted to be. It wasn’t talking. My eldest had the idea of doing a relief carving of a koi (koi are long lived). I liked the idea, but the stone was suited better for an unusual relief, more of an emerging. I set about removing the excess material to release the inner koi.

Rough cut fish

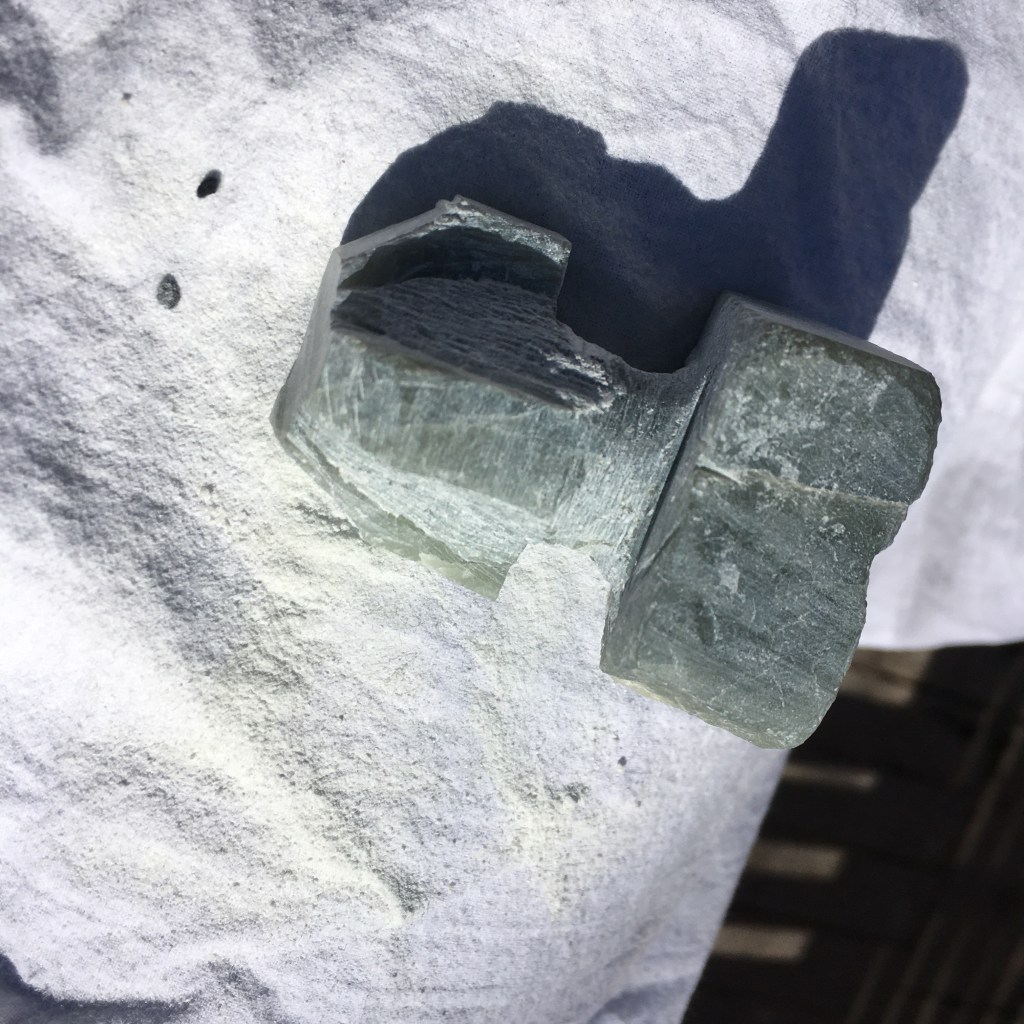
The idea in my head was of a fish coming out from under a ledge. I under cut the top, and rough cut the shape using the bandsaw and a small hand saw.

Shape refining with riffler files

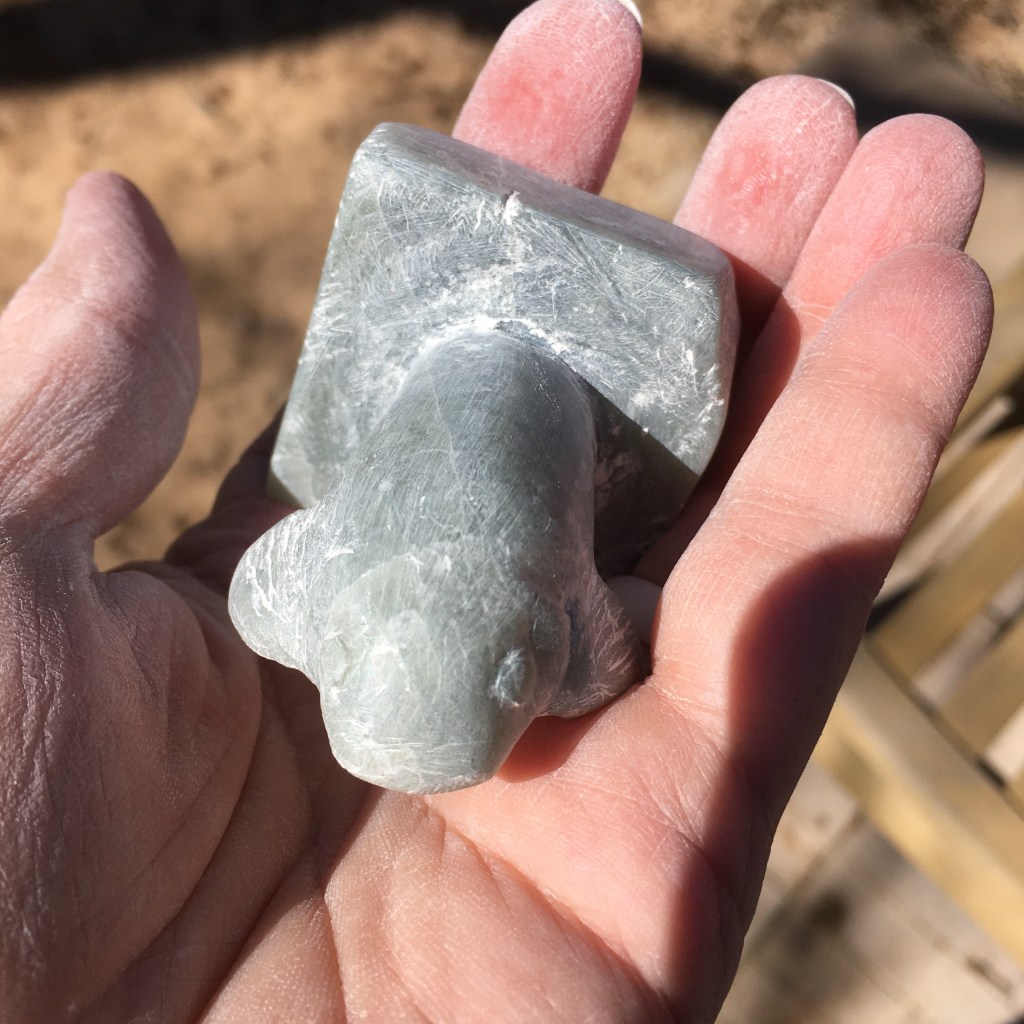
With the basic shape set, I went to work with my coarse riffler files. Oh what a hardship to sit outside in the sun filing away! More like a present to me. When I felt like the carving looked more fish than manatee, I set in with the fine riffler files.

Eyes and scales defined with an awl and knives

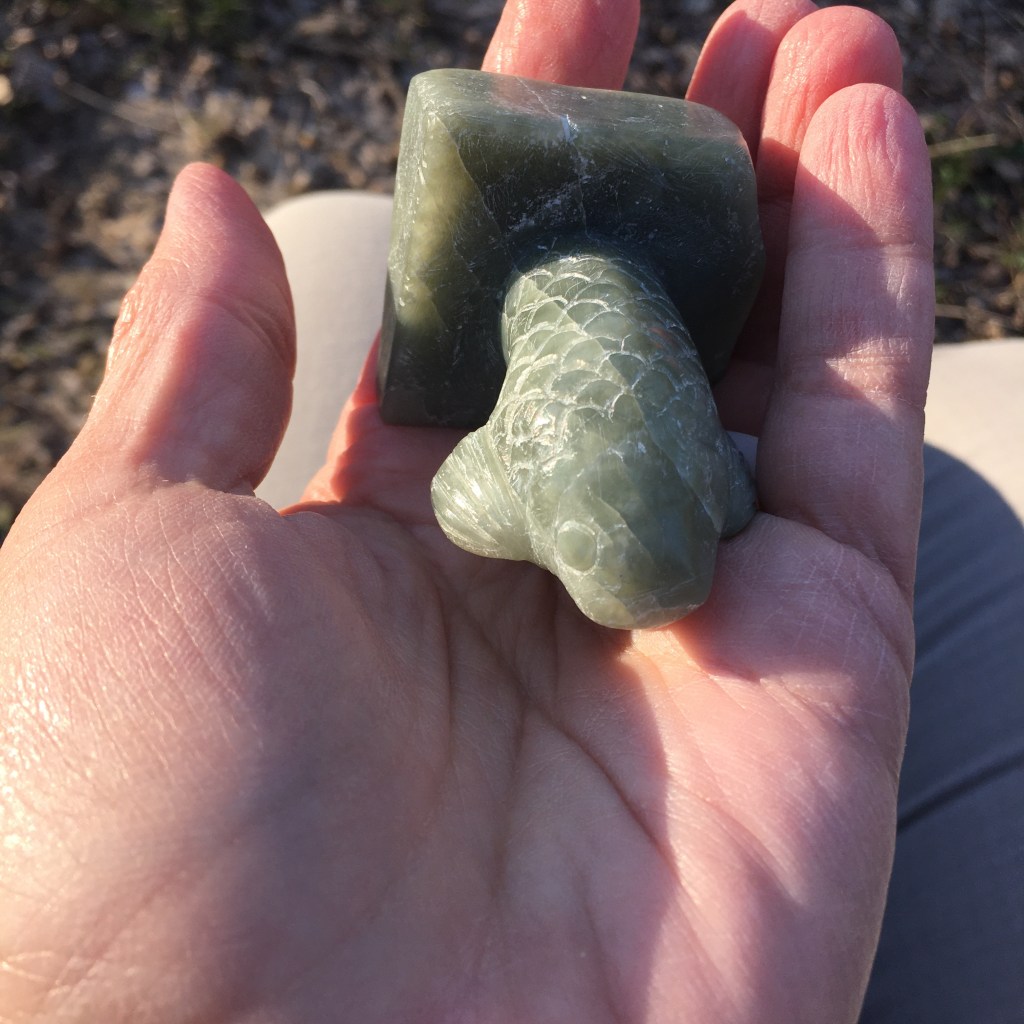
When I was pleased with the curves, I then sanded the riffler marks out and set about carving in details with an awl and knives. I was hesitant about carving scales, but this time the stone told me quite clearly that it wanted scales. I moved inside for this, since it didn’t produce nearly as much dust as shaping. When the scales were carved in, and I was pleased with the depth of the definition of the gills and eyes, I did another light sanding with 400 grit sandpaper. Then to get some gloss, I applied three layers of microcrystalline wax. Wow, the shine! My youngest thought that there should also be a fisherman, so I made a small copper figure pulling on a bent pole to reel in the massive fish. I drilled two tiny holes on the top of the ledge, and there are two wire spikes on the feet of the fisherman that fit in the holes. I am pleased with the motion of the wire figure; he is working hard to land that fish!

Small copper fisherman added to the sculpture

Rather than super glue the fisherman in place, I think I will ship the piece separated. The soapstone is weighty, and the copper figure is delicate. I would hate for the tiny massive fish to squish our champion.

Spin, spun, almost done

I spindle spun the blend of fawn and dark brown alpaca fiber. My consistency is decent when I am paying attention. If I am watching my youngest play Zelda Breath of the Wind, however, the yarn goes thin then thick pretty quickly. Oops.

Donabella and Amiee’s fiber spun up and then wrapped on the niddy noddy.

The fawn color really disappeared quickly into the brown. I’m not sure I’m going to get the gradient I was hoping for when I make something with this. We will see!

Yarn wound into a cake. The blended part is almost undetectable

Blending part 2

I blended Donnabella and Aimee’s fleece! The color difference is greater between the fawn and dark brown, and it didn’t take much brown to make a significant difference in the blend color.

Fawn and brown alpaca fleece loaded on a carder

After blending, I color sorted the rolags before spinning.

Color sorted alpaca rolags

I am finding differences in fiber in the fleeces. I’m not sure if I selected raw fiber from different parts of each blanket (the fiber sheared from the back of the alpaca), or if there are differences in fiber diameter between animals (which makes sense), or both. I am pleased that I am learning and noticing the differences!

Spinning as I go

The rolags of alpaca wool I am carding are so light and fluffy, I don’t want to pack down the fibers by storing them until everything is carded. So I decided to spin as I go.

This is as much as I could pack on my spindle!

It is a nice pairing of tasks: card a box full of rolags, spin said rolags, repeat. When my spindle was just as full as I could get it, I did wind the yarn on my niddy noddy, rinsed it, and let it dry. Even though I washed the raw fleece, it still had some water resistance. The dried yarn is balanced and more consistent in thickness than my last spindle full.

Cake of single ply 100% un-dyed alpaca

The color shift from Sugar Plum’s fleece to Donnabella’s came out nicely!

Repurposing treat jars

Feeling a little silly. My spoiled pup has been itchy for awhile. I’ve tried skin sprays, ordered some probiotics, took all the artificially dyed treats away… what? I didn’t? Turns out our go to treat has red 40 in it. How did that miss the purge? We were buying it by the jar full. I must have assumed I read the ingredients label long ago. Nope. Sugar and red 40. All righty then, out they go. But the jars are so useful… I’ll make new labels with vinyl! (Told you this stuff is addicting.)

Filling the indents in the jars to make a smoother surface

I washed out the jars and soaked off as much of the old label as I could. There were still sticky bits, so I decided to recover the whole middle in white vinyl. The indents in the sides of the jar made the vinyl pucker, so I filled them in with silicone caulk, smoothed it, and let it set. The vinyl went on better, but not as perfectly as it does on hard surfaces (the plastic jars have some flex).

New dog treat jar label

I designed some new labels in Adobe Illustrator and cut them with my Cricut. The first design (above) was not an easy weed, and the tiny toe nail marks were too small to deal with! The second design (below) was very easy to weed, but larger than the white. Oops. I didn’t measure twice, cut once. But it does look like a little tiny dog ink stepped all over the jar, so I am going with it.

Paw print text design
Applied label
Escaped paw prints

It was an interesting experiment, and I have useable, non-sticky treat jars for the new, natural dog treats. The dog is spoilt.