Oh, what did I get into?

Box cover for Dura-Craft Ashley doll house

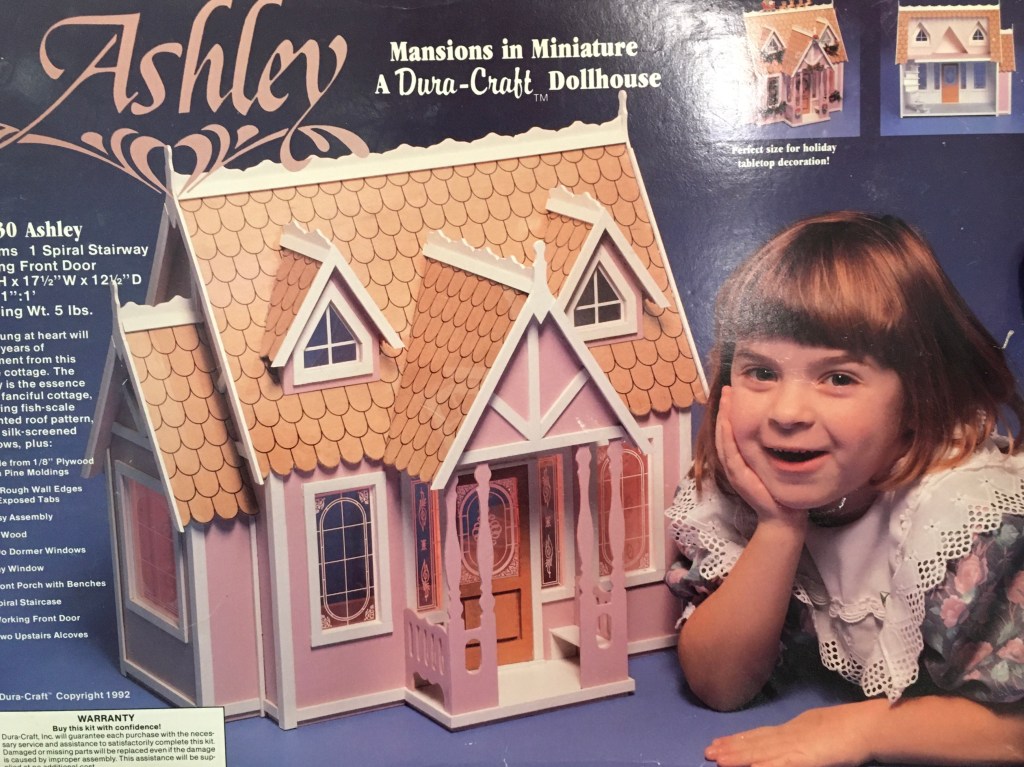
It seemed a good rainy day project, maybe stretching to a few days. The instructions said easy assembly. My youngest was enthused and helped me paint it her favorite color: pink. I convinced her not to have the entire thing a solid pink, mainly by promising to paint all the trim white myself. Oh so much tiny trim.

Pre-painting tiny dollhouse parts

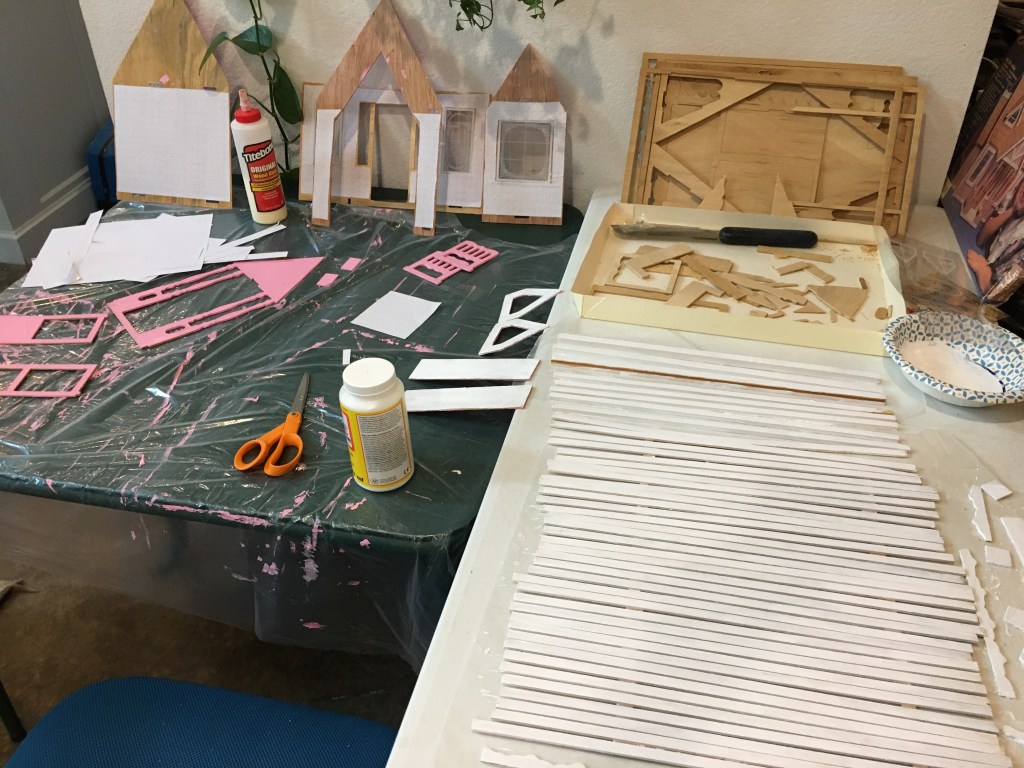
My grandmother gave me this dollhouse after I was married. My husband found the kit recently when he was cleaning out the garage. I’ve had it for probably 24 years. The Dura-craft dollhouse company went out of business in 2005. The copyright date on the instructions is 1992. I discovered these last two facts after the project was spread over two tables and a bench in the middle of the house.

Cutting the oh so tiny trim around oh so tiny windows

I discovered on day two, after the painted parts were dry, that the company and I have different definitions of “easy assembly”. Each piece of tiny trim needs to be cut to size. I have some good wood glue, but even that needs some time to set before going on to the next step. So it will take awhile to get everything assembled using a stop and go method. My youngest does come by and show interest and helps, which keeps me going. I may also be getting a wee bit obsessed. My youngest wanted wall paper inside, “Pink flowers” wall paper. I designed a repeating pattern in Photoshop and then shrunk it down to doll house size and printed it. I then used Modge podge glue to attach the paper to the wall, and other coat of glue on top to protect the paper. Maybe a little obsessed…

Custom doll house wall paper

Weaving wool

For Father’s Day I decided to weave my Dad a small tapestry with wool. I looked at the yarn I had available and decided I had the colors for a dog nose and tongue (yes, really). I wanted large blocks of color that didn’t need excessive detail, so a super closeup fit the bill.

Weaving the shapes upside down

I warped the loom with thin cotton, and used store bought black and pink merino wool and my own spindle spun orange wool (mostly merino) for the weft. I wove upside down because I figured that would be easier with the shapes I wanted. I did make a sketch and used that behind the weaving as my guide.

Woven base colors finished and removed from the loom

I found it easier to weave in the ends as I went. I finished with the fringeless method of pulling the weft through the work then weaving in. Although the shapes were recognizable as a tongue, probably a dog’s, I decided to add some embroidery to help define the shapes. I used a digital art program to sketch and refine the ideas before I attempted thread.

Digital sketch on photo of tapestry

I used the pink and black to outline and smooth out the blocks of color, then used a sparkly gray acrylic for the nose. I found the stem stitch served best. Definition on the tongue was made with a coral colored yarn.

Embroidered tapestry

To display the tapestry, I chose to mount it on a fabric covered frame. I had a pre-stretched cotton covered frame, to which I stapled thin batting, then a rough cotton fabric (of all the fabric in my stash, I like the texture of this best). I sewed the tapestry to the fabric using a curved needle and cotton thread. As I sewed I was able to even out the edges at least a little! I did label the back and attach hanging wire as well. The title of the piece is “Doggie Kisses”.

Mounted small tapestry

I may consider more small embroidered tapestries in the future. The process of making and even mounting this one was quite enjoyable!

Throwback Thursday

I don’t usually do Throwback Thursday, but when I was cleaning out cabinets, I found our old ice cream ball, complete with a crocheted cover I made to protect our fingers from the hard plastic. It helped a little, but not enough to make using the ball a regular activity. I had forgotten I made it. Oh the laughs to be found in the back of the cabinet!

Crocheted ice cream ball cover
Ice cream ball (note the ridges that are prone to causing stubbed fingers)

The ice cream ball really seemed like a good idea too. Bummer.

Experimenting more with weaving

I saw some pins on Pinterest on twining yarn around the warp threads and the string was sitting there, and the frame was sitting there, and shouldn’t I just try it? I started out going back and forth, then decided to try some random blocks of color, then since it is a washcloth anyway, tried some spirals and arcs.

Twining while weaving

I liked doing the arcs the best, especially the top white central arc, as the S twist of the twining went well with the S twist on the yarn. I don’t care for the knit look (that results from doing a S twist on one row, and a Z twist on the next), not only does it look knit, it is very stretchy in an unpleasing way for a wash cloth. The warp threads were very easy to pull through, though.

Finished twining experiment

I do like that the twining covers the weft threads on the back of the work as well as the front. I also like weaving in the ends in the middle and of the work, rather than the edges. On this piece, I only wove the ends in one way, rather than going back and forth three times as I’ve done previously, so it will be interesting to see if the ends work loose.

Rock painting

We hid all our painted rocks at a local park, so we came home and painted some more. I’d seen some face rocks on Pinterest that were painted with just shades of black and white, using the natural rock as the skin tone. I tried one, but I like painting eyes better. I may try the whole face again if the right rock rolls in. I will coat these in Helmsman before we hide them.

Painted rocks