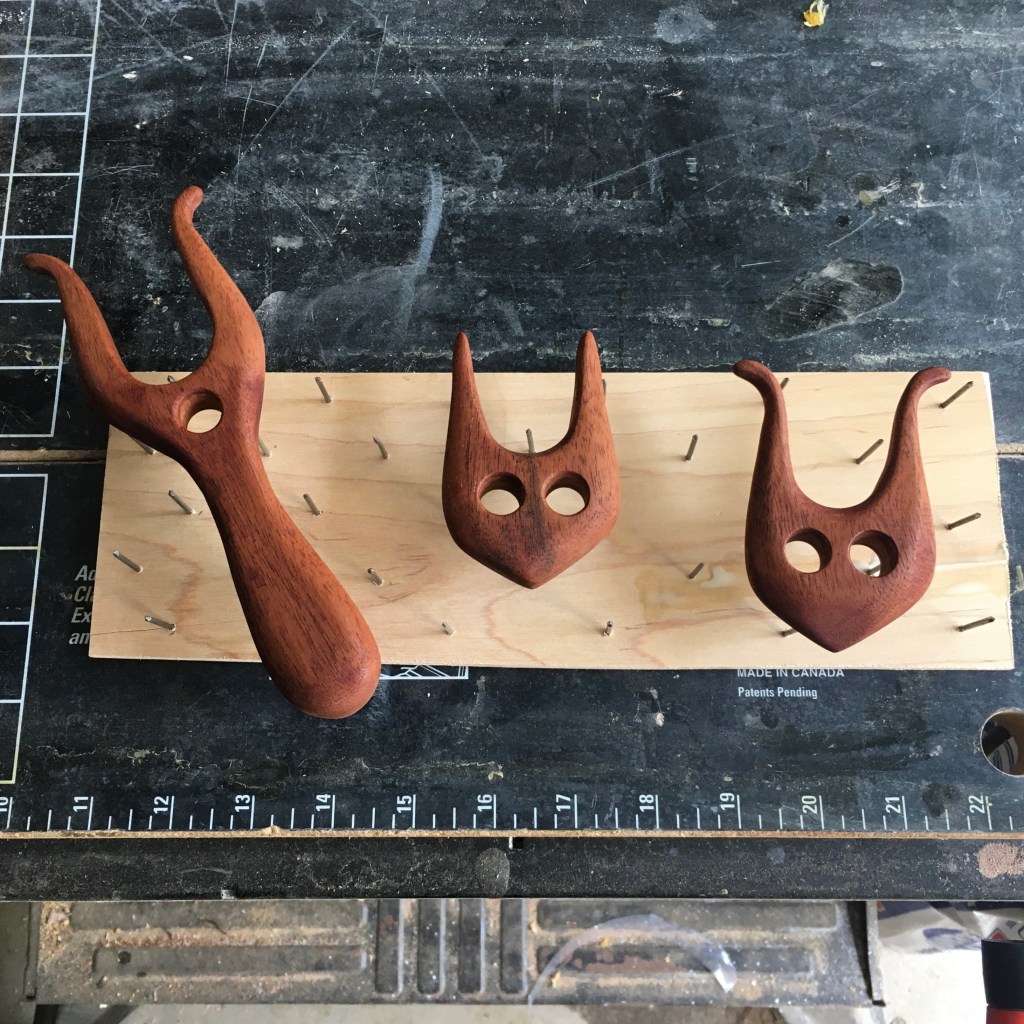
When I am applying finish on small items, such as lucets or painted rocks, I like to coat all surfaces then place them on a drying rack. The drying rack uses nails to minimize contact and keep the finish nice on the bottom of the piece. I had the idea after seeing how potters prop up their pieces for firing after coating with glaze.
Lucets with one coat of tung oil sitting on the drying rack (left lucet is a commissioned piece, the other two are available on my Etsy site)
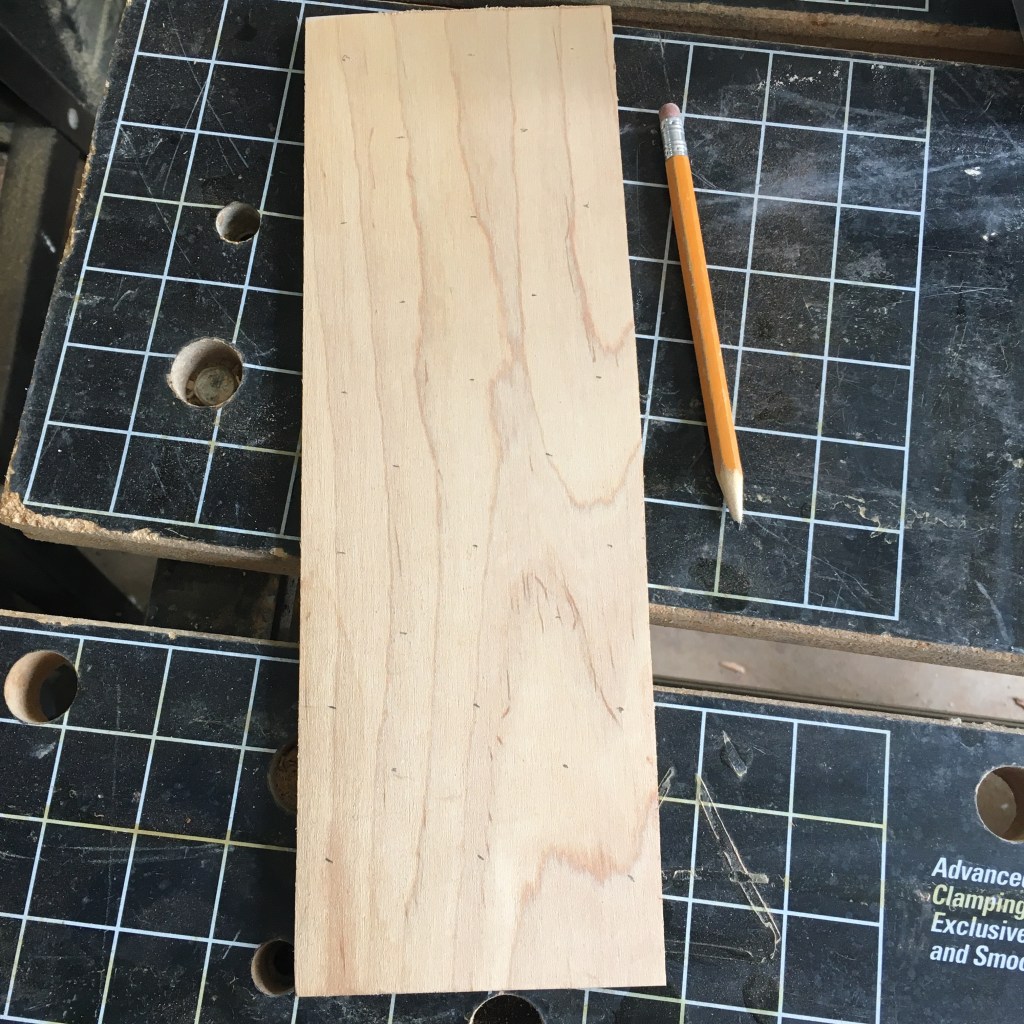
I start with a thin rectangle of wood, and mark out the hole pattern with a pencil. The hole pattern doesn’t need to be precise, in fact, having areas of different sizes helps for pieces of different shapes.
1/4” birch plank with pencil marks for hole pattern
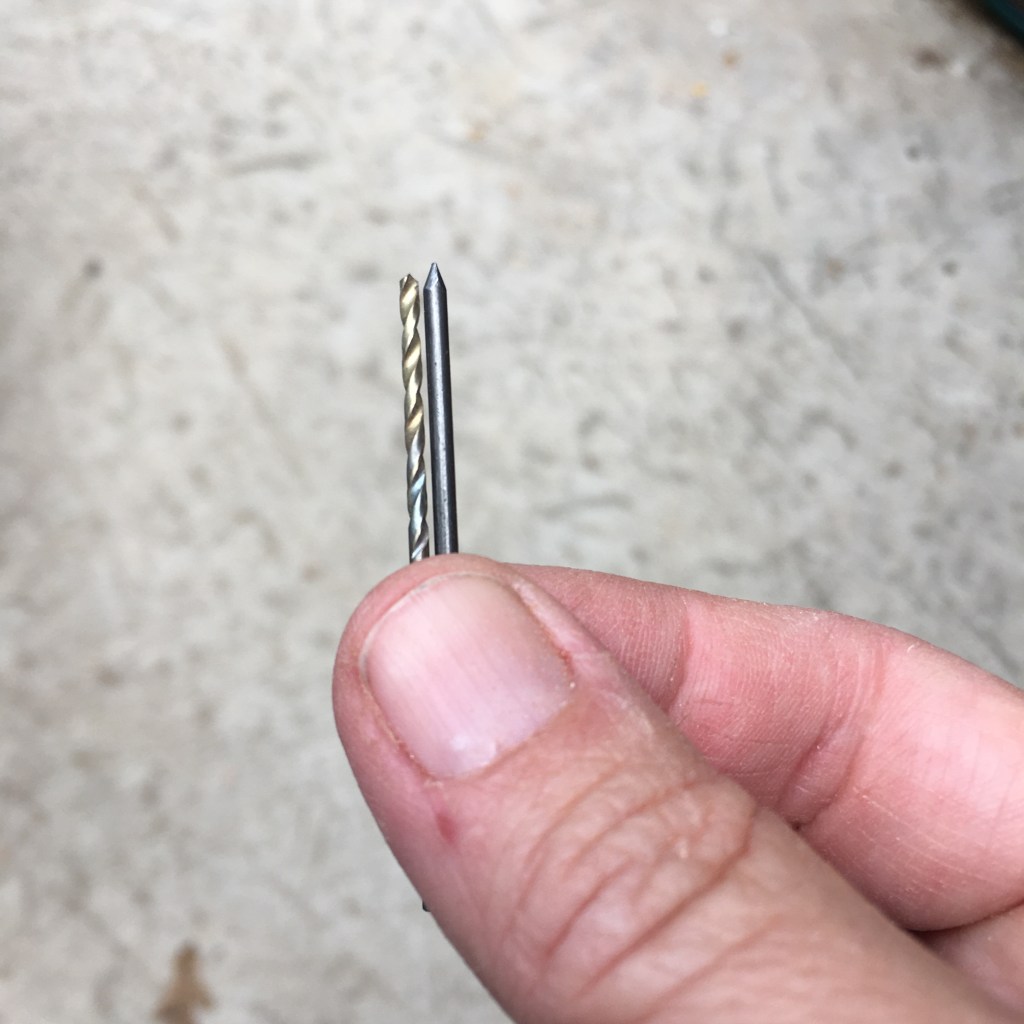
I pre-drill the holes with a bit that is slightly smaller than my finish nails. Pre-drilling reduces the likelihood of splitting the board (it still can happen though, so go slow, watch carefully).
Drill bit slightly smaller in diameter than the finish nail
Using a clamp work bench, I support the sides of the board and drive the nails in on the back side of the piece. The open space insures that I don’t nail the board to the workbench.
Hammering the nails through the board supported on a split work bench
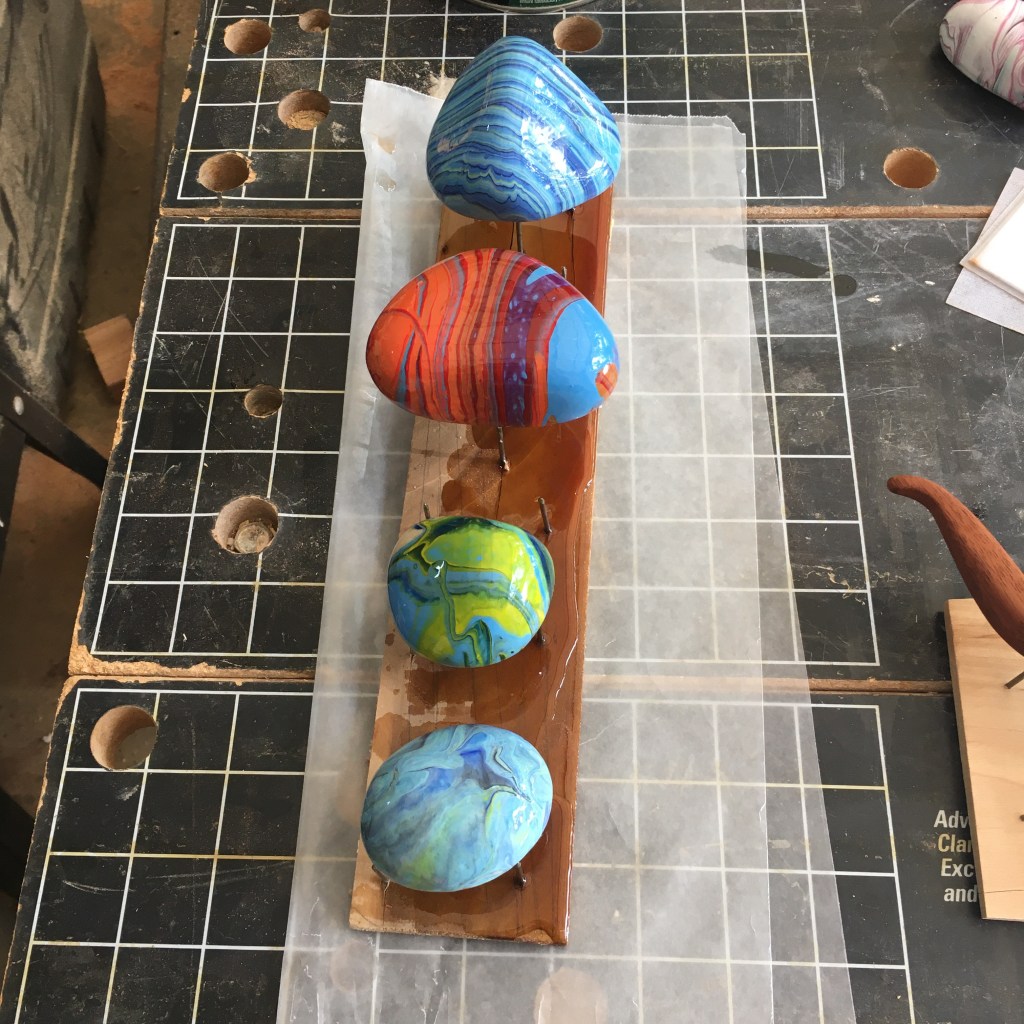
After I made my new drying rack, I spotted the one I thought I lost. Sigh. It had fallen under the work bench and was hiding. I pulled it out, dusted it off, and used it for putting a clear coat on painted rocks. But hey, I was able to do a post about making one, with pictures! And now I have two.
Painted rocks with a thick coat of clear urethane on a drying rack. Wax paper is for accidental seepage.
I have never been able to wear the loop style headbands. They just slip off the back of my head. Ironically, buttoning a mask to the headband keeps my mask on and my headband on. The things we learn. The physics are all proper with the opposing forces and all that, it is just funny. I like that with the ear loops snug to the buttons, the elastic doesn’t push my glasses forward. I trialed a thinner headband, so thought I would try some waistband elastic and a wider tube of fabric. It works just fine.
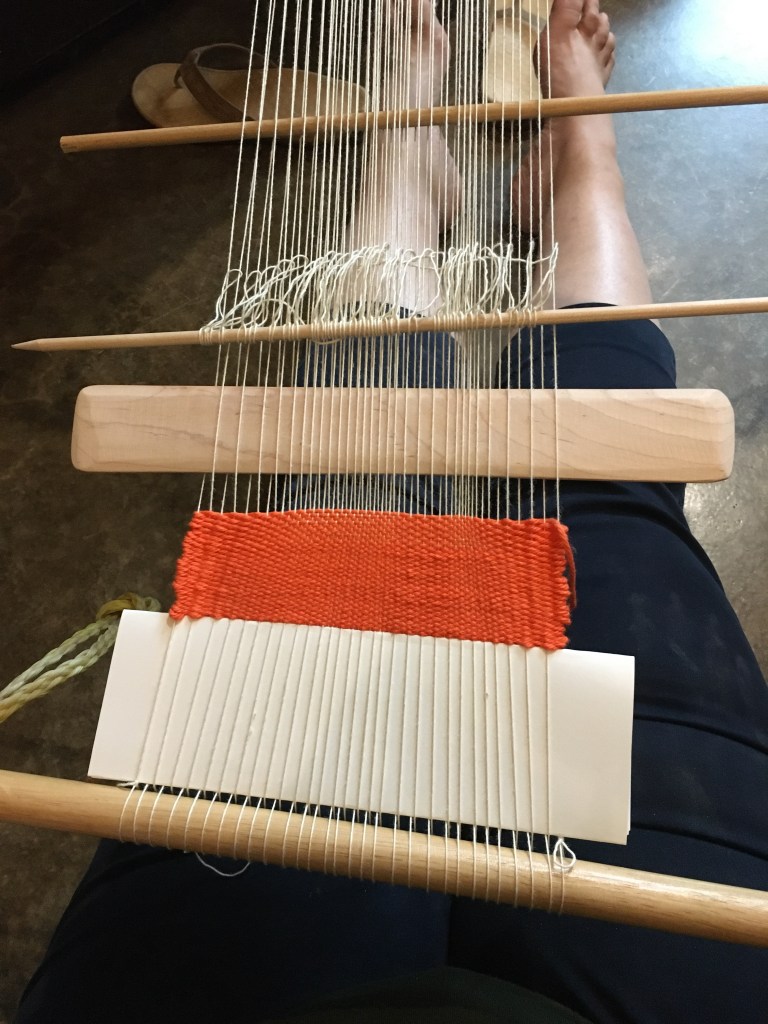
When learning a new craft, the initial pieces are usually… well, let’s just say wonky. The value in these works is what we learn from making them, even if they aren’t aesthetically pleasing. Although I wasn’t enamored with weaving at the beginning (as I completely was with spinning), it is apparently going to wiggle its way into my life because I can’t get it out of my mind. I do not have the money or floor space for a large fancy loom, or even a medium one, but I do have many sticks. I found references to back strap looms, which are used throughout the world to make intricate and beautiful textiles. With sticks. And string.
Initial test setup of a back strap loom
The back strap goes around the weaver’s hips, and the other end is secured to a stationary object, or the weaver’s feet. I had some dowels taken from a recycled toy rack, and some nylon rope in the garage, so I grabbed those, then gathered smaller dowels in my craft room, a piece of fabric for a back strap, and yarn. The only thing I made was a beater stick, which I cut from some 1/8” maple I had in my wood bin.
Attempted weaving, very wonky
My first attempt was confounding. I use online resources, videos, and pictures, and I’m not sure why my middle is tight and the edges are loose. What I did learn, though, is how to make a continuous string heddle stick, which lifts opposite warp threads than the shed stick, and makes weaving much faster as you don’t have to pick up warp threads on the back pass each time. This knowledge was completely worth the wonkiness. I decided to try again.
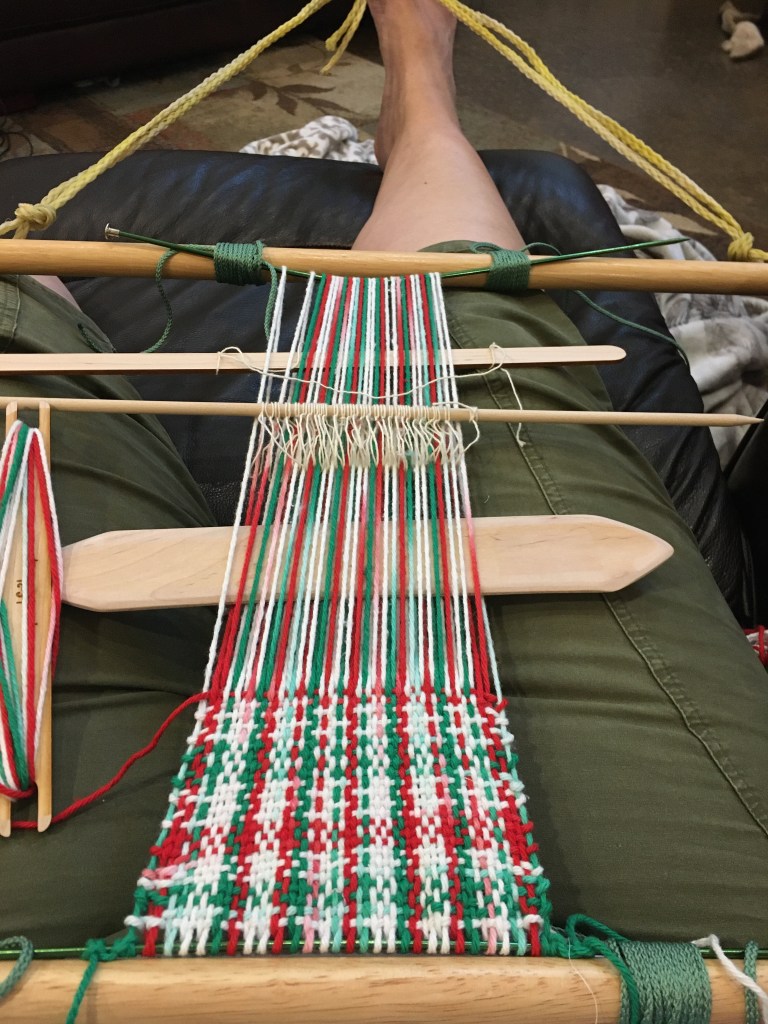
Second attempt at weaving with a back strap loom
With my second attempt I set up the warp with the same yarn as I wanted for the weft, and I used my foot for tension. (Because I am not used to sitting on the floor and it hurts, setting up this way lets me sit in my recliner. Cushy!) I also refined my sticks and used some knitting needles to hold the warp. What I learned this time was that the knitting needles are aluminium, not steel as suggested in the tutorial, and my tension may be a problem as I bent the needle on the far end. Oops. I also learned that all yarn is not created equal. The string I used for the warp and heddle the first time slid back and forth just fine. Sliding the heddle string along this different warp yarn felted the heddle and the warp together, making it inoperable.
Heddle string and warp yarn felted together
I shall try again, maybe after looking at some more pictures and videos.
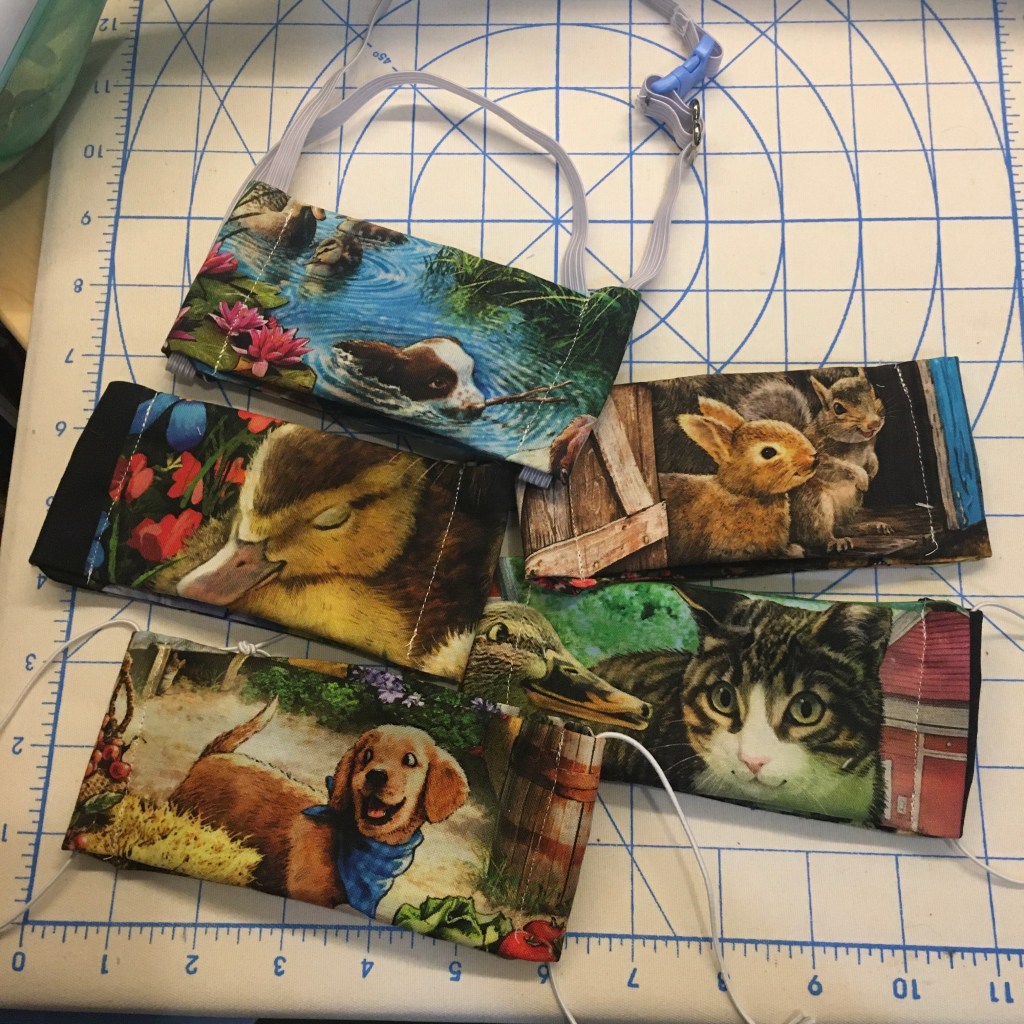
I found some cute barnyard animal panel fabric (large images printed on fabric rather than a smaller repeating pattern) at my local quilting store. I was trying to find fabric for masks for my nephew (this is not a quilting store that sells PawPatrol) and thought it might work with some fussy cuts. In quilting, a fussy cut is one where a piece is cut to capture a pattern or image in a certain way, rather than to maximize fabric usage. It usually leaves quite a bit of waste fabric, and making masks is no exception! Still, I was able to eek out five nicely composed kid-sized masks. It was an interesting experiment, but had too much waste for regular production.
One of my readers requested a video of how I make my masks assembly line style. I have tried hard to capture the process. I also decided to use the opportunity to learn new video making software, so it was particularly painful, but I learned so many new things. I used Adobe Premier Pro; I have a long way to go, but for a first project I hope it came out useful. I have added captions and voice over. Although I must disclose that trying to do clean voice over when there are others in the house is not possible. My dear family tried very hard to be quiet for the ten minutes or so that I needed to record, then my dog came and had a good solid scratch and shake behind me. Sigh. The original pattern is not mine, but is from Cook Children’s website and is available here. It is my go-to mask pattern for making many masks. The video on my mask assembly line is available here. The fabric is called “Sunshine Garden” design number #17191 by Darlene Zimmerman for robertkaufman.com. I found it in the 1920s reproductions section of my local quilting store.
Spiral layout of finished cotton masks with ear loops