Horse shoe coat hooks

One of the good things that came from the gecko running behind the coat hooks and the coat hooks coming out from the wall as the cat, dog, and I scrambled for the critter, is that it prompted me to find a better way to secure the horse shoe hooks to the wall. I love these hooks that my husband’s cousins made when they were learning to weld. I have four of them and they work great on solid wood. I tried having two on the wall by the back door, and tried to get the tiny nails that would fit in the nail holes to reach far enough into a stud, but they consistently came loose. So now I had to do something sturdier. I combed the garage and found a nice length of 1×4” trim, already painted. But it was shorter than the horse shoes. Hmm. If I set the horse shoes up above the rail, then I would be able to use the tops as hooks as well, increasing the number of usable hooks from two to six. And if I added the other horse shoe I had sitting on the counter, then I would have eight hooks!

Horse shoe coat rack mounted on a painted board

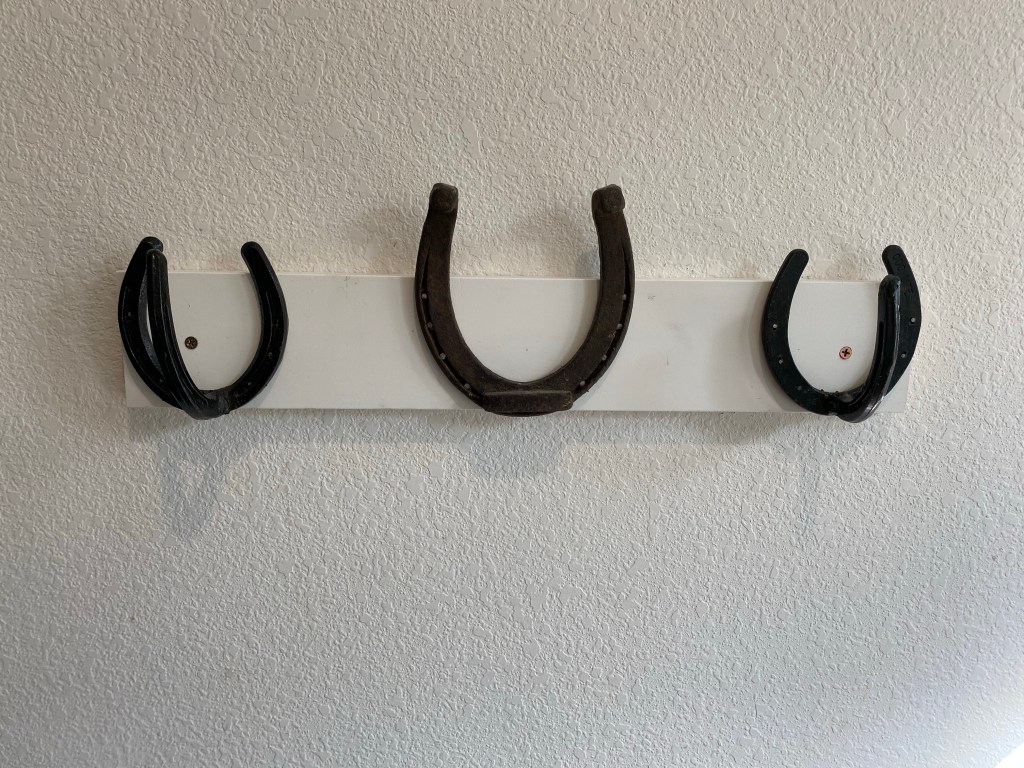
I attached the board to the wall, centering it on the studs, checking level, and running two screws into the studs. Then I took finish nails that had heads large enough to not go all the way through the horse shoe holes and set the metal lined up with the bottom of the board. I used a nail set to tap the nails down into the shoe to keep it firmly attached.

Horse shoe coat rack with an egg apron on a hook, a coat on the top of a horse shoe, and my snake grabber resting on the wood

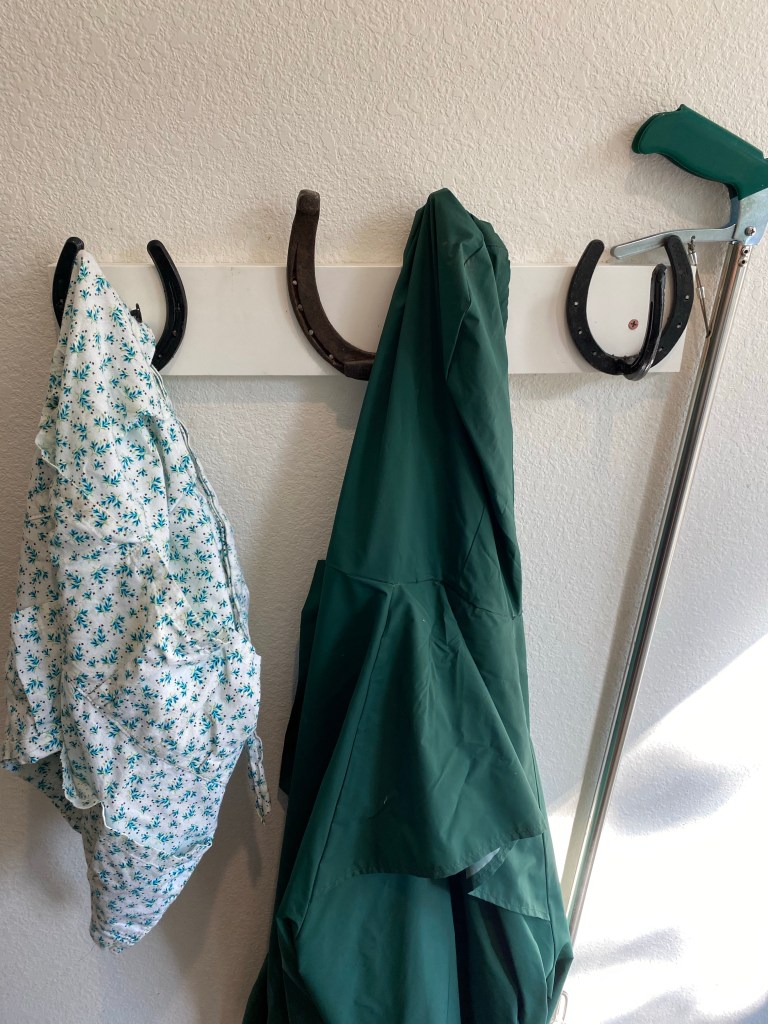
Now we have a sturdy coat rack! The best part? I only had one trip to the garage. I was able to anticipate everything I would need, gather it, and use it all. It is unusual for me not to have to make a few trips back and forth for forgotten items. (Yes, I did put everything away as soon as I was done!)

Nålbinding alpaca

I now have three preparations of three colors of alpaca and silk. One with the colors carded separately, then rolled together into a rolag before spinning and cable plying; one carded and spun separately, then plied together; and one carded together to blend the fibers then spun and cable plied.

From left to right: marled, plied, and blended alpaca silk yarn

I had such small samples of the three different blend techniques, I decided to combine them into a single project.

From top down: marled, plied, blended. Nål is osage orange

I think the effect of each yarn is interesting. The marled yarn has more variation, which resulted in some spots of darker and lighter color. The three ply is counter clockwise and unwinds somewhat for this stitch (which is my new favorite stitch: Dalarna from Sweden, Hansen’s Notation (U) O/U O:UO F1). The blended actually came out more uniform than I predicted. The intent was for this to be a hat, but I miscalculated and didn’t make it big enough. Since it is an experimental piece anyway, I also tried fulling it a bit by taking it back and forth from hot water to cold water. It did pull in some and became definitely too small for a hat.

Lightly fulled

So I took two pieces of leather lace and made it into a bag by weaving the leather through the edge. Problem solved.

Nålbound bag with leather lace

The finished fabric is very soft, but dense. It has a very nice drape, but not much elasticity, so I think the alpaca silk blend may work better as a scarf or shawl. I’ll have to test that idea!

Flower nails

I promised my kids we could make buttercream flowers. I knew I could make the frosting, but I went to look for tips and nails and didn’t have any! Where did they go? (It is entirely possible they were lost in the fire six years ago, I still look for things I used to have, even though we’ve moved.) I was able to obtain some frosting tips with a quick trip local, but no nails. Nails are helpful because they allow 360 degree access to the construction of the flower. If you watch someone making a frosting rose, most likely they are using a flower nail.

Hot glue to the rescue. I cut 1.5” circles from a cardboard box, cut down bamboo skewers, and hot glued the stick to the circle, with an extra circle of glue around the bamboo for good measure.

Flower nails made of cardboard, bamboo, and hot glue

To use them, we put a dot of frosting on the head of the nail, then applied a square of parchment paper. (Paper cutters are great for making lots of small squares.) The flowers were constructed on the paper so they could be easily slid off and popped in the freezer.

Frosting flower experiments in the freezer drawer

Oh my goodness did the kids have fun making these. We filled up the whole freezer drawer! I did order some washable metal flowers nails, since this is very much a repeatable activity, which we repeated the following week.

Two color rose on a flower nail (purchased)

The second time around we experimented with color. We split the buttercream into four parts, and colored some red, blue, and yellow, and left the fourth portion uncolored. Each frosting bag we loaded with multiple colors. The favorite bag had all three primary colors dolloped on the sides, with white down the middle. This makes great unicorn poop (above the blue star in the picture below). As we reached the ends of the bags, the blue and yellow had combined to green, and the pink and yellow had combined to orange, but these two made adorable little blooming cacti (far right middle in the photo below). Happy discovery!

Another drawer full of frosting creations

Blended

Next color experiment with my three colors of alpaca fiber is blending them all together with a little silk. (The silk makes it so strong I can’t break the singles by hand. I’m undecided how I feel about that.) I aimed for equal portions of each color, but I didn’t get out the scale, so I knew there would be variations in the rolags I produced from carding. (Honestly, there will be variation even if I weighed, but the subtle change in color can be quite pleasant.)

Blended alpaca silk rolags in my arm bag ready for spinning
Cable plied (4 ply: spun, plied, plied again) alpaca silk blend

I think I like the subtlety of this yarn, but I want to make it up into something to be sure. Yarns can look very different in the ball or skein than they do in a finished piece!

Three ply

Three colors of alpaca, three ply yarn; seems a natural choice for my continued color combination experiments. I carded the colors separately again, but this time added a little silk to each preparation (as I have read that silk and alpaca complement each other), and then spun the colors individually. Taking the inside end of each tiny yarn ball, I plied them together. This made an interesting visual effect, very bold upclose.

Alpaca and silk singles
Three-ply alpaca/silk yarn