Cat flap

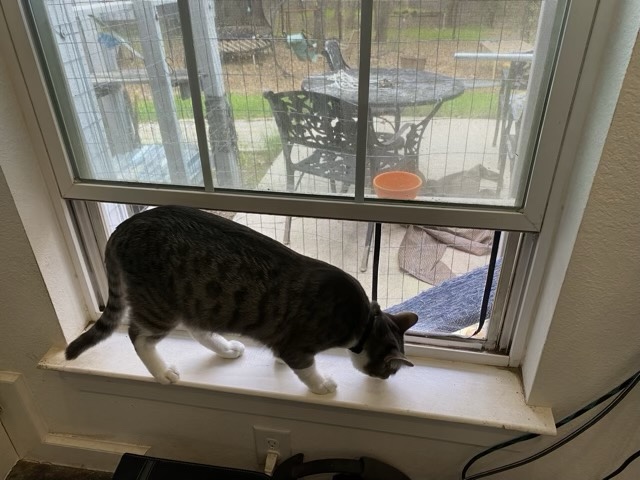
When we built the catio almost six years ago, we set up a window as the access point. To keep the flies out I cut a cat flap in the screen (because window screens are relatively easy to fix). Well, this is fantastic in the summer, but in the winter it gets a bit chilly in the living room. I had been using a scrap piece of clear plastic to block some of the incoming draft, but it was getting old and brittle so I ordered a larger piece. With a larger piece I was able to cover the whole screen and cut a new cat flap.

Photo description: Window screen on the floor covered in clear plastic.

I cut the plastic to size and adhered it to the screen frame with glue dots. I then put it back into the window. It took the cats a couple days to really get used to it, but it makes a huge difference reducing the winter breeze through the room.

Photo description: View from inside the newly lined window screen with Thor the gray tabby on the windowsill investigating the new smells.
Photo description: View from outside the window, actually showing the reflection on the window plastic and Izzy the calico cat being cold and refusing to use the weird flap. I had to carry her inside for a couple of days until she figured it out.

Found!

I knew I had another box of blended fiber by Anniewhere, and I found it while looking for what to spin next in my prepped fiber box! Yay! I think I’ve spun 4 oz of this blend so far, which consists of Merino wool, Blue Faced Leichtester, Alpaca, Tussah Silk, and Finn Wool. I’ve been using it to test out different spindles, so I continued that and dug out a 3D printed Turkish spindle that I bought at a fiber festival. It spins beautifully and even though I have to use a half hitch at the top, rather than a hook or notch, I haven’t been dropping it as much as I feared.

Photo description: From the top, a rosewood ring distaff with cord and handkerchief, a 3D printed Turkish spindle with turned wood shaft and the start of a yarn turtle, bakery box full of carded and blended fiber.

I even used a small ball of a single spun from the same fiber that was left over from plying to start the yarn turtle, and in so doing had a gauge for how thin to spin, and saved more yarn from the scrap bin!

Box modification

We’ve had a small collapsible bench for several years. At one point I added cat flaps to give Sophie the cat a hiding place. Then it underwent a transition to a litter box hide, but the dogs dug at the door flaps trying to get to the sand treats (ew).

Photo description: Fabric box with cat flap that has had the trim torn off.

I have mentioned that Thor, our newest cat, is becoming a big boy, so I modified the bench yet again to allow him access, turning it back into a cat hide. Since the box was constructed to be collapsible, the side panels were split in two. It was an easy modification (much easier than the first flap I cut) to remove one side panel from each end.

Photo description: Same box, same side, but with half the side panel cut away. A gray tabby peers out of the hole.

I put a wool pad inside the box a d Thor’s rectangle bed on top. He is quite pleased with the offering.

Photo description: Gray tabby cat in a rectangular fuzzy bed with rolled sides on the lid of a fabric bench with side holes.

The holes are on opposite sides of the bench to retain some rigidity.

Crochet basket

Here is another good yarn stash buster, a tightly crocheted mosaic basket. I combined the mosaic crochet technique of dipping down with color with an amigurumi technique of using a smaller hook to get a dense fabric.

Photo description: Standing round basket with multi-colored base in rounds, and sides with a two-tone basket pattern, rim finished with an i-cord, sitting on a puff stitch cat mat.

I’ve done a series of video shorts on the stitches starting here.

Here are the instructions:

  • With worsted weight acrylic yarn and a size G hook, double crochet (dc) 10 stitches into a magic ring. Pull the ring tight and finish the round with an invisible join. Weave in end.
  • Start the round by putting the hook through the back loop (bl), yarn over (yo), pull through, and make two chains (ch). Dc in the same space. 2dc in the back loop around for the first row. 1dc bl then 2dc bl for the second row. Dc bl, dc bl, 2dc bl for the third row, etcetera until you have a base the size you want. Each row should have 10 evenly spaced increases. Finish off each row with a invisible join, weave in end. Offset the increases to keep the circle round and not lumpy. You can change colors for each round.
  • Row 1: Turn the work, and work in the opposite direction so the basket pattern faces out. Join color 1 by inserting the hook into the bl, yo, pull up loop, ch1. Single crochet (sc) bl in same loop. Sc bl around. Join with slip stitch (sl st) to first sc.
  • Row 2 and 3: with color 1, ch 1, sc bl in same stitch, sc bl around. Join with slip stitch (sl st) to first sc. Do not cut yarn.
  • Row 4: With color 2, insert the hook into the bl, yo, pull up loop, ch1. Sc bl in same loop. Sc, dc in front loop (fl) of previous row (pr). * skip sc, sc bl, sc bl, dc fl pr. Repeat * around. Drop color 2, pick up color 1, sl st into first sc. Here is a video.
  • Row 5: With color 1, ch1, sc in same stitch. In this row make sure the dc fl pr is in the stitch before the previous row’s dc. Each dc is separated by two sc bl. Continue pattern around. Drop color 2, pick up color 1, sl st into first sc.
  • Row 6: With color 2, ch1, sc in same stitch. In this row make sure the dc fl pr is in the stitch before the previous row’s dc. Each dc is separated by two sc bl. Continue pattern around. Drop color 2, pick up color 1, sl st into first sc.
  • Repeat Rows 5-6 until desired height is reached.
  • I like to finish the top with a three loop i-cord, and found that skipping every fifth stitch gave a nice curve to my basket.
Photo description: Adding a three loop i-cord to the top of the basket, shows the basket side texture.
Photo description: Calico cat in the crocheted basket, she is laying down, it is a tight fit.

Izzy the calico cat reports that I made this basket just a touch too small. She can’t tuck her head in.

Another tatting attempt

I went shopping in my craft room. I was fairly certain I had more than the one tatting shuttle I found, so I perused my shelves and found a baggie with five more shuttles! Score!

Photo description: Ziplock gallon bag with shuttles and bobbins lying on a table in front of a plastic storage bin filled with yarn tools labeled “knitting”.

I have inherited a variety of crafting implements over the years, so shopping in the craft room is a common occurrence. I did manage to make a lopsided star in tatting. Skill development in this area continues.

Photo description: White tatted five-pointed shape with some twisted stitches and curved points lying on my palm.