I pulled out my spinning wheel and realized that it has been a long time since I spun with it. Thor the cat has never seen it in action and he is nine months old. Hm. He was quite fascinated with the process, and after this photo had to be told to knock it off as he went for the wheel and the yarn.
Photo description: Gray tabby looking at a vintage wooden Befra Willy Spinning wheel, specifically at the yarn coming from the orifice.
Awhile ago I made my Dad a nålbound wool cap with ear flaps. He recently had a haircut and found that sleeping in the wool was too hot, so requested a lighter version of the cap to be on his gift list. Nålbinding is inherently warm, and works best with wool or easily felted fiber, so I changed not only the fiber, but the method of construction. I had some very soft 100% cotton yarn, which is difficult to nålbind, but very easy to crochet. My favorite cushy crochet stitch is a half double crochet, so this is what I used to make a spiral round cap with ear flaps. The yarn was self-striping, and I used a shell stitch above the ears to start the flap then decreased before the flap, and increased around the flap. This was very much a stitch by feel construction.
Photo description: Striped crocheted hat with ear flaps on a table.
I had more yarn, so decided to make a second hat. I tried for a smaller size, but half-double crochet hats don’t narrow as quickly as double crochet hats, so the crown size needs to be significantly smaller. I forgot this fact, and ended up with a hat the same size, just without ear flaps. So I sent both to my Dad to try as after haircut sleep caps.
Photo description: Striped beanie style cap on a counter.
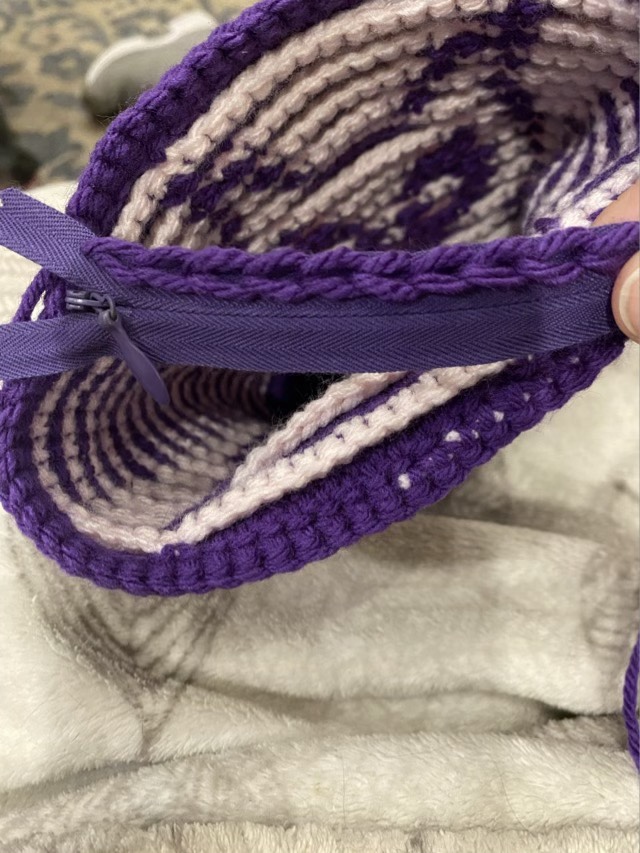
I wanted my owl bag to have a zipper, so I took a zipper from my stash and made a line of chain stitches a yarn needle and matching yarn on each side of the zipper.
Photo description: Purple invisible zipper with one side done with a line of embroidered chain stitch, in front of the bag to be zippered.
I then used a slip stitch to crochet the zipper to the inside of the bag, leaving one row as a lip at the top (mainly to help hide the zipper and stitches.)
Photo description: Finished zipper installation shown from the top of the crocheted bag.
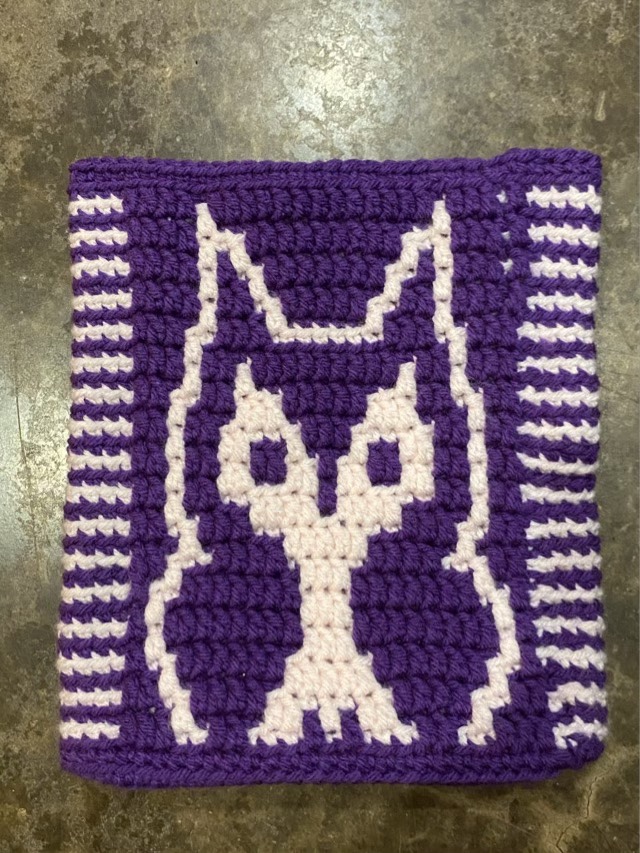
Next for my mosaic crochet experiments is to attempt a chart of an image rather than a repeating pattern. I used the knitting chart app to plot out an owl, with the goal of making a small bag. I used a smaller hook to produce a dense fabric, and made the base as a long oval with increases on the ends in each row.
Photo description: Densely crocheted long oval in the foreground with calico cat and iPad in the background. The oval has been started with a chain, then four rounds added with increases on the ends only.
To make the walls of the bag, I worked in rounds of back loop single crochet, alternating colors, and dipping down with double crochet to block out color in the previous row. My original chart was close, but I had to make some adjustments as I went due to technical aspects. Here is the final chart.
Photo description: 25×28 grid with purple and white owl graphic.
And here is one side of the bag.
Photo description: Mosaic crochet bag on its side showing an elongated owl pattern with pink and purple stripes on the side.
It is still recognizable as an owl, but does have a different look since the mosaic crochet does not produce perfectly square color blocks, at least at my current level of understanding. This phenomenon occurs in charted knitting too. I found the reverse side of the crochet intriguing, as it was almost a negative of the front.
Photo description: Inside out bag with the light pink predominant rather than the purple, and the color blocks are split by row.
Since I worked in the round, I didn’t cut my ends, but took them up to the next row as I circled. This way I had less yarn ends to weave in (yay!)
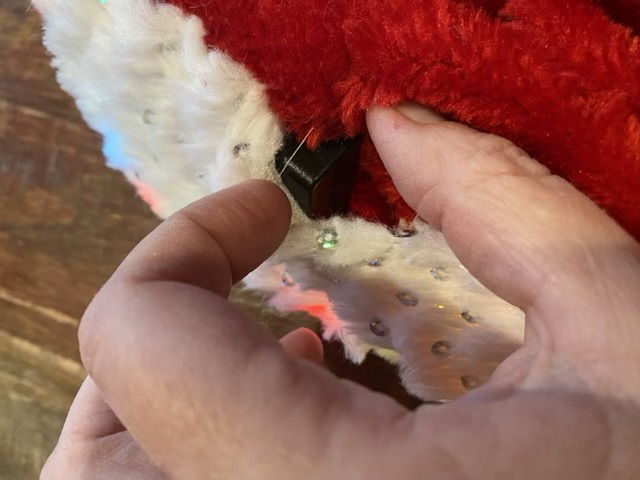
To be festive, I added a string of colored led lights to a sequined Santa hat. The cool part? The lights show through the white faux fur brim. The battery pack fit inside the brim in the back, and I wrapped the lights loosely around, then used white thread to make a basting stitch around the brim to hold everything in. The long stitches will be easy to undo, should I need to remove the lights, and I left a gap just large enough to slide the battery pack out.
Photo description: Santa hat showing a gap in the basting stitch between the hat and brim, with the corner of the battery pack visible.Photo description: Red and white Santa hat with silver sequins on the brim, and colored lights showing through the faux fur, next to a spool of white thread and a needle.