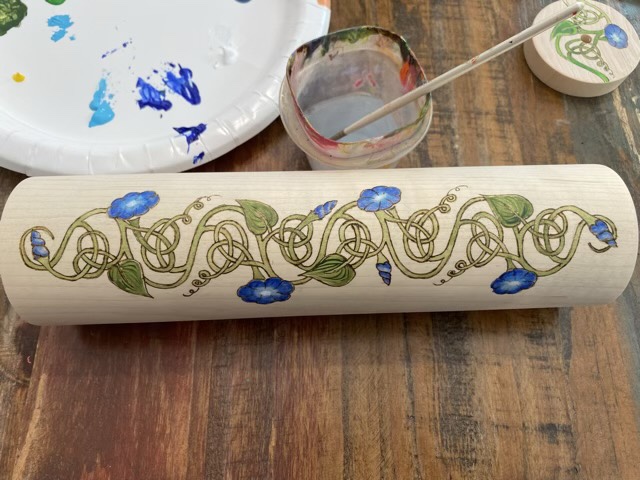
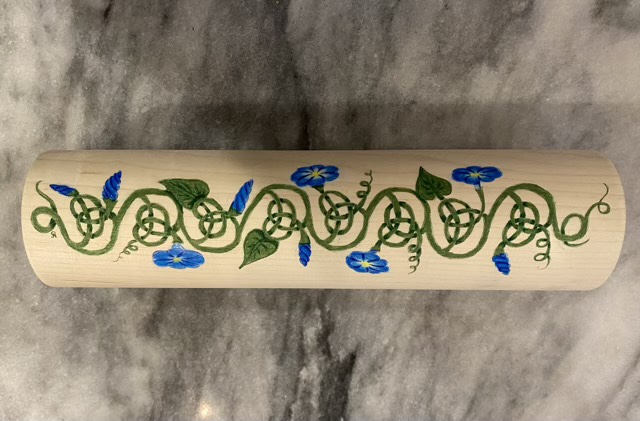
I love, love my wood burned Celtic knot morning glories on my rolling pin, but I feel it could use some color. With the lines solidly established, I felt confident adding some diluted acrylic paint to make the design pop.
Adding acrylic paint to the wood burned design
I know from experience that acrylic paint does well under coats of tung oil, so I am not in fear of losing this design to mineral spirits. But I have a new problem. The old rolling pin handles are a different wood and thus a different shade than the new rolling pin center. Not pleasingly, either. Paint to the rescue. I sanded down the old finish on the handles to prep for paint.
One handle in the original color, one sanded down before painting.
I used the darkest blue acrylic paint that I used in the design to paint the handles. Next step, finishing!
I was gifted a professional wood burner setup last December, and it has been waiting for me to clean up my craft space and find a project to burn. The wait has ended. I liked the pencil drawing on my wooden rolling pin so much I thought wood burning would be the best next step. I read through my instructions and flipped through a detailed book, then practiced on one of the rolling pin’s cut off ends.
Practicing with my new wood burner
I am in love. The wire writing tip for the wood burner is absolutely fantastic. There is a bit of learning curve with temperature settings and speed of burn, but I am loving the results.
Partially wood burned rolling pin
The writing tip burns the line I want without making deep marks that would transfer to dough. The burn is deep enough, though, to hold up to light sanding to remove stray pencil marks. But not so deep that I can’t use a blade to lightly scrape away mistakes.
Wood burn complete
So exciting! This opens up a whole new world for my wood work.
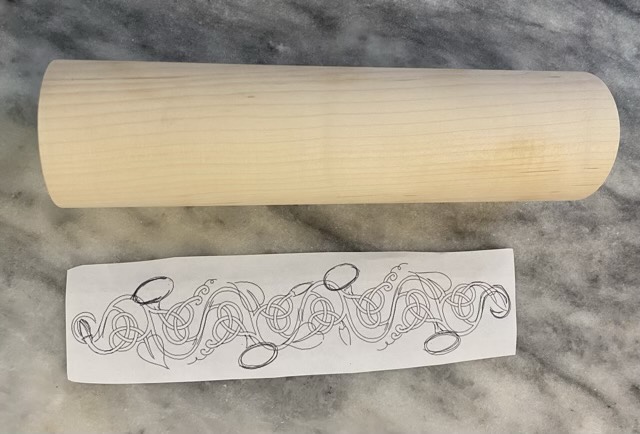
After the disastrous incident with colored pencils (see yesterday’s post), I redrew my Celtic knot morning glories using digital tools (iPad, Adobe Fresco, Apple Pen). Eventually I will make a clean graphic, but for transferring onto my rolling pin, a printed rough sketch works fine.
New design sketch, printed then cut out
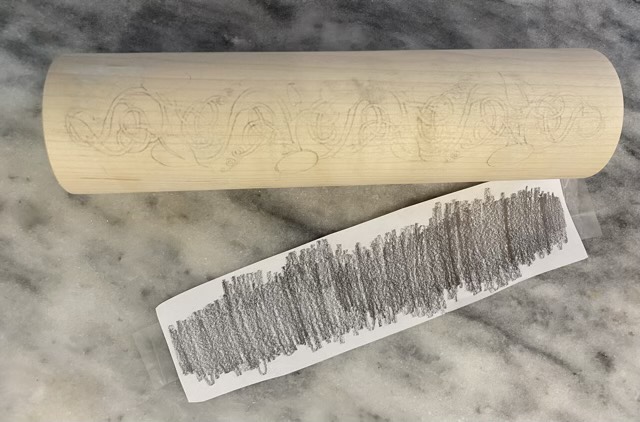
My transfer paper was rather worn out, so I rubbed a #1 pencil across the back of the design to do the transfer.
Pencil lead rubbed on the back of the paper does a fair substitution for tracing paper
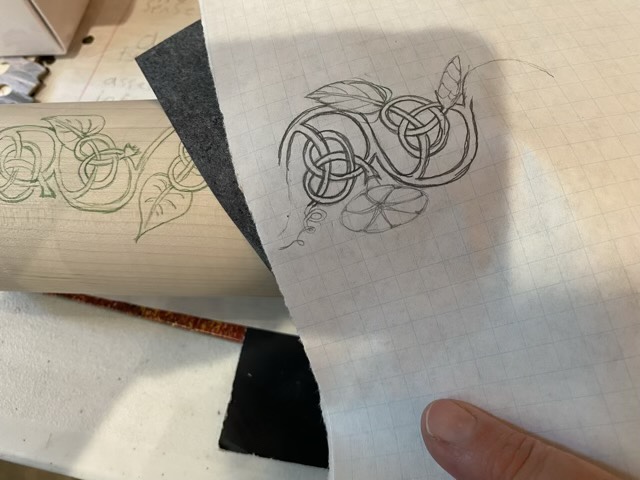
The transfer wasn’t as clear as I’d like, so I went back over the design directly with pencil, using my sketch as a guide.
Transfer clarified with direct pencil marks
This design pleases me, and I quite like the look of the pencil lines. Painting directly with acrylic is still quite intimidating. Hm.
I love morning glories and Celtic knots. Years ago I started on a Celtic knot style morning glory vine drawing. For my refurbished rolling pin, I wanted to add art, so pulled out the sketch and transferred it to the wood with tracing paper.
Transferring a Celtic motif to a rolling pin
Even though I’ve had success with acrylics on wood in the past, I was leery of trying to paint such small precise lines with even a small paintbrush. So I used Primacolor colored pencils instead. The color was gorgeous and the pencils were so nice!
Prismacolor pencils on wood
I was so excited to have my rolling pin done and back in use that, as soon as the drawing was done, I rushed off to start the tung oil sealing process. Tung oil is a food safe sealant and even though it takes some time and many applications, it is my first choice for wood sealant. The first coat of tung oil is diluted 50/50 with mineral spirits to help the tung oil soak deep into the surface of the wood. Mineral spirits dissolve wax. Colored pencils are made with wax. My intricate drawing turned into a heartbreaking smear across the wood. Sigh. I took the rolling pin to the sink and scrubbed off the color with soap and water, then when it was dry, sanded it down again. Though this was a rookie mistake, I did learn (as you do) if I want to seal with tung oil, I can’t use colored pencils. Also, looking at the finished design, I was not happy with the knot orientation. Since I have to redo the art anyway, I will use the opportunity to improve the design. But not today.
I had a logo contest pop up on my feed for Lacewing Creative Retreat in Texas, and decided since I love crafts and a place to dedicate time to finishing a craft seems like a fabulous idea, I would submit a design. I made the top five! They are having FB fans make the final call on their page. (I’m cross-posting this on my business blog too, so I apologize if you follow both and get a double hit!)