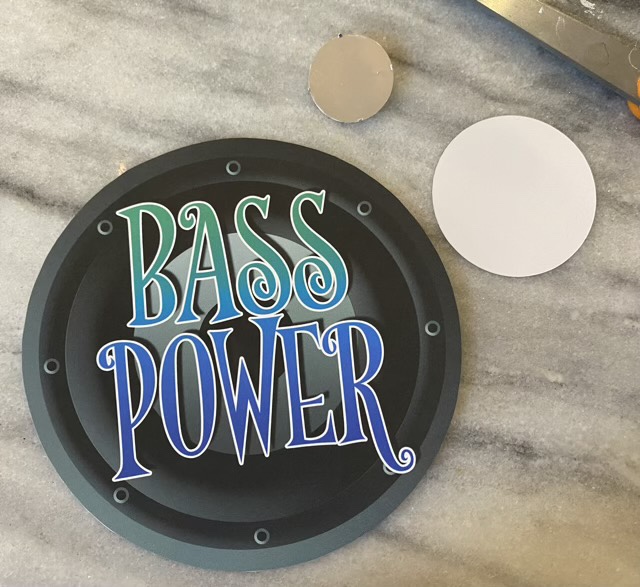
I love singing harmony, especially four-part harmony. I sing with a women’s barbershop chorus and on coaching night we needed a way to distinguish the sections and do a little team building, so I made pins for the basses. I did the design in Adobe Illustrator, printed on card stock, then cut out the 5” circles. To make the circles into pins, I had 1” pin bases in my stash. I cut out 2” card stock circles to hold the pin bases.
Pin parts
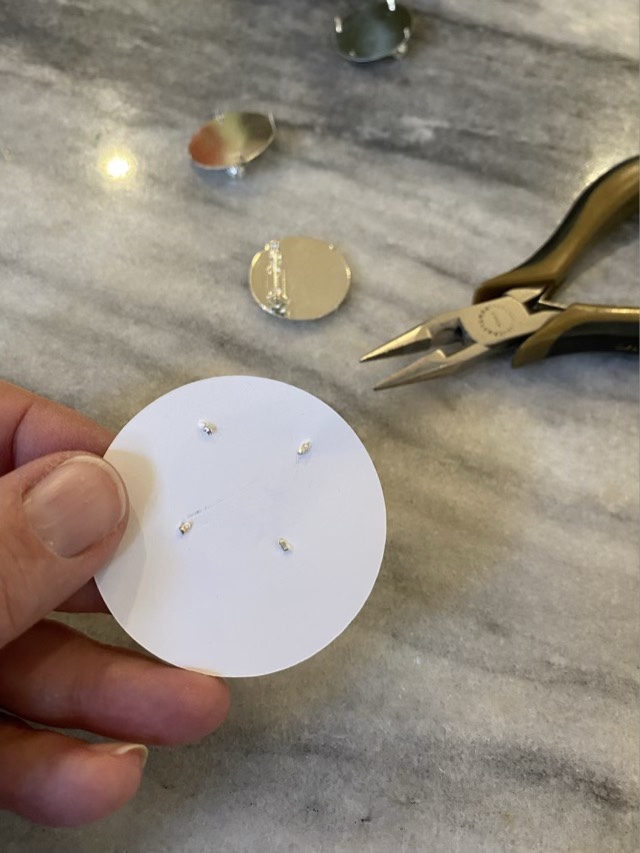
The pin base has prongs, which I poked through the card stock and bent over with pliers to hold it to the smaller circle.
Pin base attached to cardstock
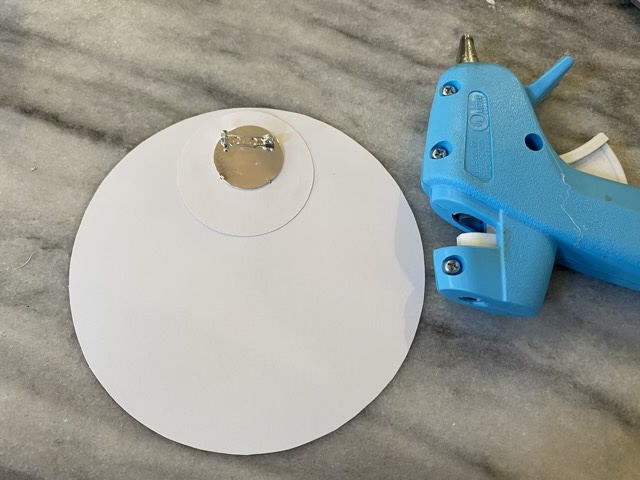
Then I used hot glue to attach the pin and circle to the larger sign.
Hot glue provides a strong bond for cardstock
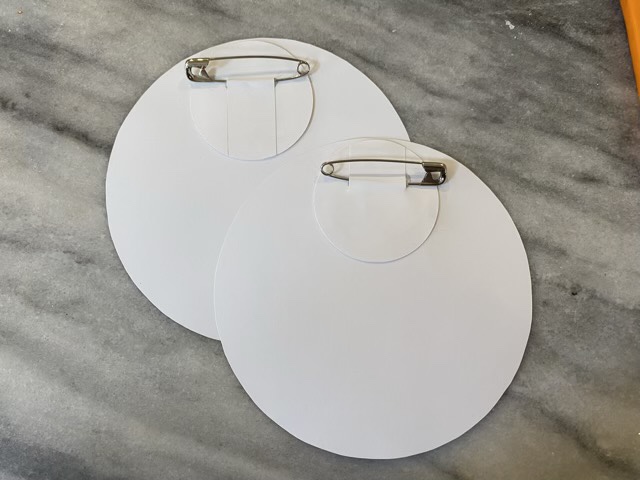
I didn’t have quite enough pin bases, but the technique works great with safety pins as well. I cut two slits in the card stock circle to hold the safety pin, then used hot glue
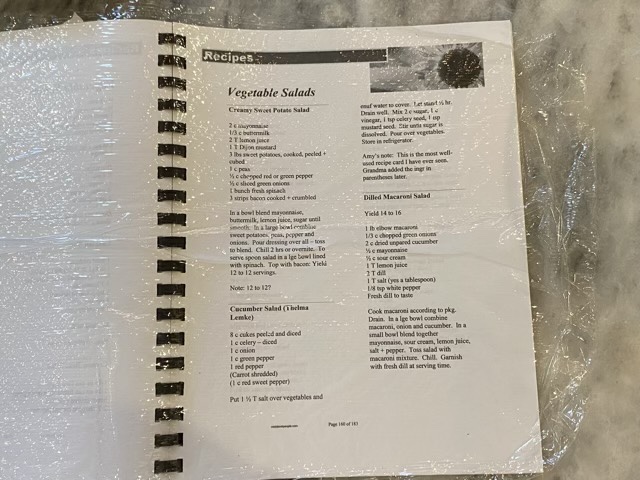
I have a precious recipe book that my sister put together from my Grandmother’s most used recipe cards. I don’t want to spill or drip on it, so I cover the pages with a sheet of plastic wrap to protect it.
Recipe book protected with plastic wrap
The cucumber salad is the recipe I use the most often.
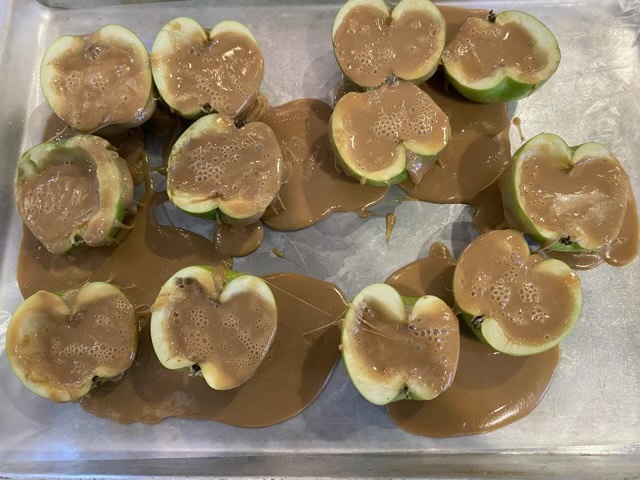
So it seemed like a good idea. (That’s usually how Pinterest fail stories start, don’cha know.) Instead of dipping apples in caramel, hollow them out and fill them with caramel. More caramel! My eldest wanted to try, and volunteered to make the caramel (we did get a kit, but it was still a long time at the stove). The caramel tasted amazing! Apples are actually not hard to hollow out with a regular spoon, it is just tricky to do it neatly. Then the trouble began. Filling the apples made them tip and the caramel run out. Oops. So something to keep the apples from tipping should be added to the list.
Caramel Apple Pinterest fail
Then when the apples were refrigerated to cool the caramel, the apples juiced. The moisture from the apples made the caramel watery and gross. I did go back and read a couple of the “instructions” (neither of which actually tested their recipe (clue #1)), and it was recommended to dry out the apples first. Hm. Even dipping them in lemon juice and drying them off wouldn’t have prevented the sugary caramel from drawing out the massive amount of water from the apples. As for slicing the apples into neat caramel-filled crescents, forget about it. The caramel popped right out of the apple.
Pinterest pic (I would credit it, but it appears in several posts. Hm.)
I’m not sure what magic was wrought to create the pictures, but we didn’t have it. I see now from the picture that the original craftsperson put the apples in a muffin tray. They also added something from a bottle. Hm. Even if I were to find the proper instructions, the ratio of apple to caramel is hard to eat. And apple slices should be refrigerated and caramel should not. So the idea is intriguing but the execution, even when perfect, is a tiny window. Now a good dipped caramel apple can sit on a shelf for days, and be enjoyed at room temperature.
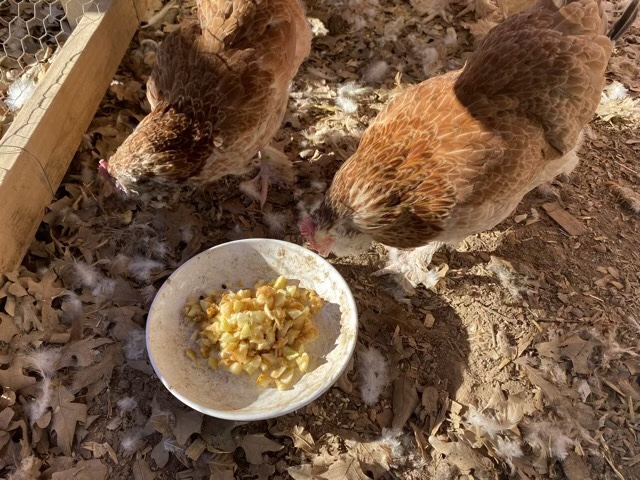
The good thing was that the chickens enjoyed the left-over apple innards! (I did not give them the sugar soaked shells.)
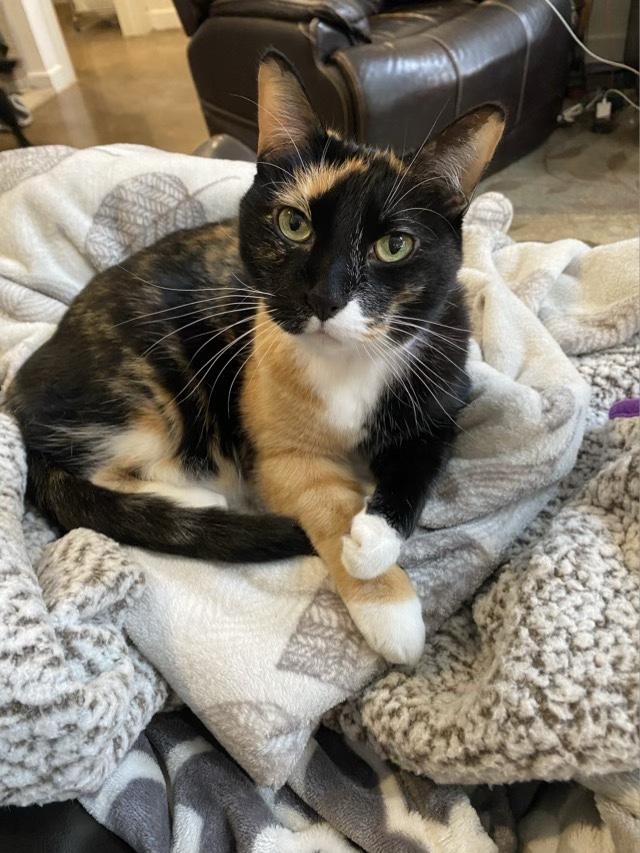
Izzy the cat was very pleased with the pile of fuzzy blankets I put on her (my) chair. What I really should have captured in a picture was how pissed she was when I put all those throws in the wash and she was left with no fuzzy blankets. To make up for it, I laid out a fresh, warm from the dryer blanket, folded in fourths for extra cushiness, on one of her favorite perches. The princess may have forgiven me.