I can’t go up to my craft room without sitting down and sewing on the Singer model 66 sewing machine. Regular use keeps it in working order, moving the oil around the parts and keeping things from seizing up. I just have to plan an extra ten minutes (minimum) when I wander up there to sew a few more scraps together.
Photo description: sewing fabric scraps together on a Singer model 66 from 1916.
I also need to plan extra time to extradite Izzy the cat, who knows as soon as the craft room door is open and makes a beeline for the bed.
Photo description: Pleased calico cat sitting on the day bed.
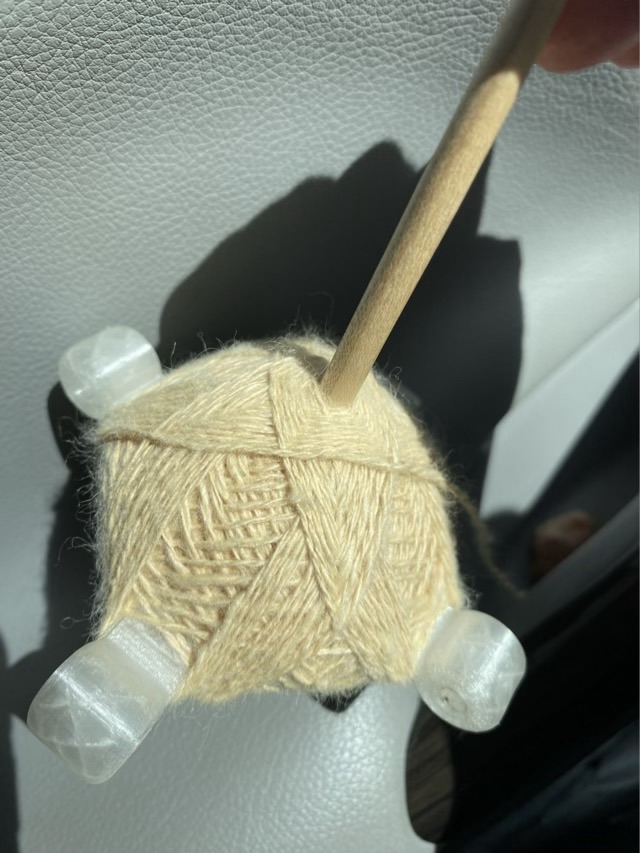
My wrapping on a Turkish drop spindle is getting better. This is two plied soy fiber on a flexible filament 3D printed Turkish spindle that I bought at a fiber festival.
Photo description: geometric patterns created by the over two, under one, wrapping pattern on the yarn “turtle” around the arms of the Turkish spindle.
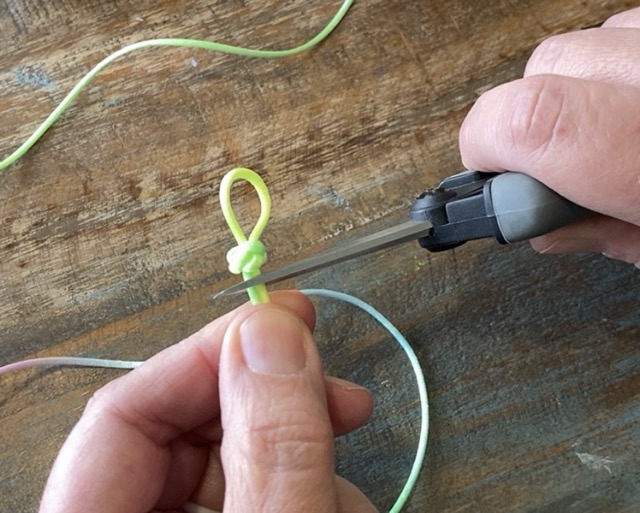
Making Celtic button knots is one of my favorite things to do. I use them for decorative ends, jewelry clasps, and now I have a way of making stitch markers for knitting! It is a great DIY for the stitch marker exchange at your favorite fiber meetup.
Photo description: ten rainbow hued stitch markers made from satin cord, with a decorative knot and a loop.
Here is my DIY video. It is a single take and you can hear my dogs pacing around me in the video, but all the data is there. For those that prefer pictures and words, I’ve provided steps below.
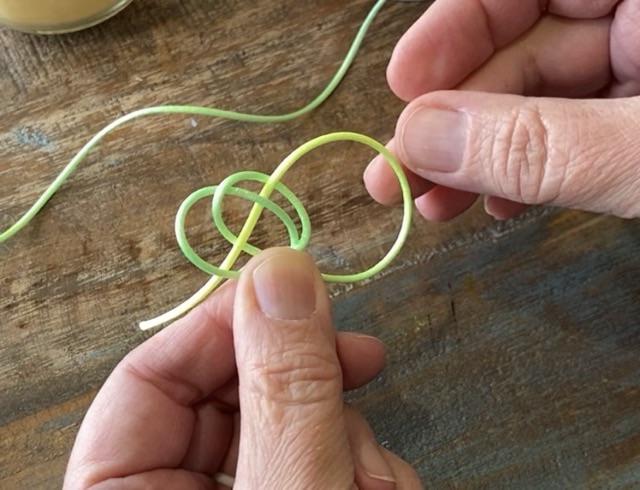
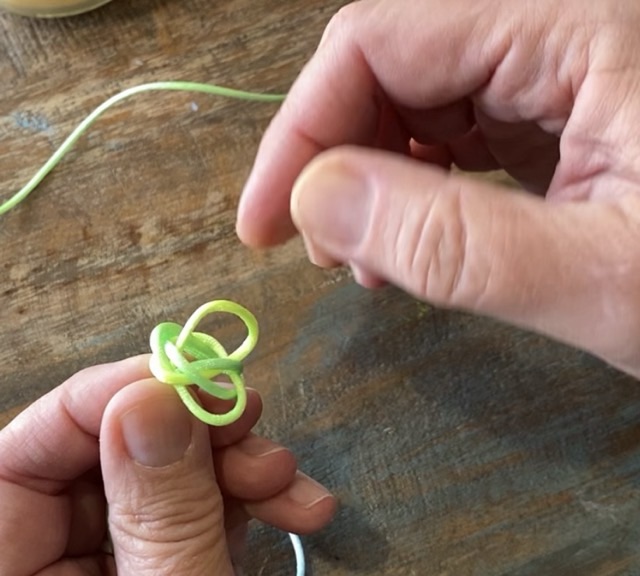
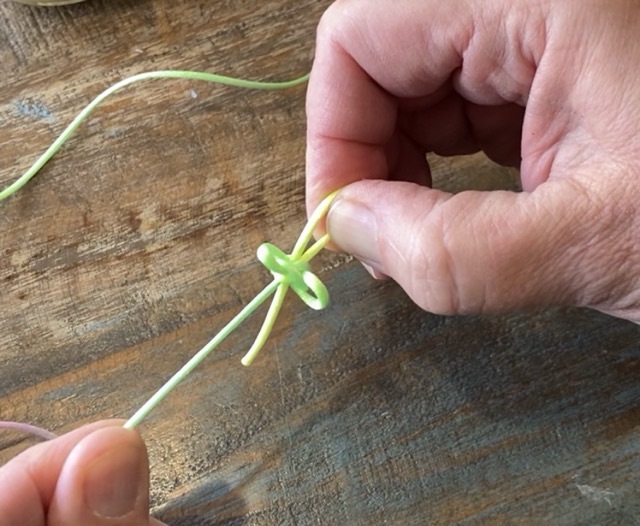
Step 1: With the satin cord, make a counterclockwise loop, pinch with thumb. Make a second loop about the same size, also counterclockwise, laying on top but slightly to the right of the first loop.Step 2: From right to left weave the end over, under, over, under the sides of the two overlapped loops.Step 3: Take the end counterclockwise over the right most loop side, under two strands, and up through the middle. Pull the knot gently but leave the center hole open.Step 4: Put the end through the center hole, but leave a loop. Hold onto the end and pull the knot tight using the cords next to the knot. Step 5: There will be loops in the knot after tightening, gently pull these taught by tracing the cord around the knot. This is the longest part of the process.Step 6: When the knot is tight and neat around the loop, cut off the ends leaving a very short tail. Melt the ends using a candle flame so the ends fuse together. If you are using leather or cotton, glue the ends so they don’t pull out.
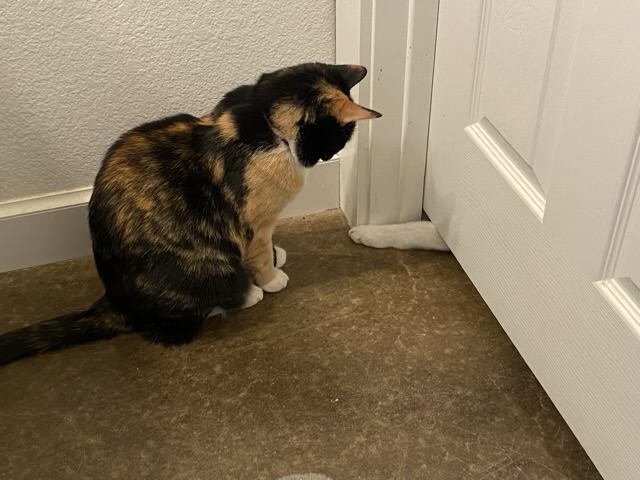
Photo description: Calico cat sitting in front of a door looking down at the white paw sticking out from the other side.
Thor the cat plays a dangerous game, sticking his paws under doors at Izzy the calico. His favorite thing to do is antagonize her, and she doesn’t mess around. She goes for the take down. Right after this picture she went after him, both paws and mouth open. Maybe they are playing? If so, she doesn’t play nice.
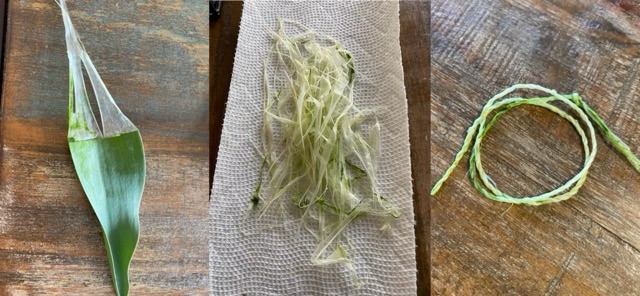
We went to a tulip festival where you could pick your own tulips. We were instructed to grasp the stem at the bottom and pull straight up. We often came away with the whole plant! At home I put the stems and flowers in a vase, and had a whole pile of tulip leaves. Was there fiber there I could harvest? I tried different ways of taking the leaf apart, and found translucent fibrous material on the back of the leaf that I could peel away from the fleshy section. (Many plant fibers are harvested after retting, a process that rots away the non-fibrous material, I wasn’t ready to go that far with these tulips.)
Photo description: from left to right: partially peeled tulip leaf, fibers from leaves on a paper towel to dry, rewetted and twined tulip leaf fiber
I left the fibers to dry for a couple days, then rewetted them one at a time before twining them together. The resulting twine was not very strong, even after drying.
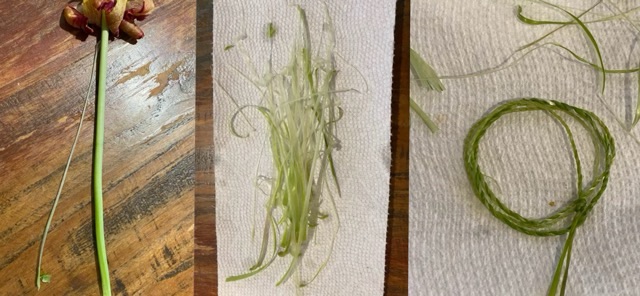
Tulip blooms don’t last long, and I noticed that the stems were starting to curl up at the cut ends. Would the fiber in the stems be stronger? I peeled the outer layer of the stems and let them dry to find out.
Photo description: from left to right: spent tulip with a portion of the stem peeled away, pile of fibers from tulip stems, twined tulip stem fiber.
The fiber from the tulip stems is stronger than the leaf fiber, at least with the method I used to harvest. I can’t imagine a survival situation where I was stranded in a field of tulips and needed rope, but if I were, I’d use the stem fiber, and hope that it didn’t need to bear much weight because it still isn’t that strong. When dry, I can break it with my hands with some pressure. Harvesting the fiber is also tedious and time consuming for small gains, but was an interesting experiment.