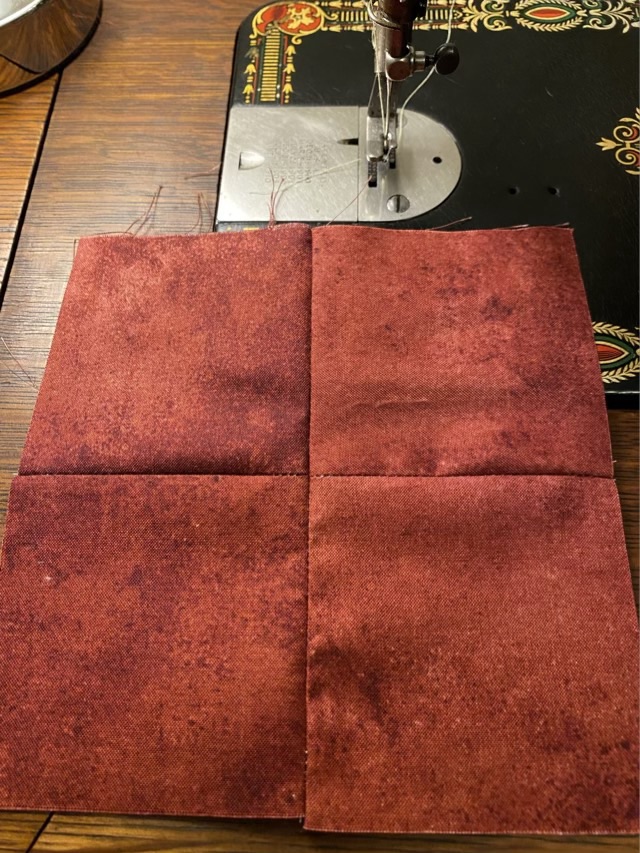
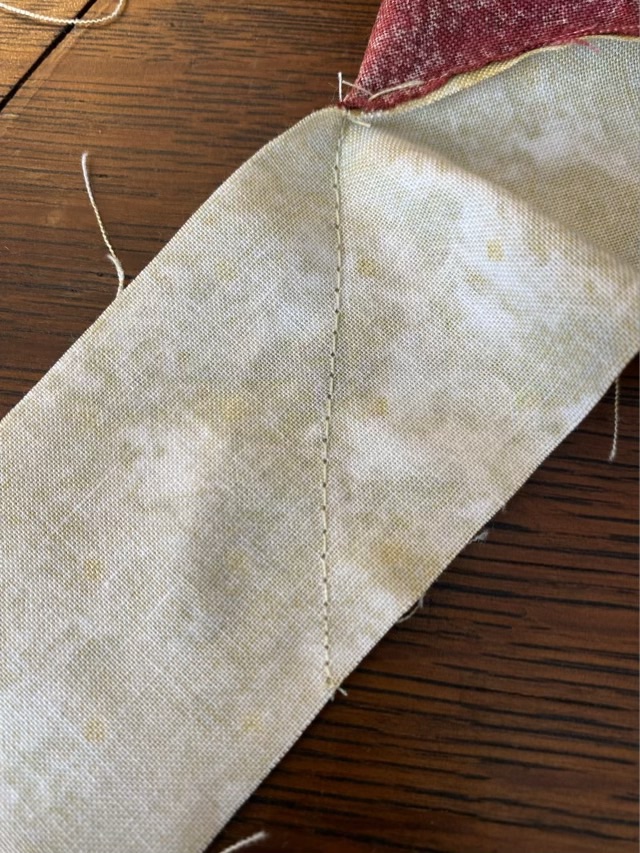
Found!

I knew I had another box of blended fiber by Anniewhere, and I found it while looking for what to spin next in my prepped fiber box! Yay! I think I’ve spun 4 oz of this blend so far, which consists of Merino wool, Blue Faced Leichtester, Alpaca, Tussah Silk, and Finn Wool. I’ve been using it to test out different spindles, so I continued that and dug out a 3D printed Turkish spindle that I bought at a fiber festival. It spins beautifully and even though I have to use a half hitch at the top, rather than a hook or notch, I haven’t been dropping it as much as I feared.

Photo description: From the top, a rosewood ring distaff with cord and handkerchief, a 3D printed Turkish spindle with turned wood shaft and the start of a yarn turtle, bakery box full of carded and blended fiber.

I even used a small ball of a single spun from the same fiber that was left over from plying to start the yarn turtle, and in so doing had a gauge for how thin to spin, and saved more yarn from the scrap bin!

Floof

Both Mr Tom and his Shadow are in full glorious long winter coats. They still come over for brushes, and I caught a couple pictures of their rubbing ritual. This cat greeting behavior is how I convinced Shadow to get brushed, because he would rub on Mr Tom and I would sneak in a brush stroke. For the longest time I think he thought the brush was Mr Tom not me. He knows now though, and likes his coat groomed even more than Mr Tom.

Photo description: Long haired white cat next to a long haired black cat with his tail over the white cat, both walking along a rug covered with leaves.
Photo description: Same two cats, tail positions reversed.

Mama cat is also long haired and performs the greeting ritual. I actually managed one brush stroke along her back, but she is much more wary than even Shadow.

Yes, they are my neighbor’s cats.

Box modification

We’ve had a small collapsible bench for several years. At one point I added cat flaps to give Sophie the cat a hiding place. Then it underwent a transition to a litter box hide, but the dogs dug at the door flaps trying to get to the sand treats (ew).

Photo description: Fabric box with cat flap that has had the trim torn off.

I have mentioned that Thor, our newest cat, is becoming a big boy, so I modified the bench yet again to allow him access, turning it back into a cat hide. Since the box was constructed to be collapsible, the side panels were split in two. It was an easy modification (much easier than the first flap I cut) to remove one side panel from each end.

Photo description: Same box, same side, but with half the side panel cut away. A gray tabby peers out of the hole.

I put a wool pad inside the box a d Thor’s rectangle bed on top. He is quite pleased with the offering.

Photo description: Gray tabby cat in a rectangular fuzzy bed with rolled sides on the lid of a fabric bench with side holes.

The holes are on opposite sides of the bench to retain some rigidity.

Crochet basket

Here is another good yarn stash buster, a tightly crocheted mosaic basket. I combined the mosaic crochet technique of dipping down with color with an amigurumi technique of using a smaller hook to get a dense fabric.

Photo description: Standing round basket with multi-colored base in rounds, and sides with a two-tone basket pattern, rim finished with an i-cord, sitting on a puff stitch cat mat.

I’ve done a series of video shorts on the stitches starting here.

Here are the instructions:

  • With worsted weight acrylic yarn and a size G hook, double crochet (dc) 10 stitches into a magic ring. Pull the ring tight and finish the round with an invisible join. Weave in end.
  • Start the round by putting the hook through the back loop (bl), yarn over (yo), pull through, and make two chains (ch). Dc in the same space. 2dc in the back loop around for the first row. 1dc bl then 2dc bl for the second row. Dc bl, dc bl, 2dc bl for the third row, etcetera until you have a base the size you want. Each row should have 10 evenly spaced increases. Finish off each row with a invisible join, weave in end. Offset the increases to keep the circle round and not lumpy. You can change colors for each round.
  • Row 1: Turn the work, and work in the opposite direction so the basket pattern faces out. Join color 1 by inserting the hook into the bl, yo, pull up loop, ch1. Single crochet (sc) bl in same loop. Sc bl around. Join with slip stitch (sl st) to first sc.
  • Row 2 and 3: with color 1, ch 1, sc bl in same stitch, sc bl around. Join with slip stitch (sl st) to first sc. Do not cut yarn.
  • Row 4: With color 2, insert the hook into the bl, yo, pull up loop, ch1. Sc bl in same loop. Sc, dc in front loop (fl) of previous row (pr). * skip sc, sc bl, sc bl, dc fl pr. Repeat * around. Drop color 2, pick up color 1, sl st into first sc. Here is a video.
  • Row 5: With color 1, ch1, sc in same stitch. In this row make sure the dc fl pr is in the stitch before the previous row’s dc. Each dc is separated by two sc bl. Continue pattern around. Drop color 2, pick up color 1, sl st into first sc.
  • Row 6: With color 2, ch1, sc in same stitch. In this row make sure the dc fl pr is in the stitch before the previous row’s dc. Each dc is separated by two sc bl. Continue pattern around. Drop color 2, pick up color 1, sl st into first sc.
  • Repeat Rows 5-6 until desired height is reached.
  • I like to finish the top with a three loop i-cord, and found that skipping every fifth stitch gave a nice curve to my basket.
Photo description: Adding a three loop i-cord to the top of the basket, shows the basket side texture.
Photo description: Calico cat in the crocheted basket, she is laying down, it is a tight fit.

Izzy the calico cat reports that I made this basket just a touch too small. She can’t tuck her head in.

Mums

I was given a pot of Mums, so decided to plant them in the front garden. If they lived, awesome, if not, at least it was some color for a while. I had some spectacular mums in Colorado, or I remember them as spectacular. They aren’t usually as happy in the Texas heat, but since it is entertaining the idea of winter here, maybe it would work.

Photo description: Yellow and red variegated blooms and bright green compact leaves on a freshly planted chrysanthemum plant.

I was pleasantly surprised that the plant hung in there and finished blooming. On hot days I did have to give it some more water, but overall it did better than I expected. Then it gave me a shock. It started new buds and bloomed scarlet flowers.

Photo description: Single scarlet red mum bloom surrounded by buds bearing the same color.
Photo description: Same mum, but with larger scarlet flowers, and leaves a dusty green., freshly deadheaded.

I thought maybe that there was a different plant growing up from the soil, but when I deadheaded the old blooms it was obvious the bright red flowers came from the same stems. Huh. I did an internet search, and wow, is there a load of garbage about mums out there. So much worthless click bait. I gleaned that this and many other different mum color changes have happened to others, but was not able to find a reliable explanation why. Someone did mention that growers will do things to the plants to make the blooms change color, but most of the answers involved mixing up seed color, which is not the case here.