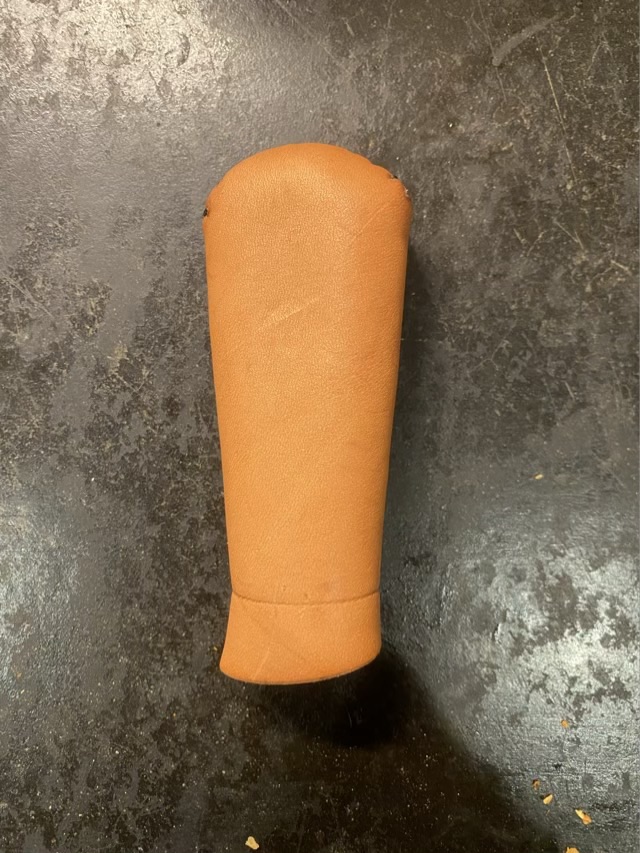
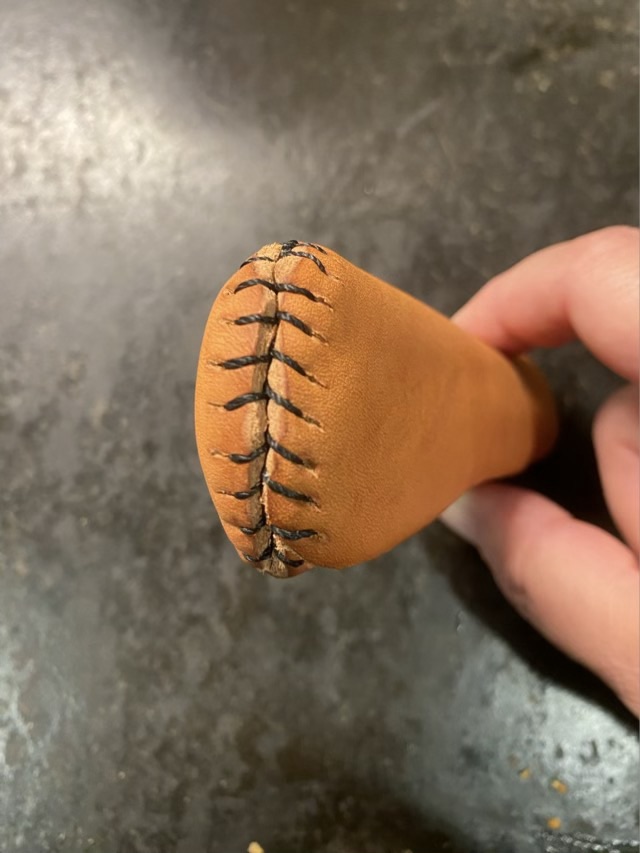
Dad put another leather handle for cast iron pans on his wish list, so I delivered. I used some unfinished tooling leather, cut it to shape, wet it, and formed it to the handle of my Lodge cast iron pan. The design is wrap around, with only the end sewn, so that it can slip on and off. I sewed the ends together with waxed thread using a baseball stitch.
Photo description: dried leather is pan handle, side viewPhoto description: sewn end of the pan handle
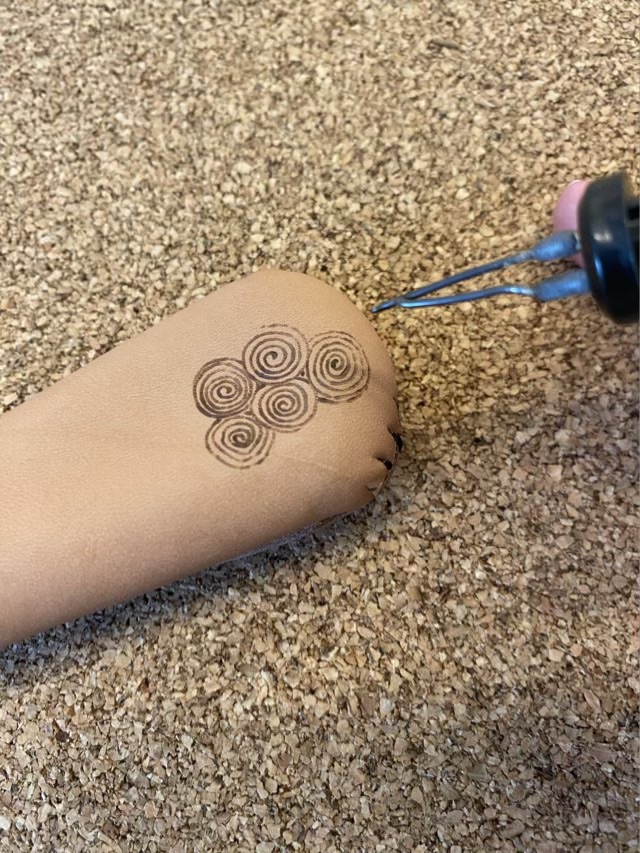
I wanted to add some decoration to this so turned to my pyrography setup.
Photo description: starting the decoration with spirals done with a pen tipped pyrography toolPhoto description: completed pyrography in Zentangle style, with spirals going to stacked tear drops to clustered bubbles finished with parallel lines
I finished the leather with Resolene, a leather conditioner that will protect against food splatters.
The Baize Shetland wool was the first Livestock Conservancy Shave ‘Em to Save ‘Em fiber I purchased. I bought a 13 oz batt, and have been spinning it at demonstrations and fair booths. I’ve been quite remiss in actually making a fiber page! That is now rectified, and this wonderful fiber has a page in my sampler book.
Photo description: Post card from the breeder (top left), single spun and two ply yarn (top right), unspun wool as purchased scoured and carded (middle left), crochet round (middle right), two Shetland lace knit samples (bottom left), nålbinding (bottom middle), and a woven swatch with combed fringe.Photo description: same page, but with the samples folded up to show the descriptions
Shetland wool is a joy to spin, and is definitely on my “will purchase again” list.
I had a bit of a shock looking for eggs in the nesting boxes recently, a very tiny egg.
Photo description: brown egg on a scale reading 17 grams
I found it where the new chickens lays their eggs, so I’m certain it came from one of the Black Star hens. I broke it open and there was no yolk.
Photo description: cracked egg with only egg white, no yolk
Maybe the term fairy egg comes from the thought that something stole the yolk? That would be old school fairy thinking, not the new tiny jingling sparkly fairies. Either way, it is not something concerning for the health of the chicken, just a hiccup in the production system. I do believe I have something going on with egg production, though. With six hens I’m finding maybe one egg a day. It could be that they are all older, 5 years old, well past prime laying. It could be the stress of a new pecking order or the heat. There could also be something stealing the eggs, although not fairies, but likely a snake sneaking a snack.
I had a long period of time in which Sculpey clay was my go-to medium. I found this photo from March 2007 of a thread cutter made from layered oven bake clay surrounding a wheel cutter blade with a brass wire loop. I formed each side of the cutter using a mold that I made, baked it, sanded it, then assembled it, probably with glue (tsk). The loop was properly made with a mechanical connection: prongs that went into holes in the clay.
Photo description: striped red thread cutter with indents to allow access to the blade inside, but protect from accidental cutting
I made several of these at one point. If I were to attempt to make them again, I would make sure there was a mechanical connection holding the blade between the sides. I’m sure the glue didn’t hold up to time or dropping.
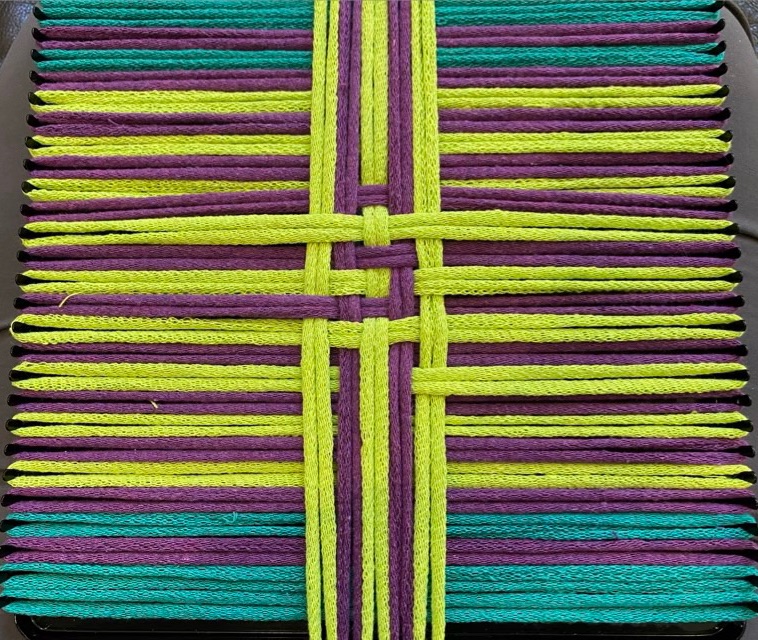
Once again I was down to the last set of cotton loops for a potholder loom. I actually started several patterns gleaned from Pinterest, didn’t like them, and took them apart. Once woven, the knitted cotton loops are quite robust, but if woven and unwoven repeatedly, they have a tendency to unravel. I needed to make a choice and stick to it. I love spirals so decided to tackle a spiral pattern potholder. This was easier decided than done. I did find a picture of a spiral potholder, but couldn’t wrap my head around the sequence of under overs working straight across. I ended up working from the center, slowly adding loops on each side and meticulously tracing the spiral, fixing the woven path as I went.
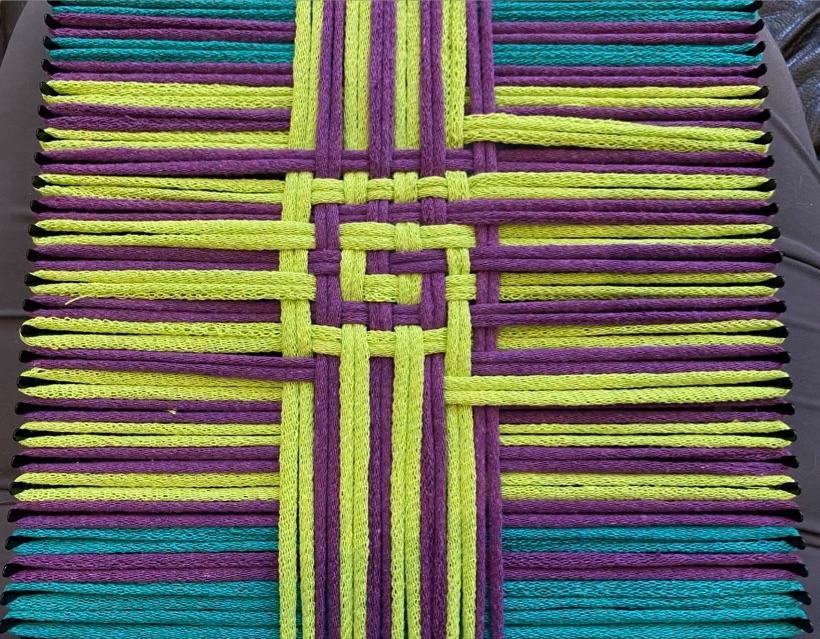
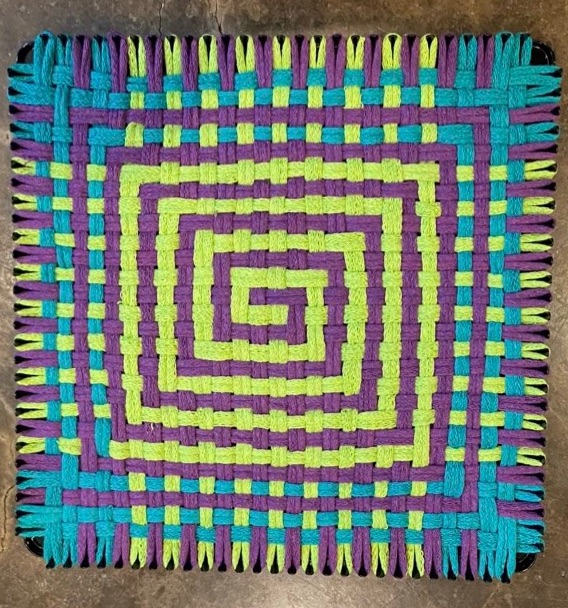
Photo description: potholder pro loom with horizontal loops set and five vertical loops woven together only in the centerPhoto description: more loops added, the spiral growing out from the center of the loomPhoto description: spiral is largerPhoto description: weaving complete, the spiral disintegrates toward the outside because I ran out of purple loops
The key to the spiral is that sometimes loops go over two, rather than one opposing loop. These floats happen at the corners when the color needs to be continuous. The order of loop color is the same for the vertical and horizontal.
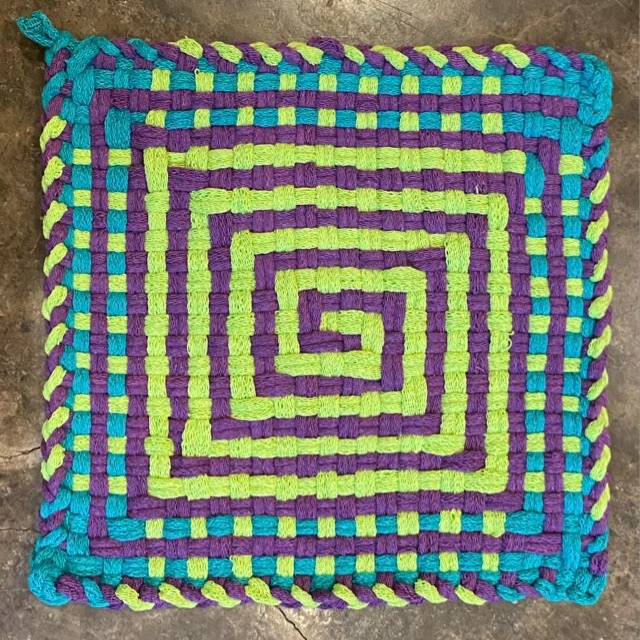
Photo description: finished potholder with chain edge and corner loopPhoto description: back side of the same potholder showing an equally interesting V pattern
I managed the make this whole week a throwback with this series of potholder experiments! The loops are now all gone and the looms have been absorbed into my weaving tool box. I plan to use the pin looms with yarn next. Tomorrow will be an actual throwback post.