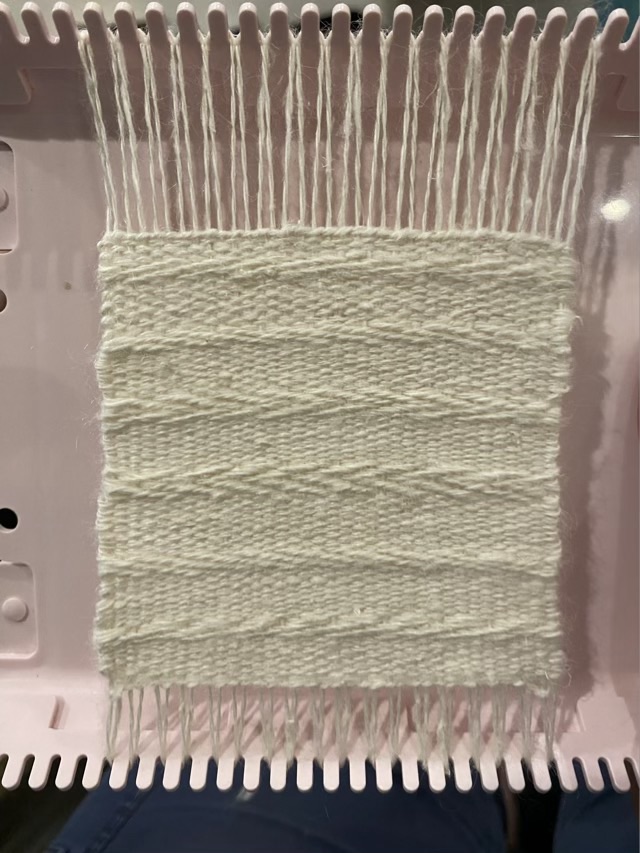
When weaving up a swatch of hand spun pineapple fiber, I decided to do a little experiment with twill. In plain weave, the weft yarn alternates going over or under one warp thread all the way across the fabric. Twill goes over or under multiple strands. You can have a pass go over two under two, or over three under one (denim), or any number of combinations. The next pass has the same pattern, just offset by one strand. The resulting twill fabric has a diagonal line going left or right depending on how the passes are aligned.
Photo description: Clover mini loom with a swatch of woven pineapple fiber showing bands of plain weave, bands of 2×2 twill at at right diagonal, 2×2 twill at a left diagonal, and 2×2 twill chevrons going left and another band going right
This was a fun experiment. I rather like twill, and it is definitely something that requires some brain power.
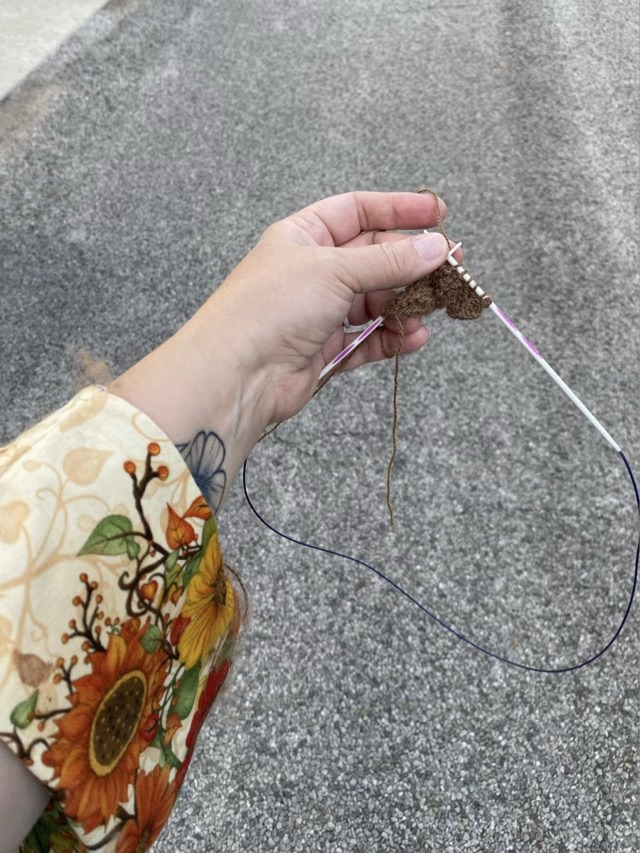
I’ve been spinning on my morning walks for some time. I finished spinning up some camel fiber, but forgot to bring down a more fiber. I didn’t want to clomp up the stairs and wake everyone up at 6am, so grabbed a ball of the plied camel fiber, a crochet hook, and circular knitting needles. It was experiment time. My intention was to make my fiber page swatches as I walked. I know the crochet pattern I use by memory, and I don’t need a pattern for my knit swatch. I think I have crocheted hats while walking before, so finishing up the crocheted camel swatch wasn’t pushing the limits really. I’m pretty sure I haven’t knit on the hoof, but with the circular needles, it wasn’t a problem. I don’t think I would take a large or fiddly project out for a stroll, because dropped stitches would be a nightmare, but a simple patch is easily done.
Photo description: asphalt background, size 2 circular knitting needles with hand spun camel fiber cast on and in progress knitting garter stitch. The ball of yarn is in the colorful bag hanging on my arm.
Things I can do while walking: spin yarn, ply yarn, crochet, knit, nålbind, chew gum. Just not all at the same time. (By the way, I really recommend not chewing gum while working with fiber, stray hairs get everywhere.)
I thought my fiber page CRICUT pattern was available online, but apparently it wasn’t, until now. I have made the cut design public and included a materials list and a link to the blog post that has assembly instructions. The link to the CRICUT Design Space project is here: https://design.cricut.com/landing/project-detail/630799ca21506d2c4716a4c2
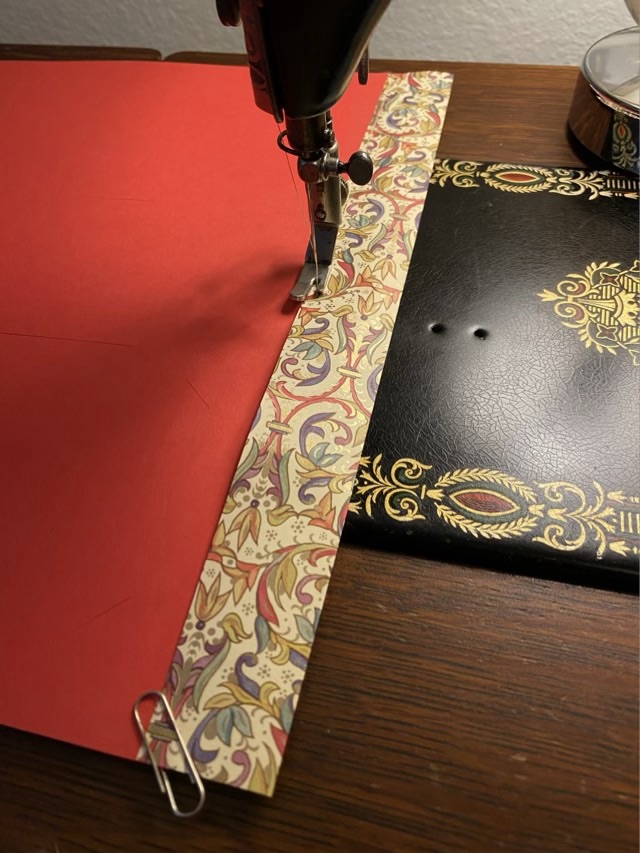
I discovered that the template wasn’t public when I went to make more pages. I assembled my entire stash of 12×12 card stock to make 10 additional pages, which should keep me supplied for a while. I sewed the spine of each page using the 1916 Singer Treadle sewing machine, which did a fabulous job.
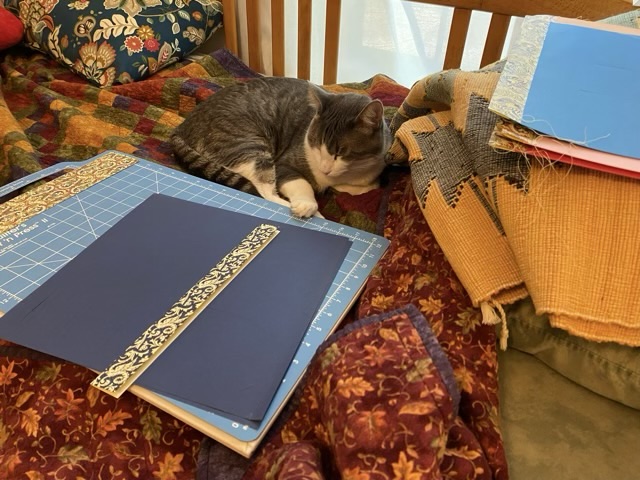
Photo description: sewing a paper spine to card stock with a Singer model 66 treadle machinePhoto description: My supervisor napping: Thor the cat keeping me company during assembly by laying on the bed with the materialsPhoto description: 10 new fiber study pages with colorful end paper spines, additional elements are in a plastic bag to ease storage until they are needed
I only fully assembled two pages with the paper spools and fiber drawer for my two current projects. The rest I left so they would stack easier until the time comes to fill them with fiber.
And here is a cautionary tale: when buying photo albums, pay close attention to the spacing of the holes and size of the album. I have too many fiber pages for one book, so bought a new one but didn’t double check dimensions (I really should know better). I’m also stubborn, and rather than returning the book, I cut new holes. My eventual plan is to make my own covers, but I needed something to protect the pages in the interim. Frustrating.
Photo description: post holes on the new cover and old page don’t match up
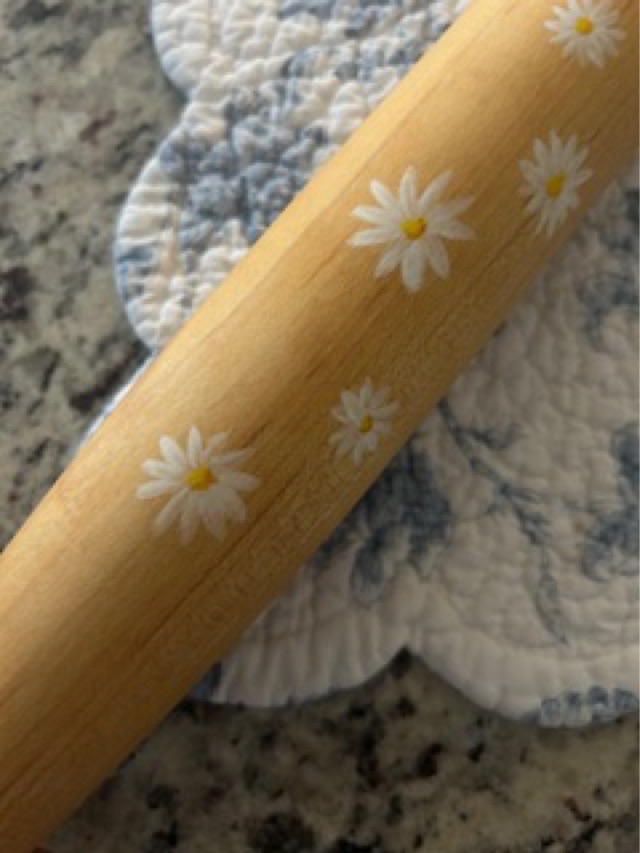
This Throwback Thursday doesn’t go quite so far back, we’re going to December 2021. I made a tapered French style rolling pin for my Mother-in-law and decorated it with painted daisies. I took some in process pictures, but because it was the holidays and I was in a whirlwind, I forgot to take final pictures. My MIL graciously sent me pictures of the rolling pin recently, so now I can share the project on the blog!
Photo description: maple wood tapered end rolling pin fresh off the lathe in 2021Photo description: recent picture of the rolling pin painted with daisies and finished with a food-safe oil and wax mixture (photo credit to my MIL)Photo description: closeup picture of the painted daisies, which really do look better close up (photo credit to my MIL)
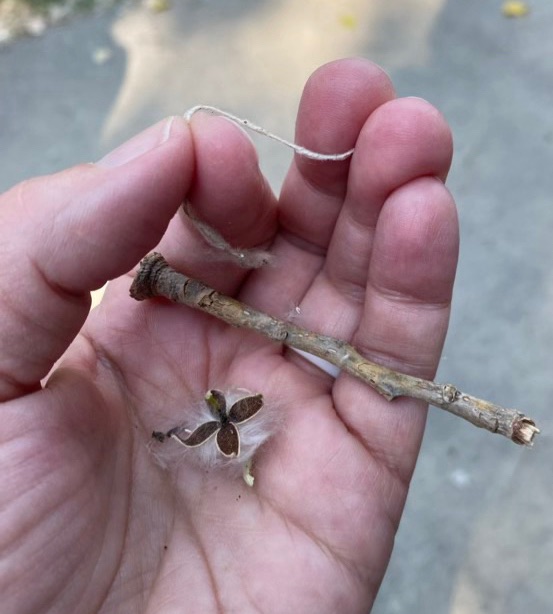
We visited a park recently covered in cottonwood seed fluff; of course I had to try to spin it.
Photo description: the start of twisting cottonwood seed into a singles yarn, with a stick to hold the yarn, and an open seed pod in my hand
There is good reason the cottonwood tree is named after the plant. The fluffy seeds look similar to the fibrous cotton seeds, but are much smaller. The fibers are short, less than an inch, which made spinning a high twist with a stick a challenge. It would have been better to use a tahkli spindle or chakra, which are designed for short fibers, but it was a walk through the park, so I used what was at hand. I also didn’t prep the material at all, but spun from clumps of seeds, taking out non-fibrous material as I went.
Photo description: small amount of single spun cottonwood yarn on a stick (different smoother stick)
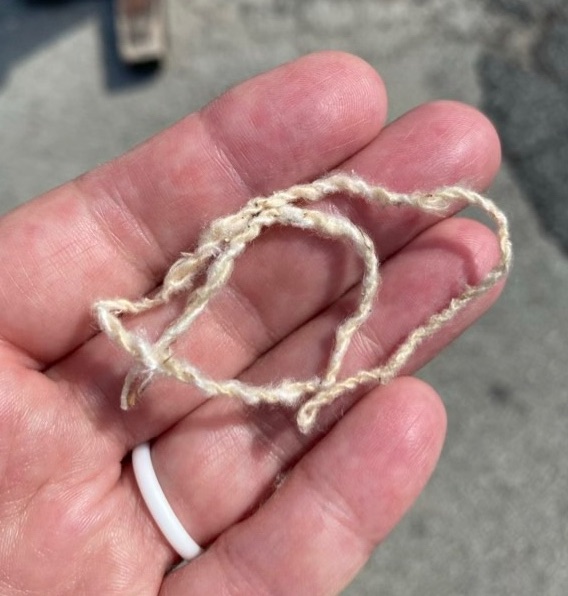
It took me the better part of an hour walking the park to spin a small amount of yarn because I was not getting enough twist in and it kept drifting apart. When we were done at the park, I had my eldest help me fold the single in half, and I added some twist to ply it, just to see what it looked like. It was fluffy and soft with a pretty luster.
Photo description: several inches of two ply cotton wood yarn
Note, I am allergic to cottonwood, but is a nasal allergy, not a contact allergy, so I was quite sniffily by the end. I have spun it now, though, so can stop wondering if it is possible.