Binding the binder

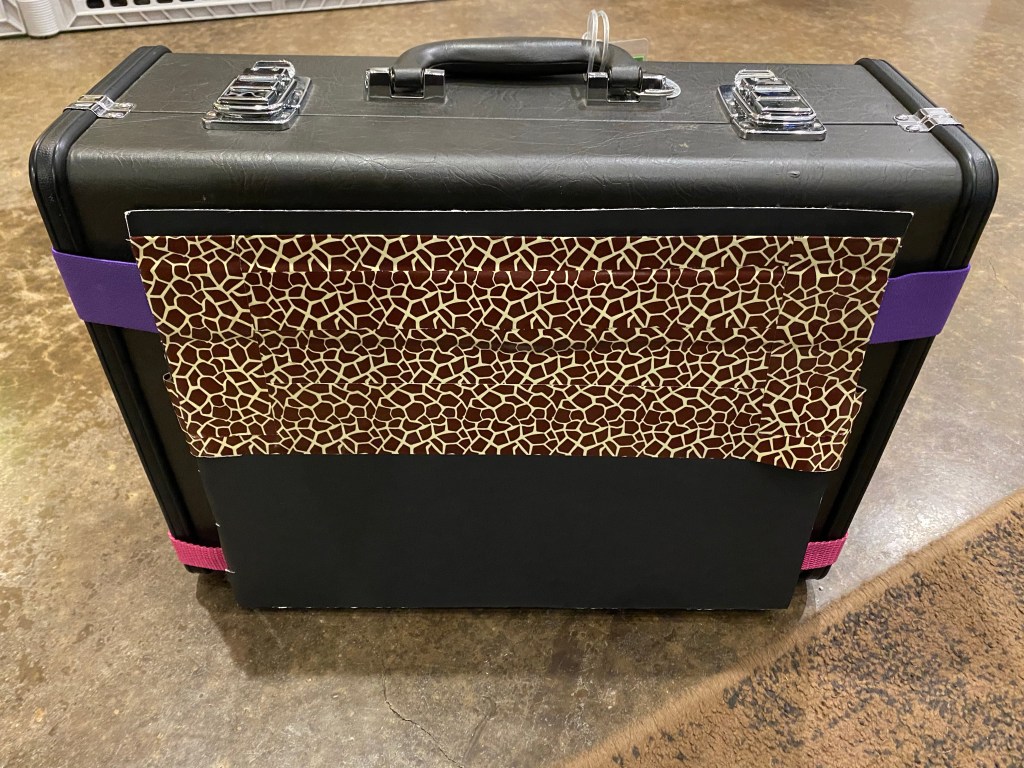
Poster board, duct tape, webbing straps, elastic, thread, and command strips. These are the supplies that went into a new music holder on the side of my youngest’s coronet case. The previous pouch secured with command strips was fine for a music book and a couple loose sheets, but couldn’t hold up to the pressure of a binder. The poor binder hung out in the backpack, lost and forlorn during band practice. To reunite music and instrument, I built a new pouch on the side of the case out of odds and ends from around the house. The bottom of the poster board folder is secured with a strip of pink webbing, looped around the lid, sewn together at the ends, then duct taped inside the folder. The top utilizes wide elastic so it has some give and grip, also sewn together, then duct taped to the outside of the poster board. A couple more pieces of duct tape make guards to keep the binder from sliding sideways, and the command strips now have a minimal job of keeping the whole unit from sagging down the case an inch. The previous command strips removed easily from the case, and they way the new holder is constructed should leave no damage to the case when removed.

Binder holder added to the side of a coronet case

Deer lights

I have been wanting to make a deer holiday statue for many, many years. I have sketches and half-done plans on bits of paper here and there, but during the holidays time is eaten by the busy monster. So this year I broke down and bought one. My husband set it up in the meadow and we plugged it into the outlet he conveniently put on the outside wall of the coop. I love seeing it standing there against the backdrop of the woods!

Purchased deer decoration

We unplugged it for our rain storm, but I worried that I might miss a midnight sprinkle, so when I plugged it back in, I rigged an old plastic food container to offer some protection from the rain. I cut slits in two sides of the base, then snipped out holes at the ends of the slits. Once the cords are in place, putting the lid back on keeps everything together.

Cord ends protected in an old plastic container
The iridescent plastic makes a rainbow shadow!

Maybe someday he’ll have a homemade buddy, but until then, I’m glad he’s standing guard.

Molded cranberry jelly

Well this was fun, I didn’t realize how easy it is to make a cranberry jelly mold. I took a 12 oz package of fresh cranberries, one cup of water, and one cup of sugar, brought it to a boil and cooked it until the cranberries popped. (I did help a few along by pressing them against the side of the pan. It scratches the same itch as popping bubble wrap.) While it was hot, I strained out the hulls, then cooked the liquid some more. I tested periodically by dropping a bit on a cold plate to see if it gelled. Cranberries have enough pectin on their own that I didn’t need to add any thing else (here is an interesting article on that). When a drop gelled, I poured the liquid into silicone rose tea cake molds and put them in the fridge. To get the jelly out, I ran the back of the mold under hot water for a few seconds, until the sides released. I think they turned out quite pretty! I realize that cranberry jelly is not everyone’s favorite thing, but I quite like it. It goes well with ham, and cornbread, and surprisingly, gingerbread.

Cranberry jelly molded rose

Cable ties

I love cable ties. In my book they rank with duct tape and WD-40 in the “it needs to work now” tool box. Yes, they are great for taming and organizing cables, but they also make good chicken leg tags (my hens are color coded). Putting signage up on a wire fence is an easy task with a hole punch and some cable ties. When the rotating wall mount for the webcam no longer holds, cable ties can be used to prop up the weakened part.

Cable ties used to prop up a webcam on the coop

The webcam is still hit or miss on connectivity. Sometimes I am able to connect, sometimes I’m not. Very frustrating. I keep tinkering with it, though.

Image from video cam, when it functions

Fingering weight yarn

My Shetland wool yarn turns out to be just shy of lace weight once I plied it. I wrapped it on my Niddy Noddy and counted 29 wraps per inch (wpi). Fingering weight is 18-30 wpi, and lace is 30-40 wpi. Hm. That is OK. This first batch (or really three, since I was also testing turned spindles as well) is really just to have something to use for Shetland lace knitting samples, to see if that is a knitting I will enjoy.

Shetland wool spun on three different spindles (original on left, two newly turned on the right)
Two-ply yarn on a top whorl spindle
Two-ply yarn closeup on a Niddy Noddy