This spring we planted some red columbines to go with the yellow columbines. The idea is to have a little glade of multi-color columbines under the front trees, since the yellow variety like it so much out there. The blooms on these two color columbines are more downward facing, like little chandeliers. Hm.
I know skinny t-shirts are a thing, but there are times when they are too skinny! My eldest has a favorite print shirt that fits this category, and drives her crazy when it rides up. We did look for a larger size, but it has been a few years since she received it as a gift. To fix it, I found a thin knit fabric that matched the weight of the shirt (and coordinated with the print), then picked out the side seams all the way up, including the sleeve seam. Using a different, well-fitted shirt as a guide, I cut 3” strips of the new fabric and sewed them in using the jersey stitch on my sewing machine.
Skinny shirt given some wiggle room by adding side panels (shown on a dress maker’s form)
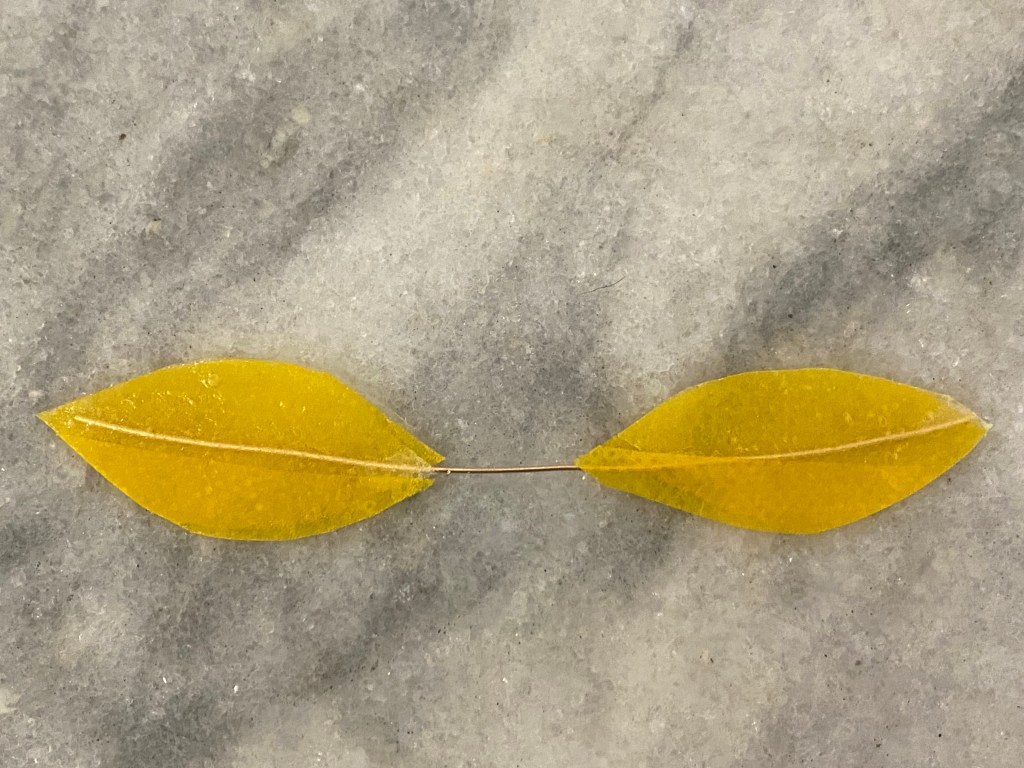
My eldest and I collaborated on a little cosplay project. She needed a crown for an English project (they are reading Julius Caesar by Shakespeare), but wanted to do the diamond circlet from Zelda Breath of the Wild so she could use it again at Halloween. She did not want to do it all in wire and have it get caught in her hair, so we raided the craft room for parts. We found non-woven colored fabric that I originally purchased to make mask filters. Surprisingly, this stuff does not take glue well. We ended up layering Modge Podge with leaf cutouts with a wire in the middle of the sandwich, and leaving it to dry on wax paper; when dry it held together and we could trim the extra dried glue.
Leaf set made of wire, non-woven fabric, and lots of Modge Podge
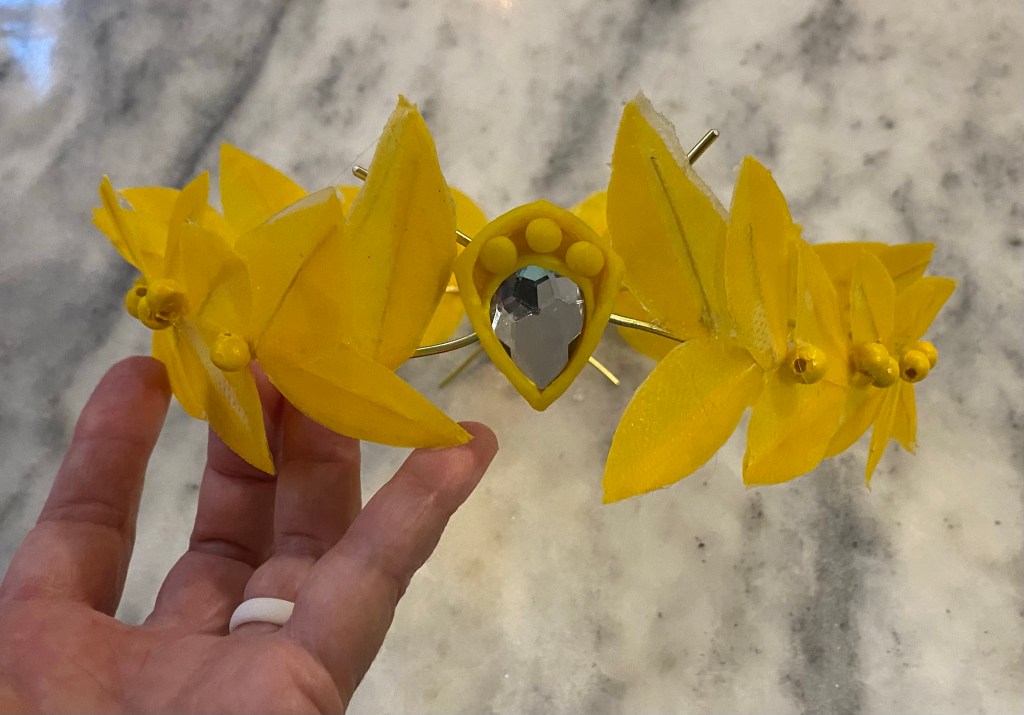
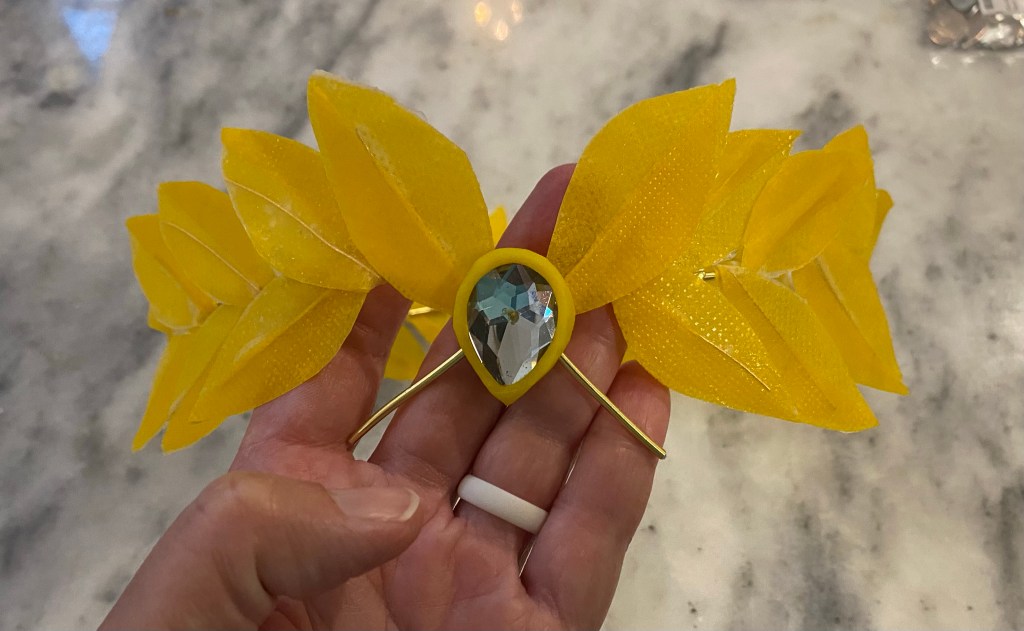
I did order clear tear drop rhinestones, but the frames are made of yellow Playdoh because it dries hard after a couple days. The “berries” are wood beads (that were in my stash) painted with yellow acrylic paint. It makes painting beads easier if you put them on a wooden skewer first, by the way. The crown is gold colored aluminum wire (yup, from the stash). I did use the crafter’s panacea, hot glue, very sparingly (so as to not catch hair) to keep everything in place.
Front of crownBack of crown
Not a perfect replica, but it is light and easy to wear.
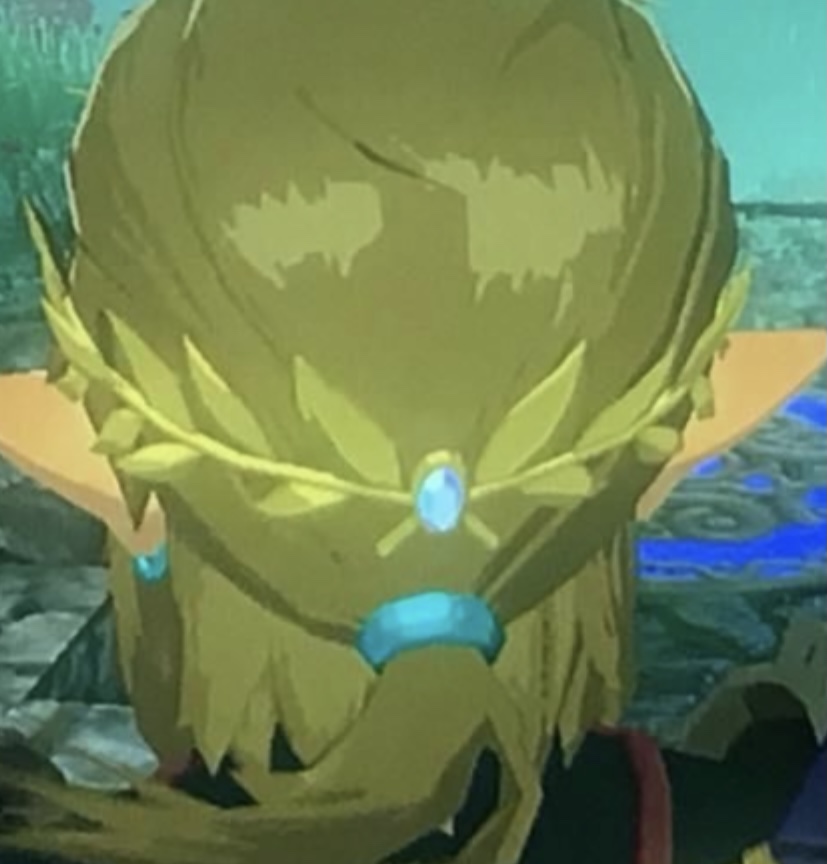
Screen shot of the back of the real circlet from the game
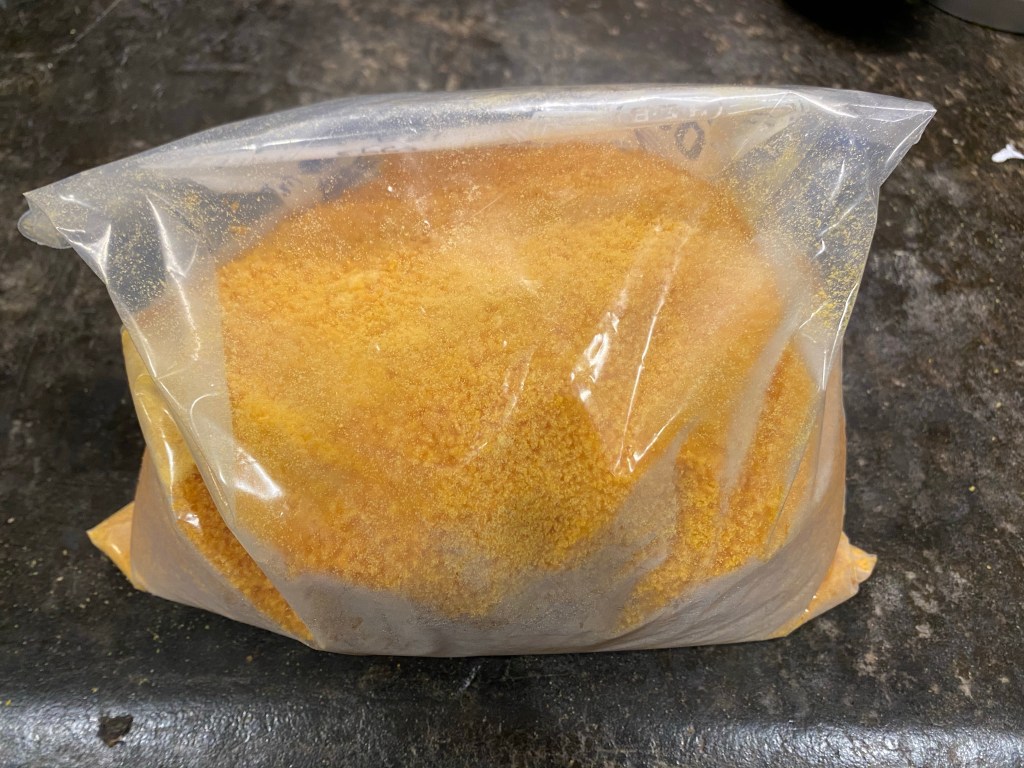
So I can fit 100 eggs into a gallon bag. If they are dehydrated and powdered first! I follow the Dirty Gourmet’s instructions on dehydrating eggs, which works really well. Now to start a new bag and see if I can store enough to make it through the next molt and winter without buying eggs.
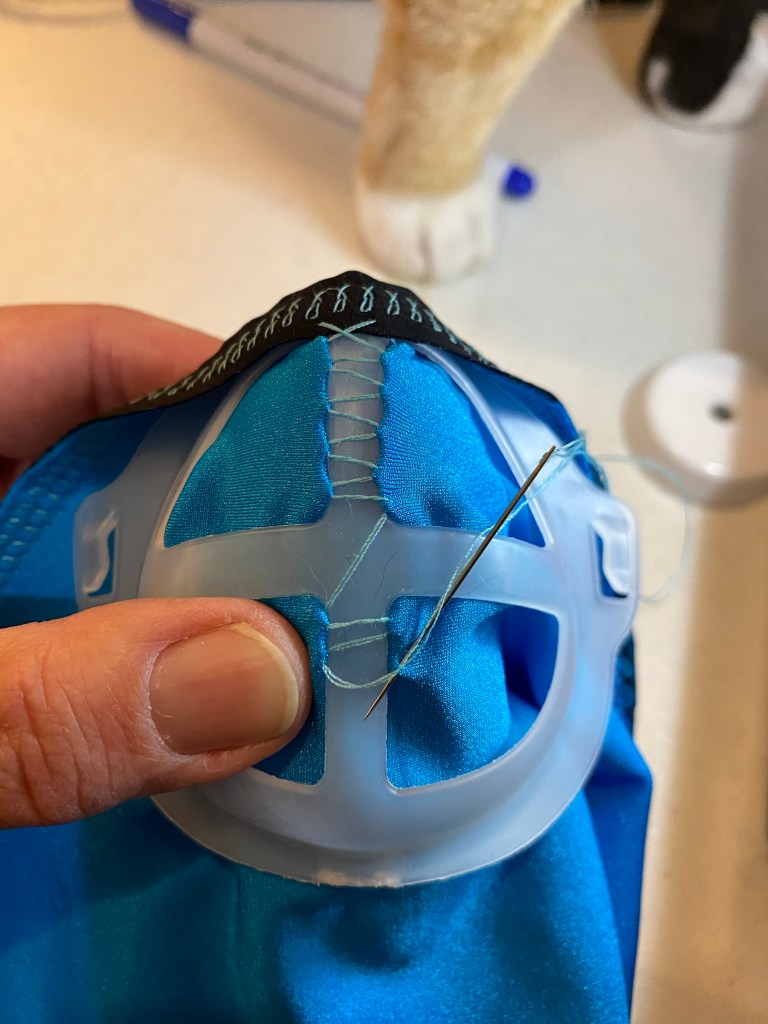
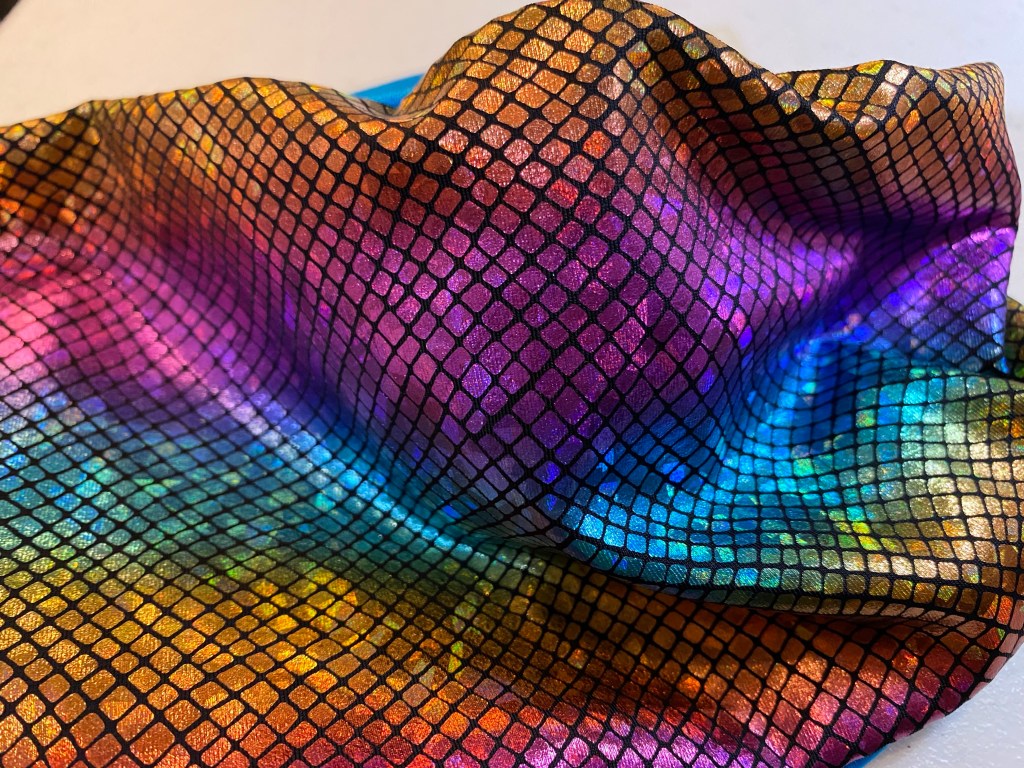
I have an ancient (probably vintage, possible antique, not ancient, but it has been handed down a few times) darning egg with a handle that sits in the bottom of my sewing box. I am making my youngest a new set of masks since she has grown and the old ones are getting a bit snug. She likes the gaiter style, but with a frame sewn in to make it easier to breathe. I use swim material because it dries quickly, and I double layer it. This time she requested material that was “pink and blue”, she is quite fond of the rainbow mermaid fabric I obtained! Because I didn’t want rainbow sparkles against her skin, I made the lining with plain blue fabric.
Sewing the frame to the lining fabric
Here is where the darning egg comes in. Sewing the frame to the fabric is a bit tricky, but the smooth wooden tool fits nicely under the fabric and frame and makes it much easier to stitch. First I use the sewing machine with a jersey stitch to secure the top edge, then I hand sew in in the frame before machine sewing the bottom edge. I turn the mask right side out and sew the back seam.
Darning egg with handleShiny rainbow mermaid fabric