DIY spinning support bowl

My little ceramic dish was OK for supported spindle spinning, but most of the support bowls I’ve seen (yes, on web searches and YouTube videos), are nice little round concave weighty things. Some are quite pretty! But I did notice that the bottom of an aluminum can is about the same size and shape.

Aluminum can bottoms

I cut off the bottom of two aluminum cans with a utility knife, then neatened the edge of one with a scissors. (My kitchen scissors actually have a tiny serration, which makes the edge of the aluminum not so sharp.

Crimping one can

Using pliers and a half-twist motion, I crimped the edge of one can bottom. This helps it fit inside the other can bottom nicely. I learned this technique from a video where they used aluminum can bottoms to make toy car wheels. Cool. This is also how I made my first whorl.

Play dough inside one can bottom

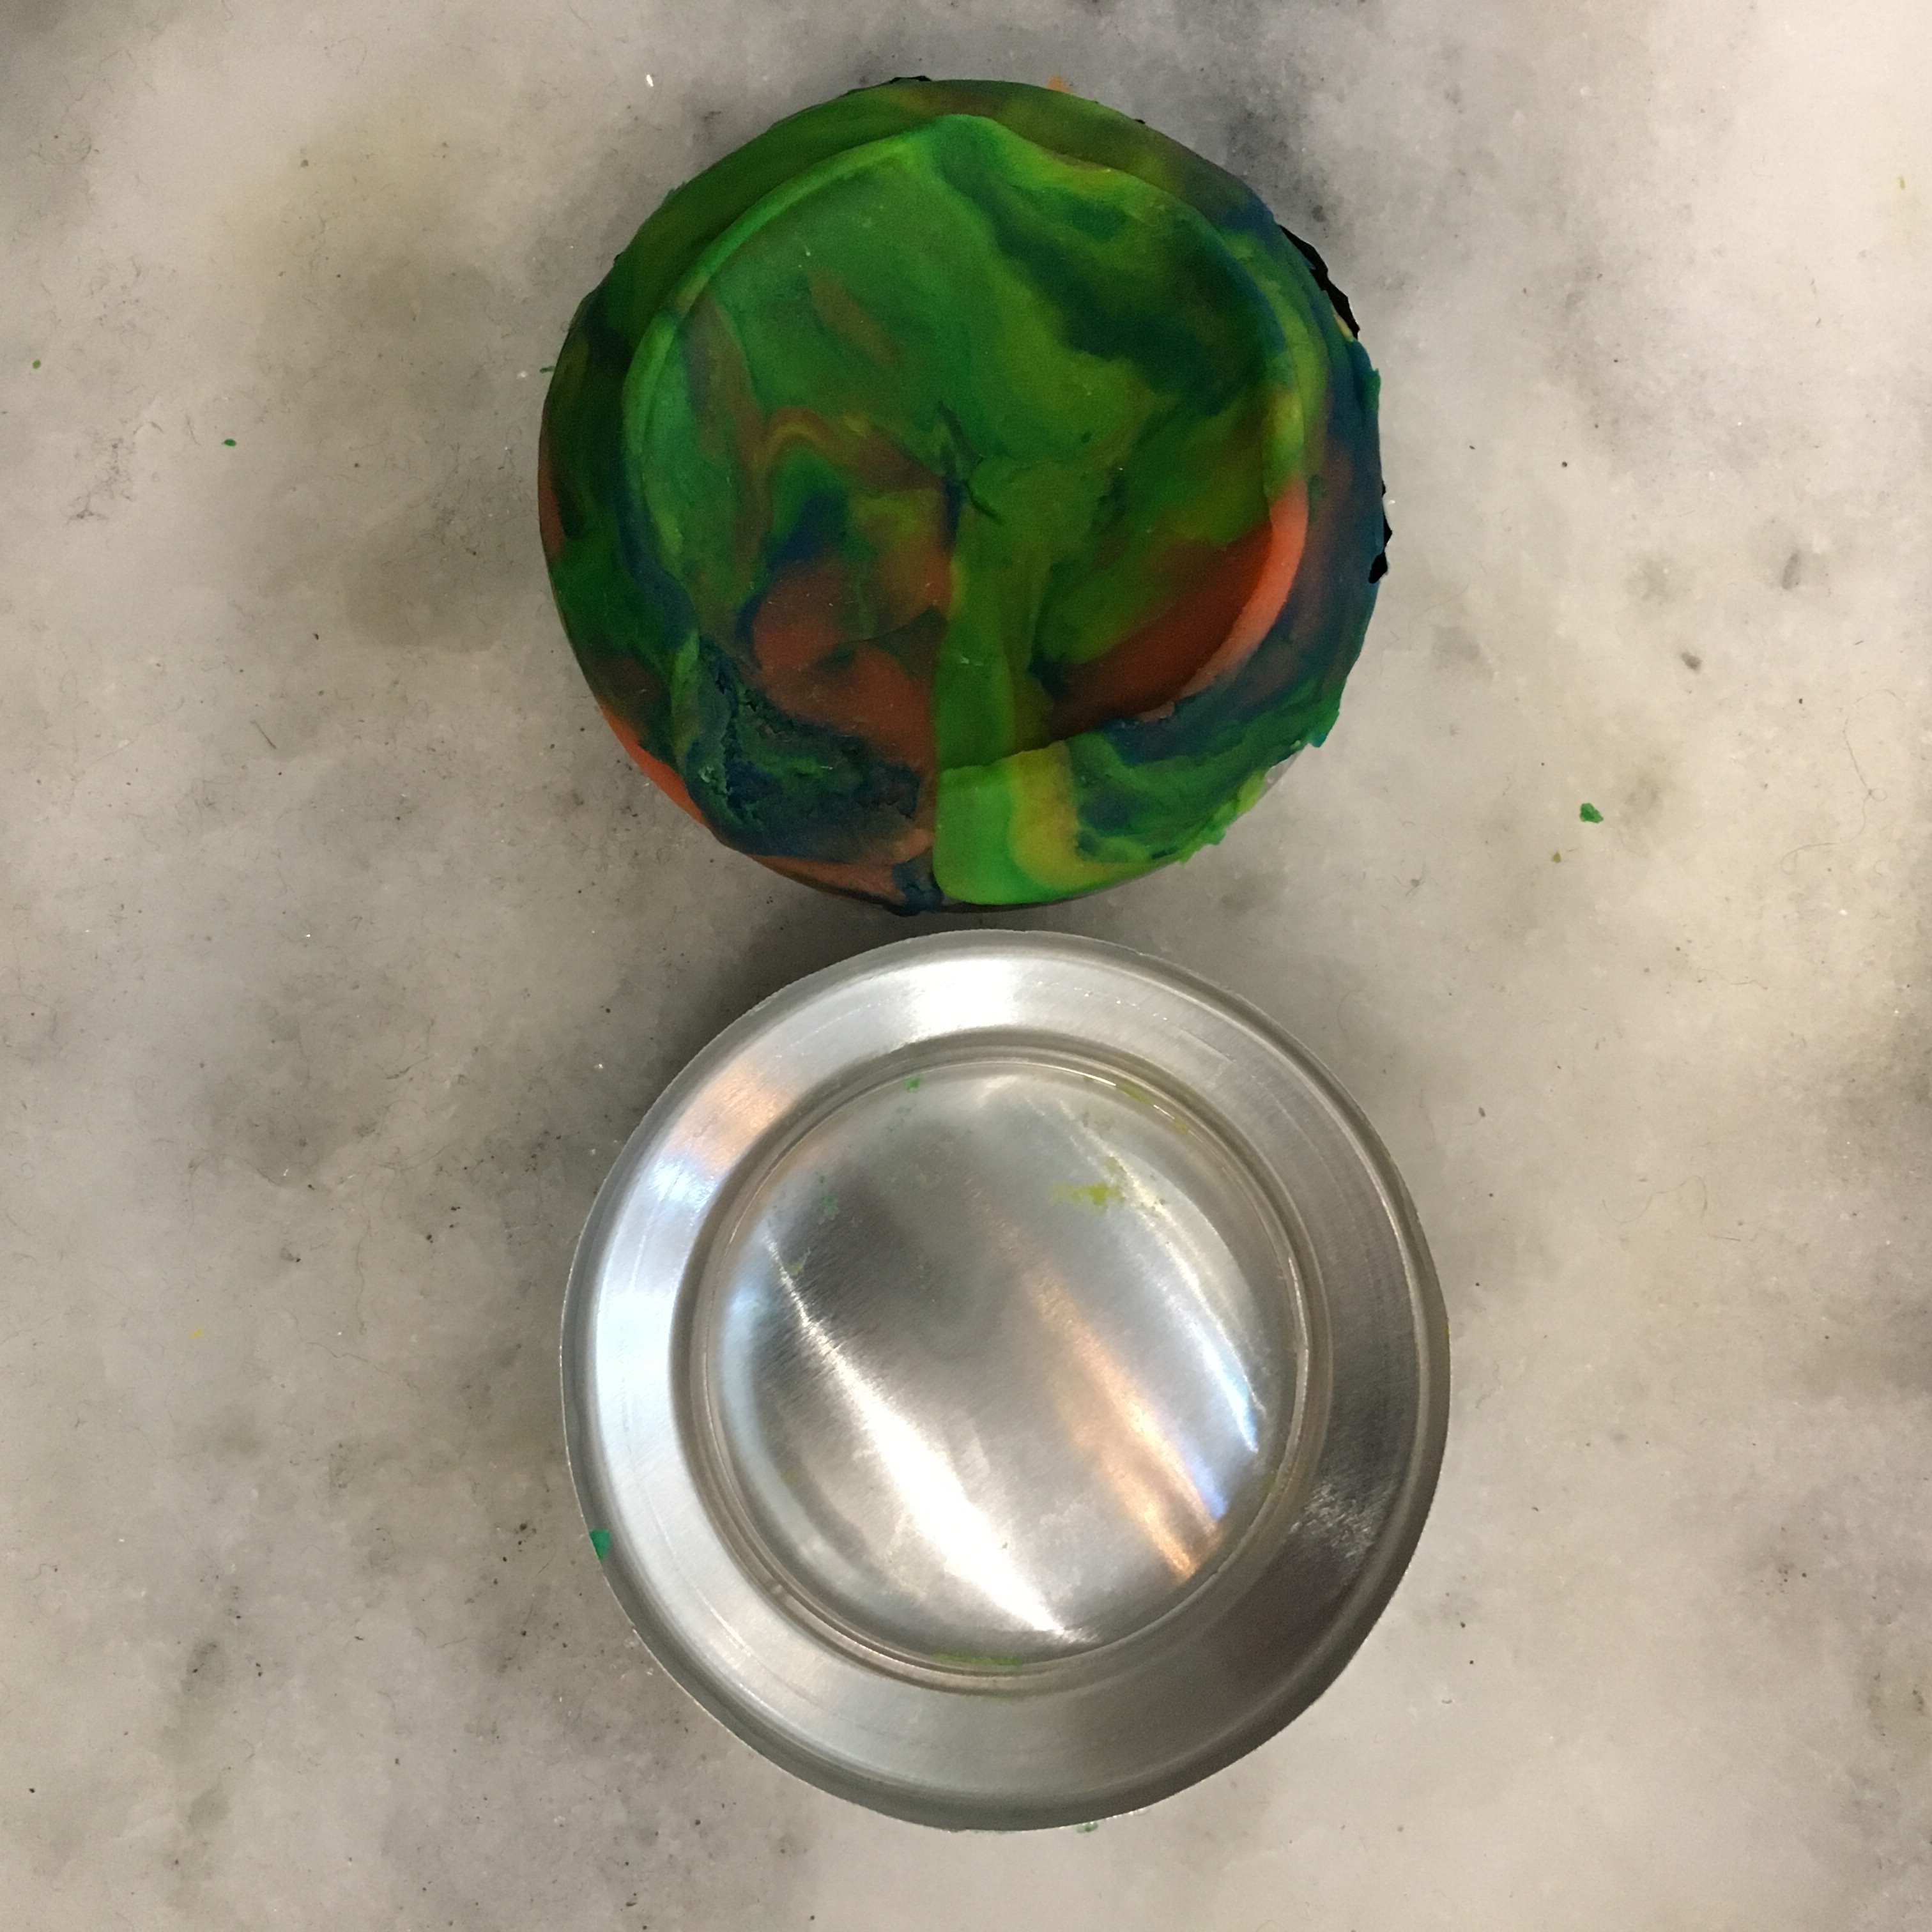
I then filled the crimped side with used play dough, and pressed the two halves together. My play dough is an off brand and quite sticky, so I didn’t do anything else to get the two sides to stick together.

Final clean up with #0000 steel wool

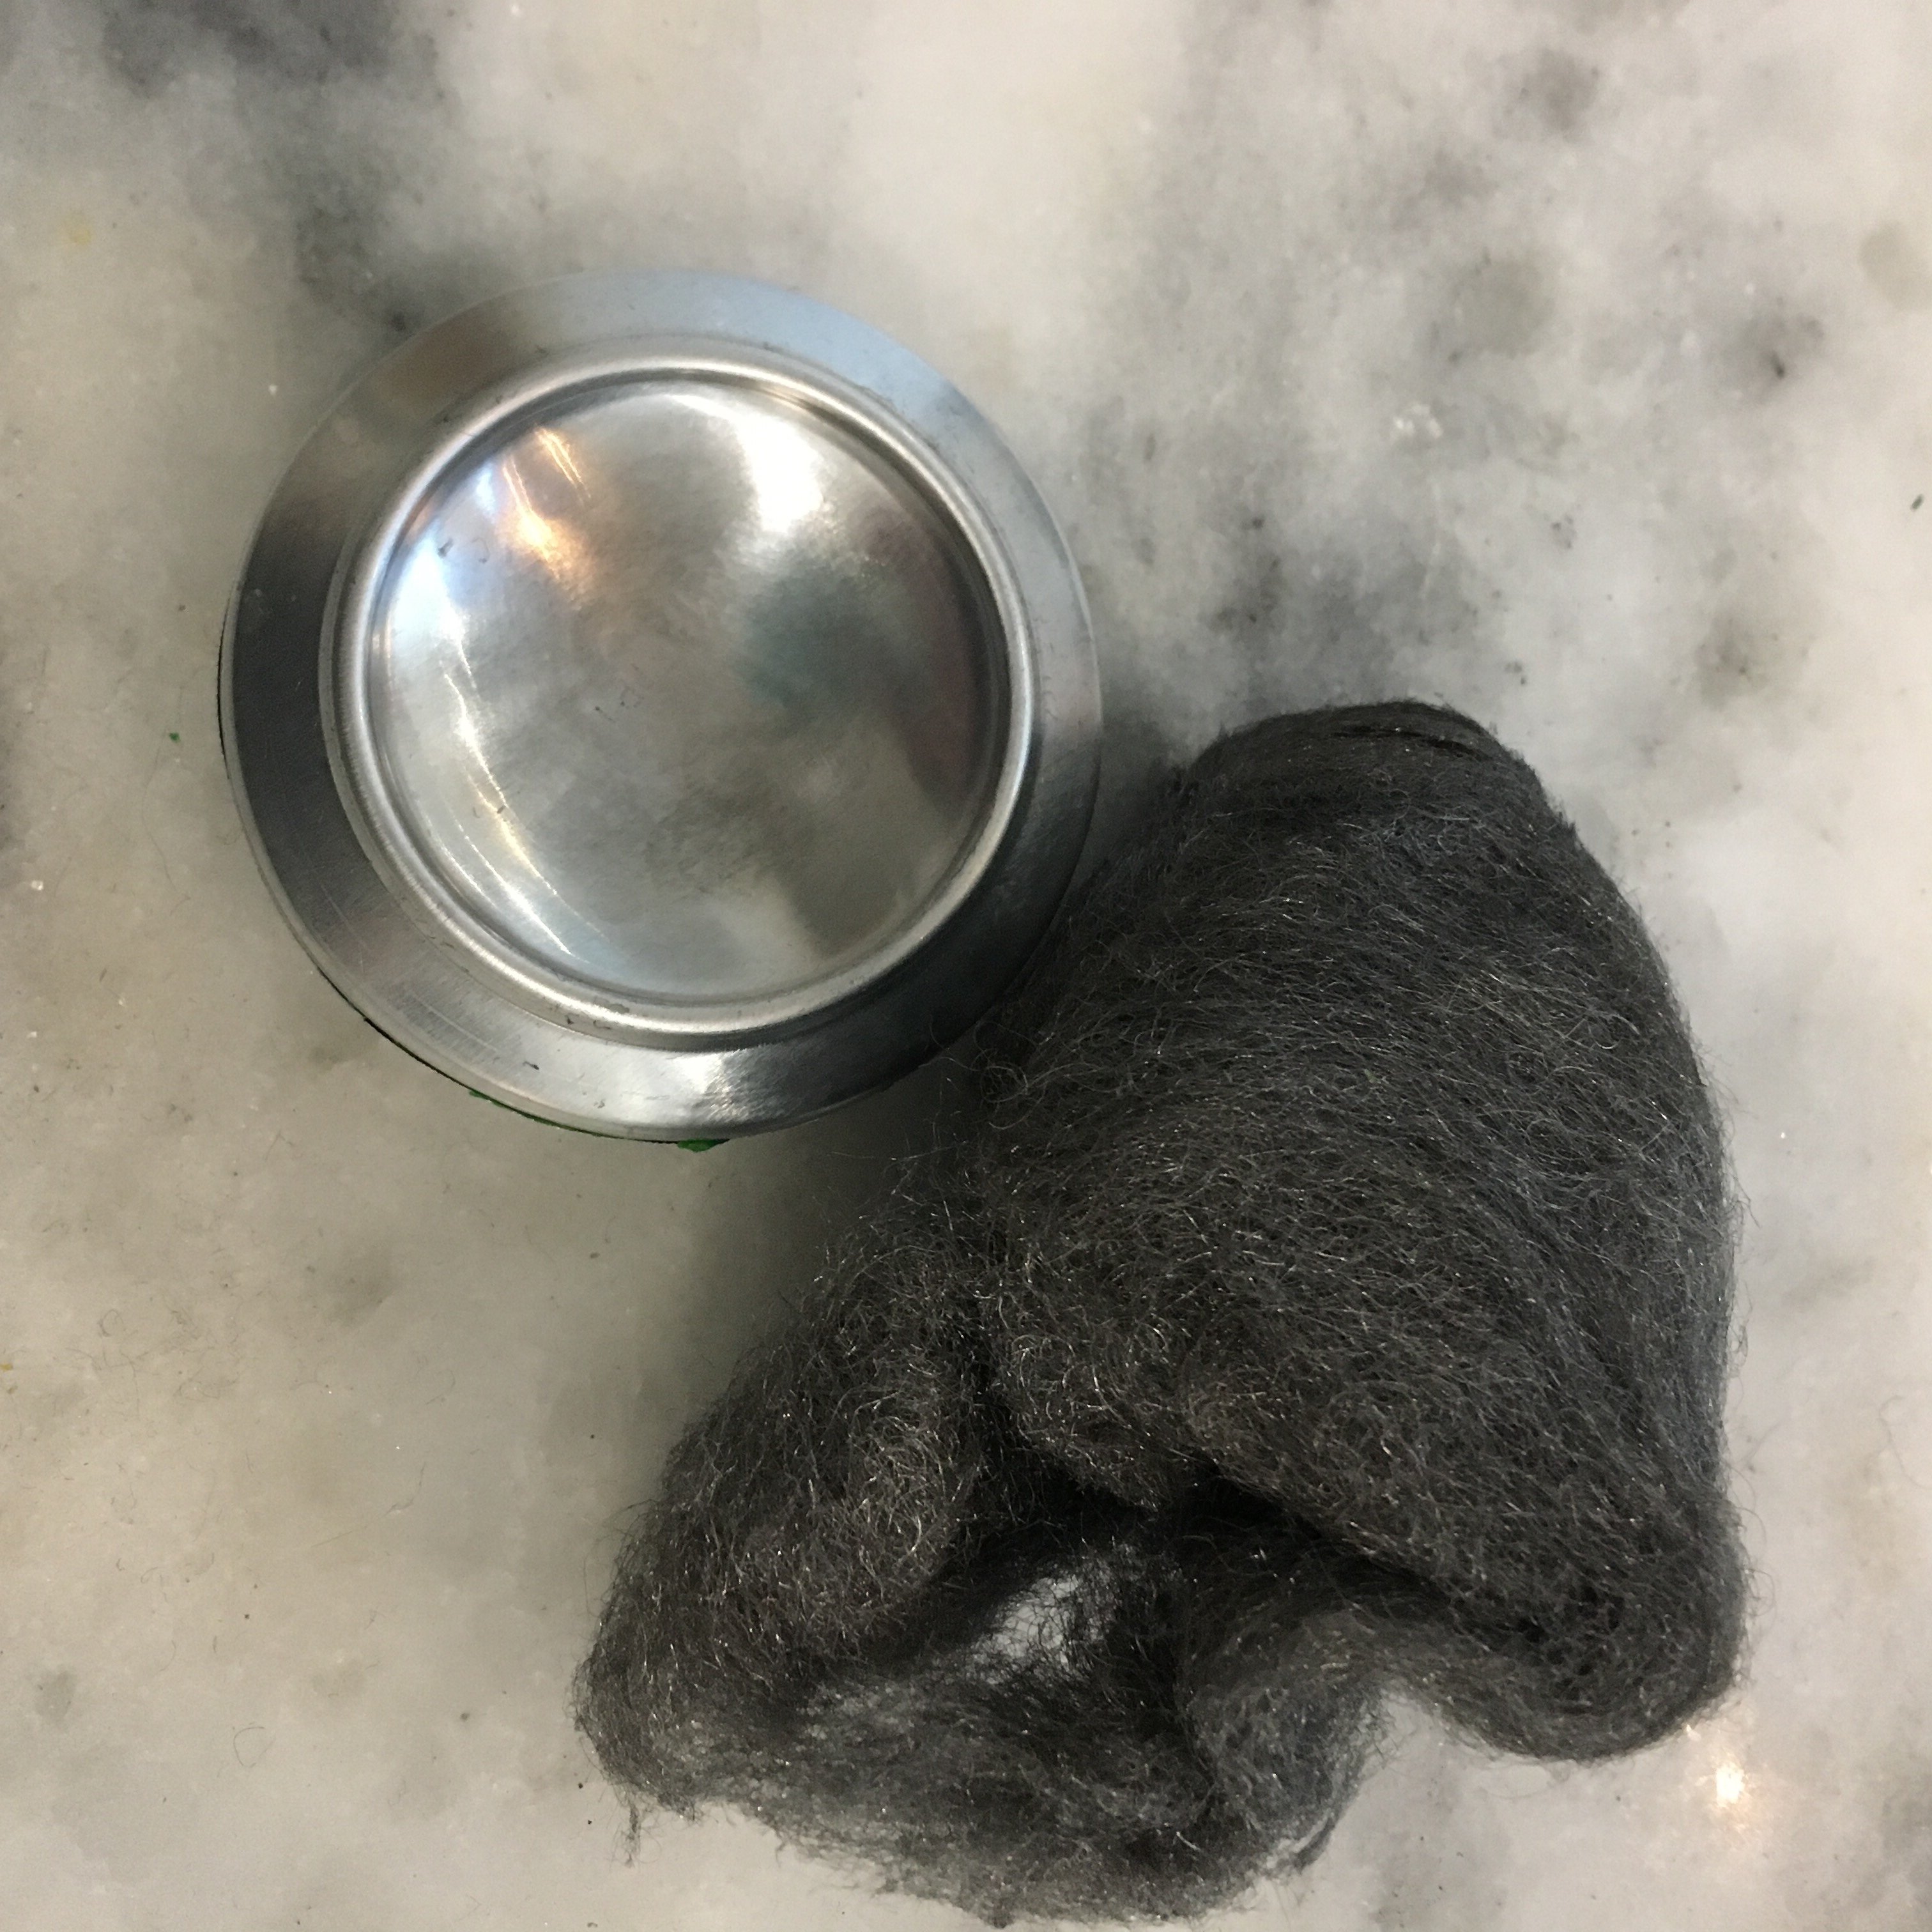
The cleaned up the print on the bottom of the can with some fine steel wool and now my support bowl is ready for use!

Because… why not?

You know that big wad of cotton that is stuffed in the top of vitamin jars? I don’t see it as often anymore, I guess manufacturers are getting better at making tougher capsules that can withstand shipping, but there was a double dose of cotton in one of the last bottles we purchased. It usually heads to the trash with the bottle seals and packaging. But not this time. I picked it up and thought: “Can I spin this?”

So I meandered over to YouTube and flipped through a couple videos. Cotton is a short staple fiber, and I’d read that drop spindles are usually too heavy to spin cotton (I only had a drop spindle, and a fairly big one at that). I saw a video on how to spin cotton balls on a pencil. I tried that, but with a large knitting needle, but didn’t have much luck.

Attempting to spin a large cotton ball into yarn

I saw a few more videos of people using supported spindles. So I made one. Well, really I Frankenstein’d one together. I took a metal afghan hook (because these are fairly easy to come by, and crochet hooks usually have a flat bit in the middle), and cut off the end and sharpened it with a belt sander. Then I took the whorl off the first spindle I made (which was made of the bottoms of two aluminum cans and some playdoh), and drilled the hole large enough to fit my new afghan hook shaft. I used a small ceramic dish as my support bowl.

Switching from a knitting needle to a make shift supported spindle.

This setup worked better, but I did have some fits and starts. Turns out the aluminum can whorl is heavy, putting the total weight for this spindle at over two ounces. Yikes! That is even heavier than my Turkish spindle. But I muddled through and was able to produce a single ply yarn.

Single ply cotton yarn spun on a supported spindle

I used my Turkish spindle to chain ply the single into a three-ply yarn. (It turns out that I can use this as a supported spindle as well because of how I made it. Oh well, sometimes I get caught up in an idea.) Then, because it was such a wee bit of yarn, I crocheted a small motif. Because… why not?

Chain plied yarn
Motif crocheted from cotton balls

Twine treat bag

I read that some people feed their chickens radish greens, so this last time I bought radishes, I stripped off the greens, but then was faced with how to feed them to the chickens. When I throw herbs on the ground, the leaves usually just stay there. Sometimes I hold the stems so the chickens can tear off bite-sized pieces, but one bunch of radishes has quite a few leaves. I have seen pictures that people have posted with wire baskets or racks to hold lettuces, but nothing like that in my possession came to mind. I do have twine, though. So I made up a small bag to hold the leaves.

First I cut 8 lengths of twine, about 20“ long.
I tied an overhand knot at one end.
Working in pairs, I tied four square knots, then shifted the pairs and tied four more square knots.
When I had the depth I wanted, I tied four strands with an overhand knot, and did the same for the last four strands.
Separating the two top knots makes an opening in which to stuff leafy greens.
I hung the bag with a carabiner on the poultry wire. It seemed to work OK to hold the leaves so that the chickens could pick off bits.

More nålbinding practice

Mohair circle with nal made from Osage Orange wood

I finished spinning the one ounce of Dottie the goat’s mohair, and made a practice circle with the resulting yarn. I used the Finnish 1+2 or Mammen stitch, and am practicing circles because I like making hats. And circles are useful as dish separators, so all my practice still turns out something useful.

Brushed back

I brushed the back of the circle lightly just to see what happens. The result was soft and fuzzy!

Most useful kitchen whatnot

I received this tube of rubber in conjunction with a ceramic garlic grater. I love the grater, but was unsure what the tube was about. Until I popped a clove of garlic in and rolled it under my hand. The peel came right off! It is now my go to tool when I have to peel garlic. Such a funny little tube that works so very well!

Garlic peeler