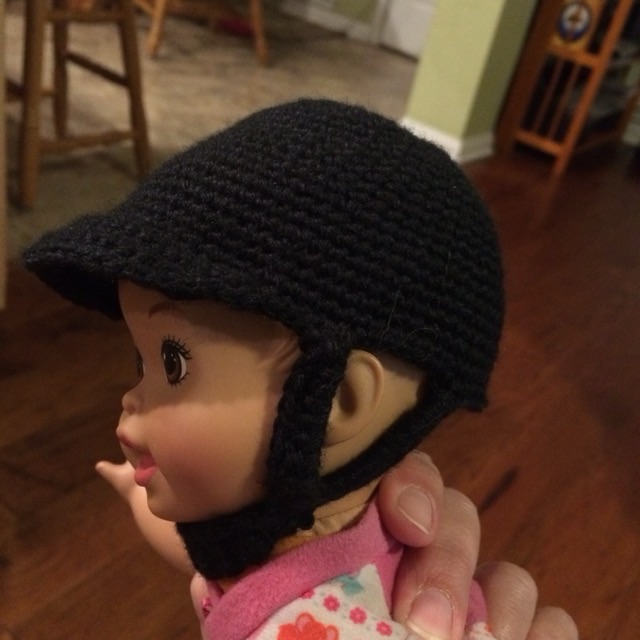
I found a picture from December 2014 that shows how the creative process sometimes works, or doesn’t. I was trying to develop a simple, repeatable wire dragonfly shape and went through many, many iterations.
Photo description: twelve partially formed brass wire dragonfly shapes on a green table
I still wasn’t entirely pleased with the end result, although I did make a few more like the shape in the bottom left.
Sometimes my ideas work right off the bat, but more often they go through a series of trials, with mostly errors. If we aren’t willing to have a few gnarls in the thread, it is hard to achieve much of anything.
In July of 2014 I was experimenting with making “viking knit” wire chains. I did a number of trials with different metals and gauges of wire. I stumbled across this picture that also showed the time it took to get a small section of work done.
Photo description: wood dowel with looped brass wire, a spool of wire, side cutters, needle nose pliers, awl, book, and ID card
I like viking knit chains, they have a nice feel and drape. The technique is looping, which years later I learned to do with yarn in a method called nälbinding. I still love nälbinding too. Neither are fast crafts, but they are satisfying.
Back in June of 2012 I was still making jewelry to enter into the Fire Mountain Gem contest. I was just starting to put my head toward marketing and using purchased elements rather than components made from scratch. The contest really is to motivate buyers to purchase from the company, so the designs that win need to have a wow factor and inspire makers to buy. Custom sculpted elements aren’t usually in the standard beaders repertoire.
I fell short of the mark on this design. I love it, but it did not make the short list in the contest. I used a purchased wire knit chain and braided it, used purchased ribbon ends and clasp, and built a daisy pin using plated button and pin findings, crystal petals, crystal beads, and seed beads.
Photo description: daisy pin necklace with Viking knit chain and crystal beaded pinPhoto description: closeup of the daisy pin centerPhoto description: side view of the pin, showing a peek of the base elements
I certainly had a long list of purchased elements, but maybe my color scheme didn’t fit what the judges were looking for, or I used difficult to decipher techniques. Hard to tell. I was getting better taking project photos, though.
In March 2012 I had a custom order for glass clay buttons for the Kansas State Button Society. I designed the button with input from my grandmother’s button group, made a silicone mold into which I pressed the glass clay, hand built the button shank, hand painted each button, and fired them in batches in my kiln.
Photo description: multiple colors of flower and fan glass clay buttonsPhoto description: close up of the buttons with a ruler showing each button about an inch and three quartersPhoto description: one button mounted on the card that was given out during the Spring 2012 meeting
Making larger batches is a completely different animal than designing a single component. The glass clay was fun to play with, but was brittle, so the buttons were decorative more than functional.
In September 2011 I was experimenting with ways to make jewelry from buttons without destroying the button. One of Grandma’s pet peeves was when buttons had been glued or cut to “upcycle” them (she was a button collector).
I came up with a wire wrap that utilized a four hole button, making it into a link component.
Photo description: first step of a button spiral cluster using two pieces of 20 gauge sterling silver wire threaded though hand made wire coils, then the button holes, then interlocked Photo description: step 2 begins making each leg of wire into a spiralPhoto description: close up of finished spiral cluster securing a button nondestructively Photo description: full necklace with identical buttons wire wrapped in silver
I actually took production photos for this necklace, for which I am now very thankful.