Buffalo down

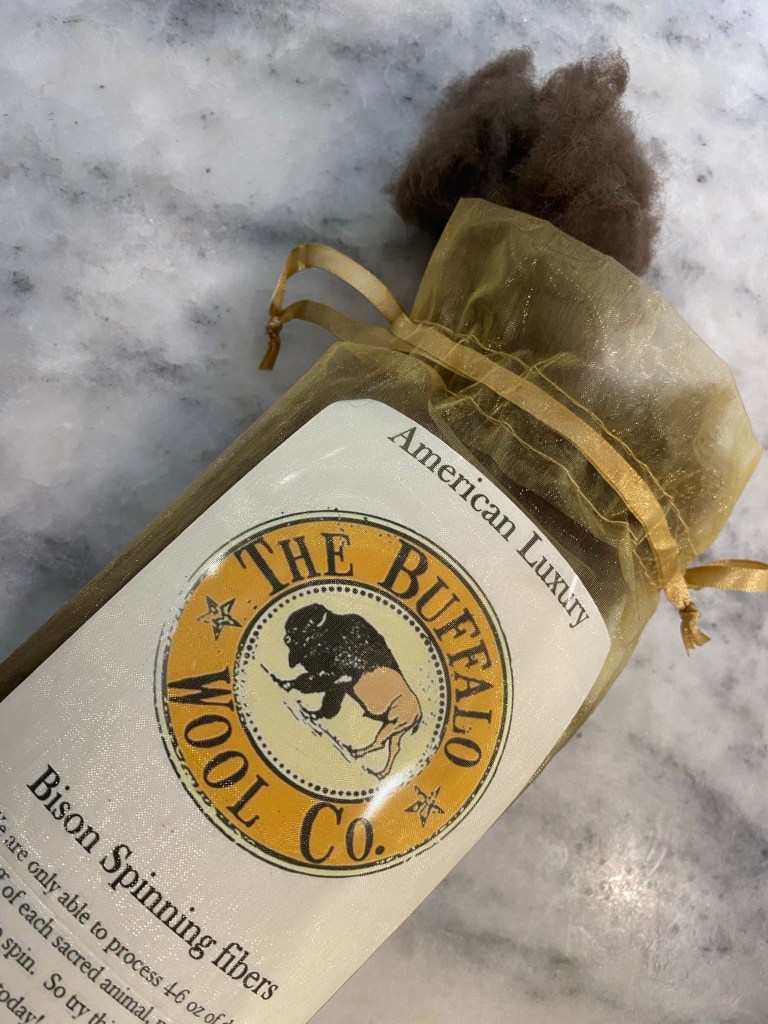
Buffalo down sounds like it comes from buffalo wings, but it is not feathers but the fine hair from the North American Bison. I love the opportunity to work with local fibers (and support local) and was so excited to find a nearby supplier of buffalo down. I grew up eating buffalo; it is a great low fat protein. To be able to use more of the animal is fantastic. The Buffalo Wool Company (thebuffalowoolco.com) uses fiber sheared from the hides of bison being processed for meat. Usually this fiber would be burned off, but they collect it and make hats, gloves, socks, and spinning fiber!

My buffalo down came in a beautiful golden bag

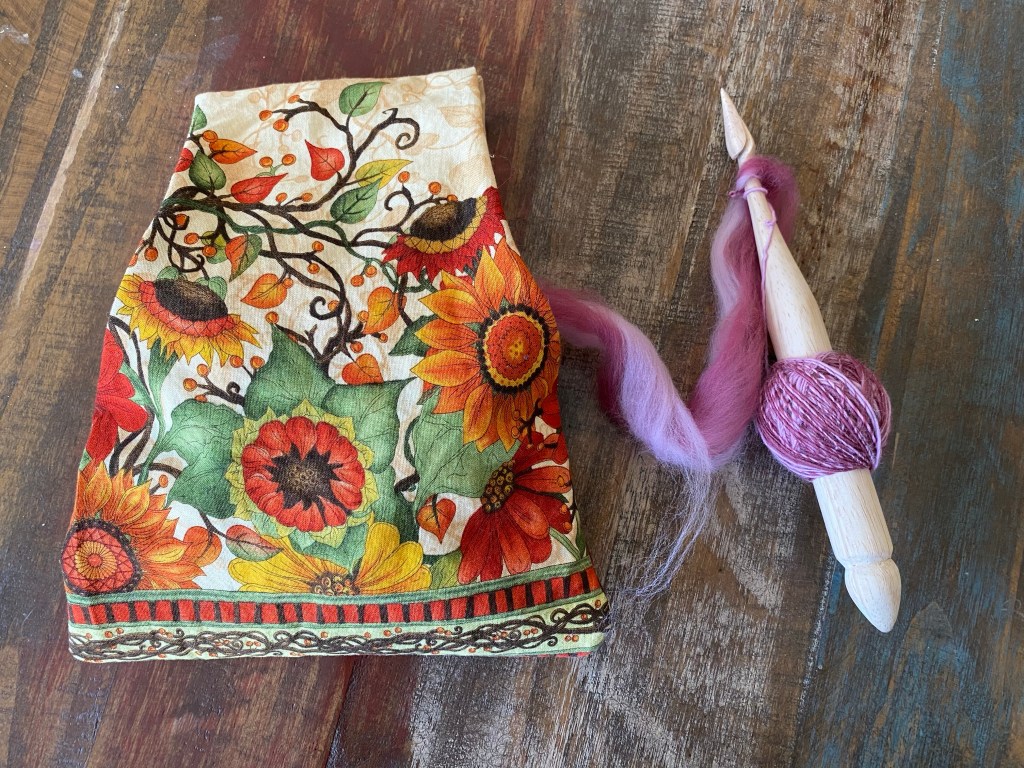
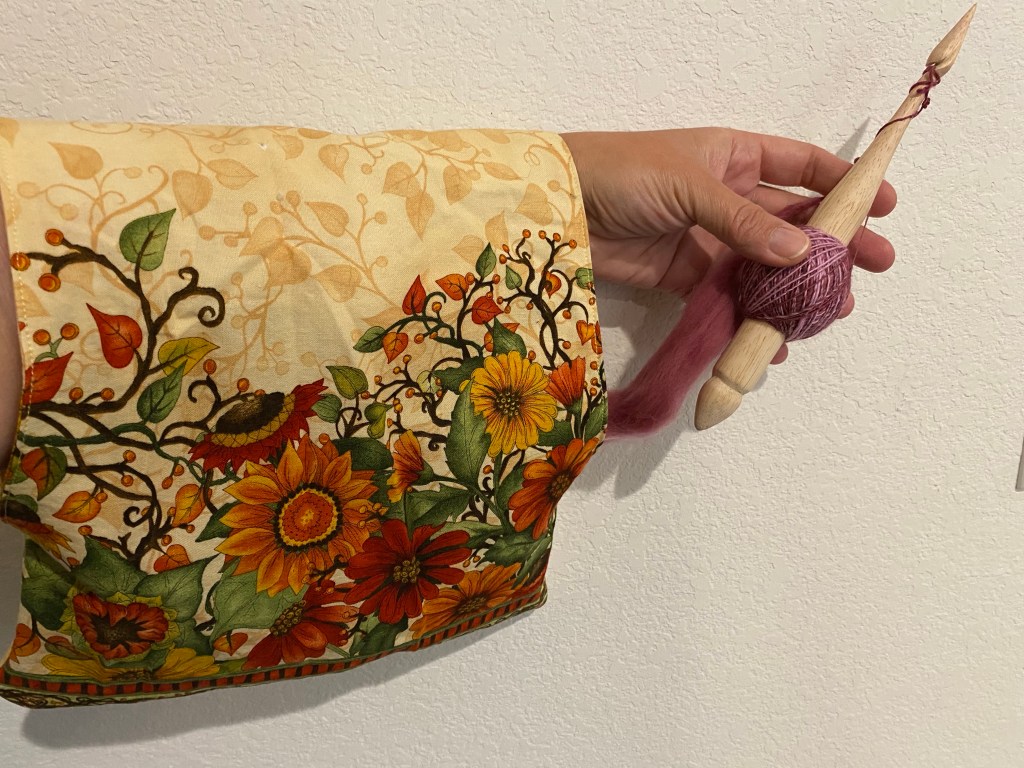
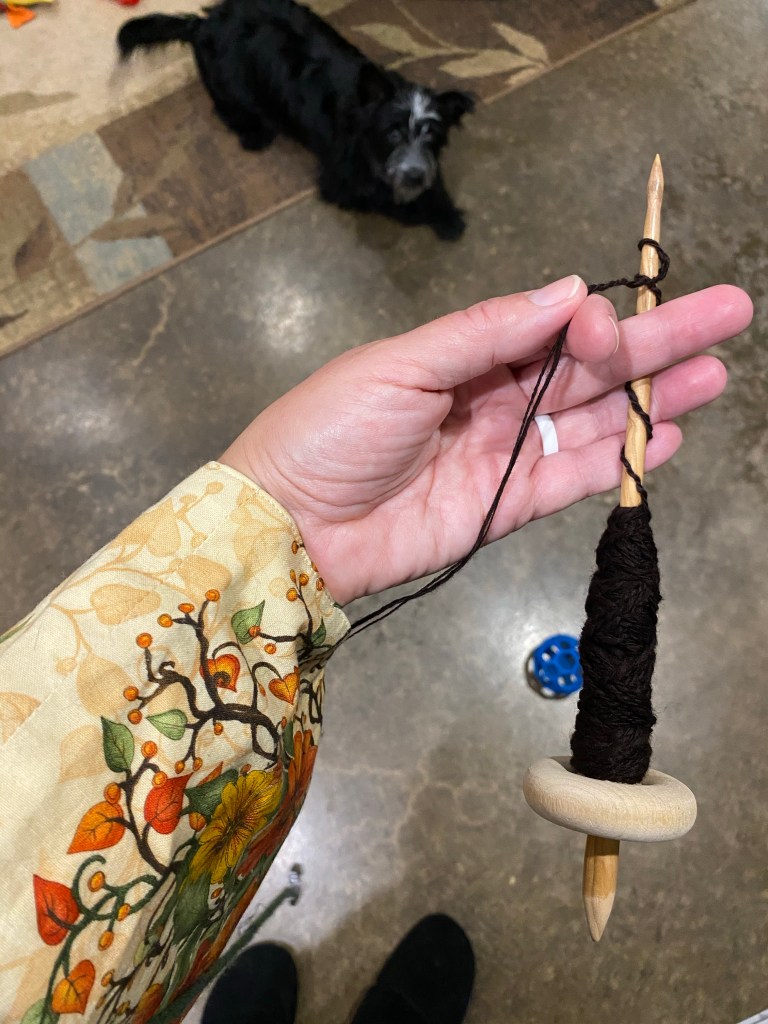
The owner was kind enough to share spinning tips as well. He said to spin “fast and fine” and to hold a small amount in my palm and spin off the pinch. I decided to use the tahkli spindle I made from an old button since it spins very fast and works well for cotton which is also a short fiber. I’m sticking with my spoon as a spindle rest because the handle is convenient.

Spinning buffalo fiber with a homemade tahkli spindle
Holding a small amount of fiber in my palm and spinning from the pinch (photo credit to my eldest)

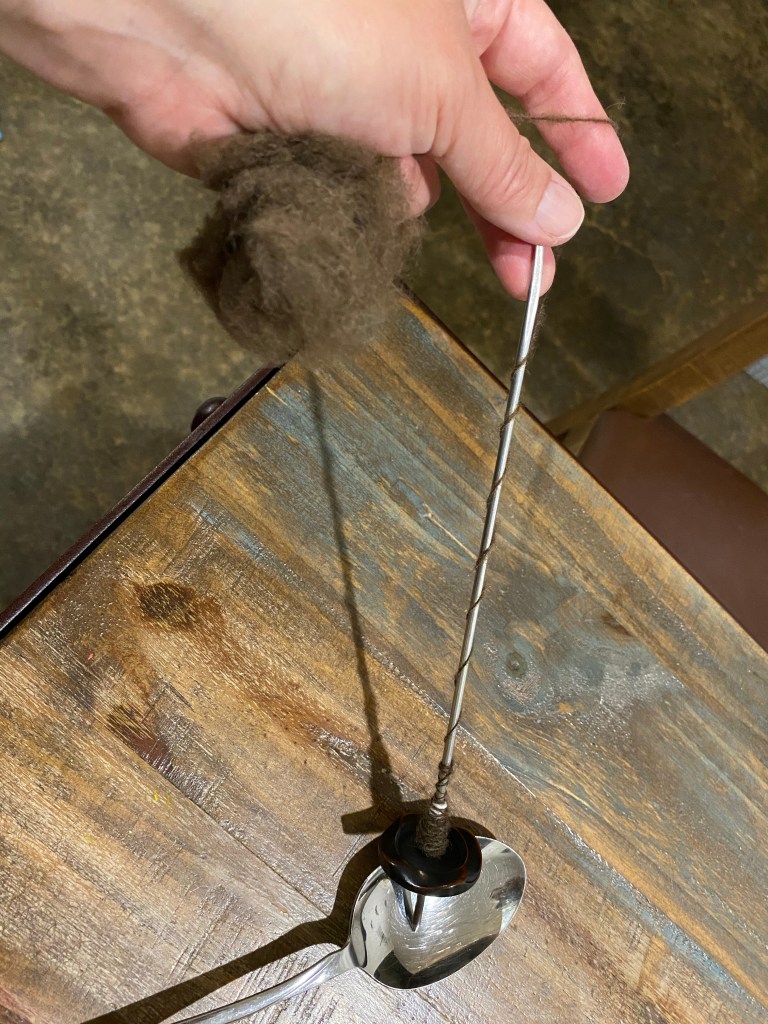
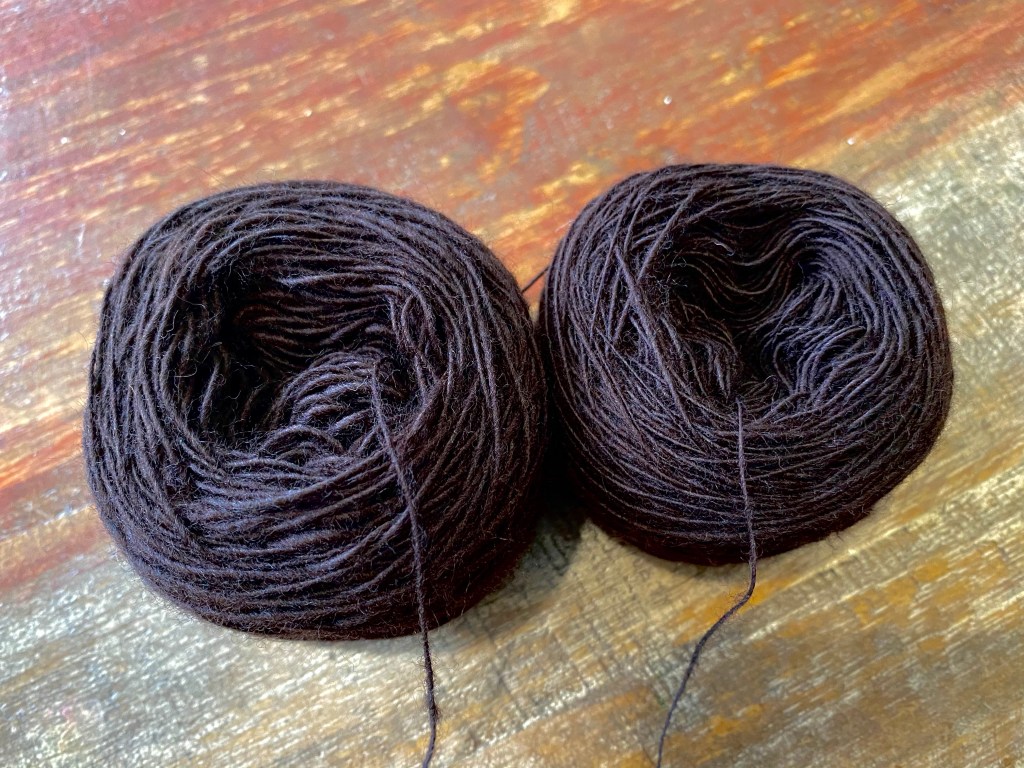
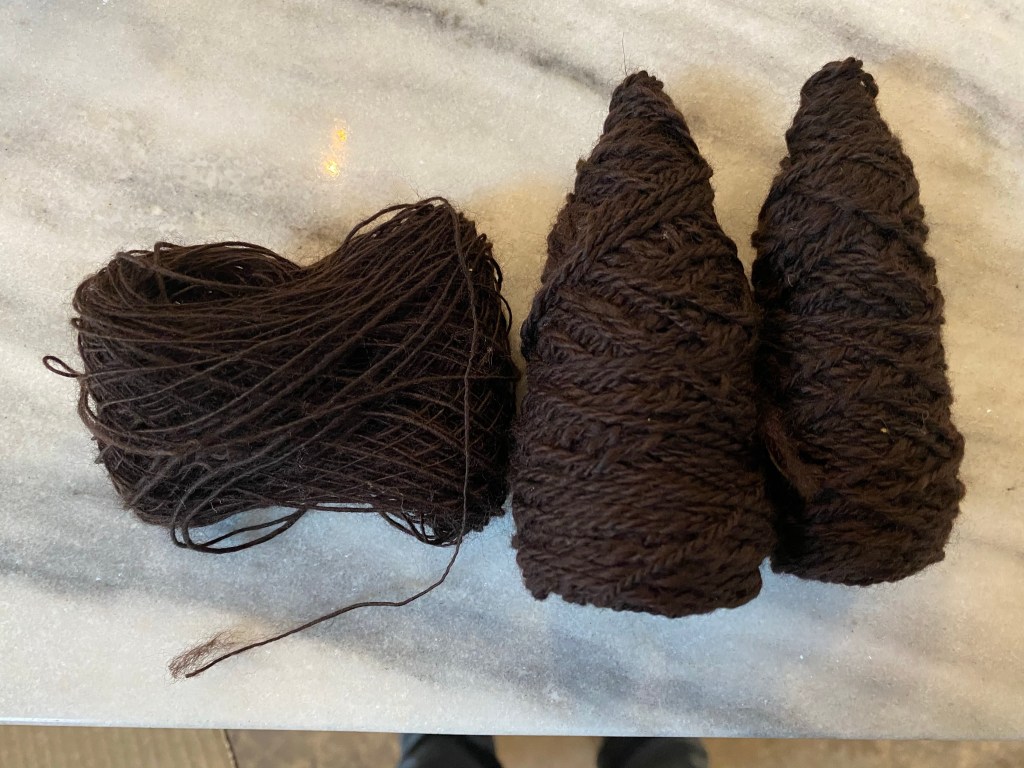
It took me a bit to understand spinning from the pinch, but once I did, spinning went much smoother. The yarn is fine but fluffy! I spun until the cop wouldn’t stay put on the shaft, then wound it onto a small wool bead that my mom made. This is much easier than starting the ball with yarn! Some of the single is very thin, I was surprised when I didn’t break any of it winding it into a ball. I weighed everything and figured that I spun 6 grams of fiber. I pulled another 6 grams out of the bag to spin another single, then I will ply! I am really enjoying the spinning! The fiber is well prepared — I had no waste! (Yup, three exclamation point punctuated sentences in a row. I’m that excited.)

Winding the buffalo fiber yarn off onto a ball

What to do with small bits of yarn

I took the single ply merino wool I had left over from plying and made a simple lace scarf for my youngest’s doll. I had just enough for a decent length. The yarn is about 32 wraps per inch, which is small even for lace weight yarn. I tried nålbinding a new stitch, but the dark yarn was too hard to see. I tried knitting, but again, it was tiny and hard to see. So I used crochet, because I can crochet without having to distinguish individual strands. I did a simple lace pattern (chain three, single crochet in previous chain, repeat), and it still took me days to complete. Making doll clothes, though, is a great way to try different techniques with small amounts of yarn, rather than tackling a human sized project.

Crochet lace scarf from hand-spun merino wool for an 18” doll

Arm bag

I have a small arm bag that I made to hold my crochet yarn while I work. It hangs on my arm, so my supplies are close and don’t get tangled. I thought I would try the bag for fiber management for spinning, but the bag is full of a current crochet project, so I made a new one! This is my favorite fabric. When I found it in the store years ago I bought the whole bolt. I have been slowly working through it for various projects, and each time I marvel at the colors and the composition. Since it has a thick border and the rest is a more subtle background vine, it works perfectly for a lined bag.

Small arm bag to hold fiber for drop spindle spinning

I started by folding my fabric to the height I wanted for the bag plus seam allowance (about 11”). With the folded fabric cut for height, I then cut the width double at 17” (to avoid one seam). I folded this piece in half and cut shallow arcs from about two thirds down, to the top, which makes a wide strap to hang on my forearm. I opened the side fold, then with right sides together sewed along the cut edges, leaving a space in one side to turn it right side out.

Purple lines indicate sewing path, with gap so the fabric can be turned right side out

I clipped corners and turned the piece right side out, then with the patterned sides together, sewed the bottom three sides and the top, leaving the arcs open. Another inside out and the bag is serviceable! A nice touch is to over sew around the arcs to keep the seam neat.

Serviceable small arm bag
A larger version of the arm bag to hold more fiber! Shown in use.

Drop spindle experiment

I’ve started to reread the book that started me spinning “Respect the Spindle” by Abby Franquemont. I don’t reread books often (Terry Pratchett excepted), and usually use books on craft as quick reference, but since I’m really enjoying spinning, and have been spinning daily, I thought I might understand the text better now. And I do.

The half hitch on my bottom whorl spindle has been giving me trouble, slowing down the production and acting a a frustrating bubble in an otherwise smooth flow (for a relative beginner). In her book, Ms Franquemont mentions many different methods for securing the yarn before adding twist, including using a notched shaft. I don’t have any notched shafts. So I made one. Rather than notch the shaft of my thin olive spindle, I started with a scrap of dowel from the garage. I shaped it using my belt sander, started the notch with a small saw, and refined the shape first with needle files, then with folded sandpaper.

Drop spindle shaped from a dowel

I kept the dowel thickness in the middle to try making yarn balls as one would with a nostepinne (yup, that is new to me too, but so cool!) The shaping is like a Russian supported spindle (roughly, the pictures I’ve seen are more elegant), but I’m using it also as a drop spindle (so I can walk and spin). I had to start spinning to test the notch, so my yarn may have a bit of wood dust as I refined the shape, spun, and refined some more.

View of notch grooves from the top of the spindle

My goal with the notch was to get the yarn closer to the center of spin as well as be functional for spinning clockwise or counterclockwise. The cone tip helps with flicking the spindle to spin, and the grooves actually help with grip. I have not applied any finishing oil as I may still tweak the shape. Sanding down to 400 grit though keeps the yarn from catching on the wood.

Gimp yarn

I read about gimp yarn in Spin Off magazine, and thought it would be good to practice making different thicknesses of yarn. Gimp yarn uses a thin single and a thicker single plied to make a bumpy looking yarn.

Two yarns, thicker and thinner, rinsed, dried, and wound into a cake in preparation for plying

I transferred the singles from my spindle to a niddy noddy, rinsed them to set the twist, then let them dry before winding them into cakes. I did all this rather than plying from cops because I wanted a smooth center pull for plying. To ply, I tucked the yarn cakes into an arm bag that I made long ago for carrying crochet yarn. They fit perfectly! And it is easy to feed the two singles from the bag and ply. I have also discovered that it is easier to get my spindle spinning counterclockwise if I flick the bottom instead of the top.

Plying yarn from cakes tucked in to the arm bag

My singles don’t have an extreme difference in size, but it was enough to get the effect (which reminds me of my grandma’s rickrack trim).

Left over thin single, and two cops of plied gimp yarn