I ordered a blend of white and gray Corriedale wool from Mohair and More for my spinning class. Corriedale is an easier fiber to spin, and the mix of natural colors makes it easier to see the twist, which makes it a great fiber for learning. This is my first time spinning Corriedale as well (I started with difficult fibers, because I didn’t know), so I spun up my own ounce of fiber for my fiber book. I used some passenger time on the road to get it finished up on one of my new student spindles.
Corriedale singles spun on a top whorl spindle with the road stretching ahead
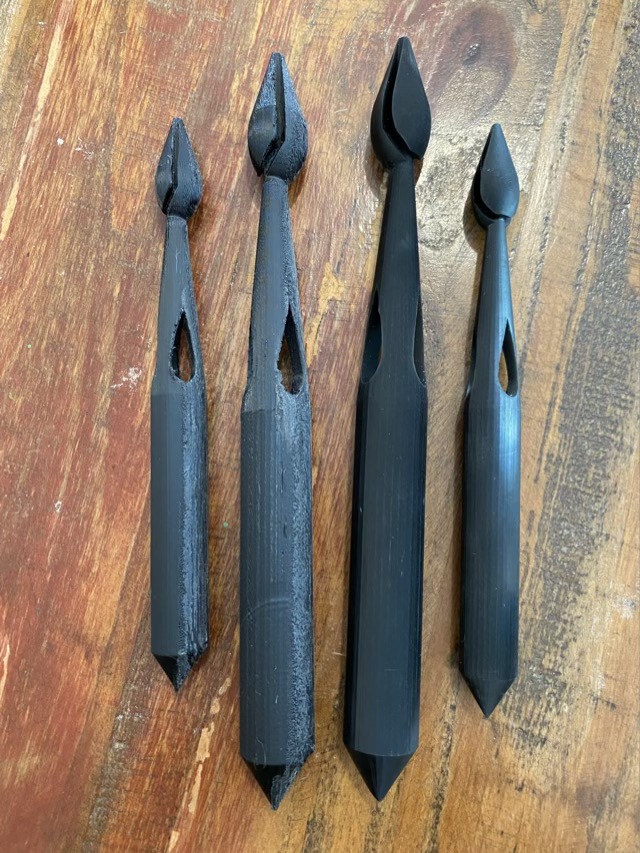
I have been collaborating with a local 3D printer, X of All Trades, to design a spindle that can be used as a supported spindle or a drop spindle, adjustable weight, and a body which acts like a nostepinne to make center pull balls as you spin. The challenge has been the narrow neck breaking, so we have been experimenting different materials. The last round of prints using bottle plastic looked promising, but the filament printing isn’t precise, and tended to bubble and create rough edges. Then they found Tough Resin. 3D printed resin can make much more precise and smooth objects, but tends to be brittle, as I found out on our first printed rounds. Tough Resin fixes the brittleness and with some tweaking of the head and neck of my model, X of All Trades has printed a lovely tool that so far has not shattered when dropped.
I couldn’t wait long to test the spindle. I was pleased that it still spins well with the head changes, and I really like the black resin, which has a prismatic effect along the print lines.
Spinning with the new 3D printed spindle
I have put in an order for a small production run, which is quite exciting.
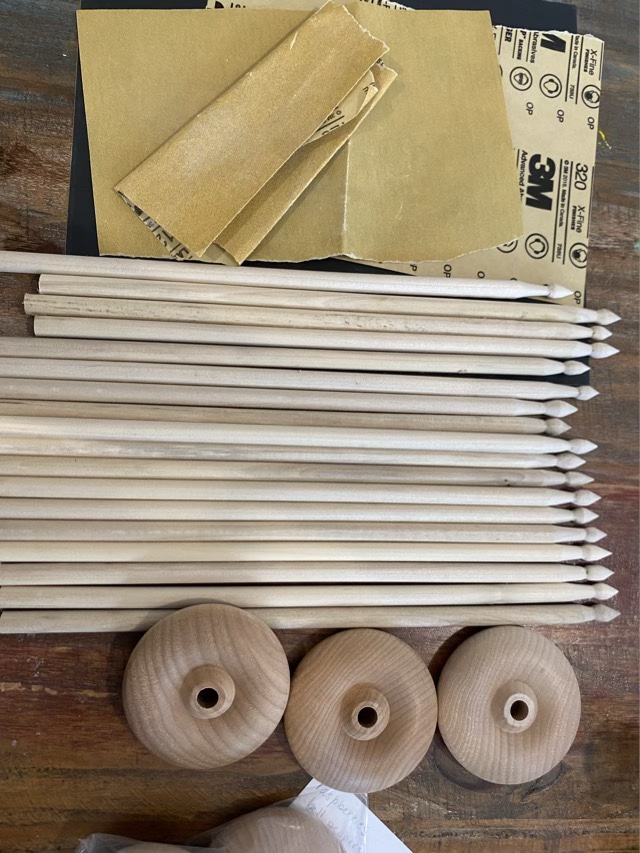
I’ve been working on a new drop spindle. I like my previous student spindles, but they are on the light side, just over an ounce. This light weight can be more challenging, so I wanted something a little heavier for upcoming spinning classes. I sourced some beautifully made wooden whorls from Pinehurst, TX, (yes, they are marketed at toy wheels, but they make lovely whorls) and some locally obtained dowels to make the shafts.
Sand paper, carved shafts with end notch, and Pinehurst crafts wheels
The whorls are lovely, but with the 12” shafts, the weight tipped over the two ounce mark, which is heavier than I wanted. To lighten the load, I drilled out material with my drill press and a 1/2” drill bit.
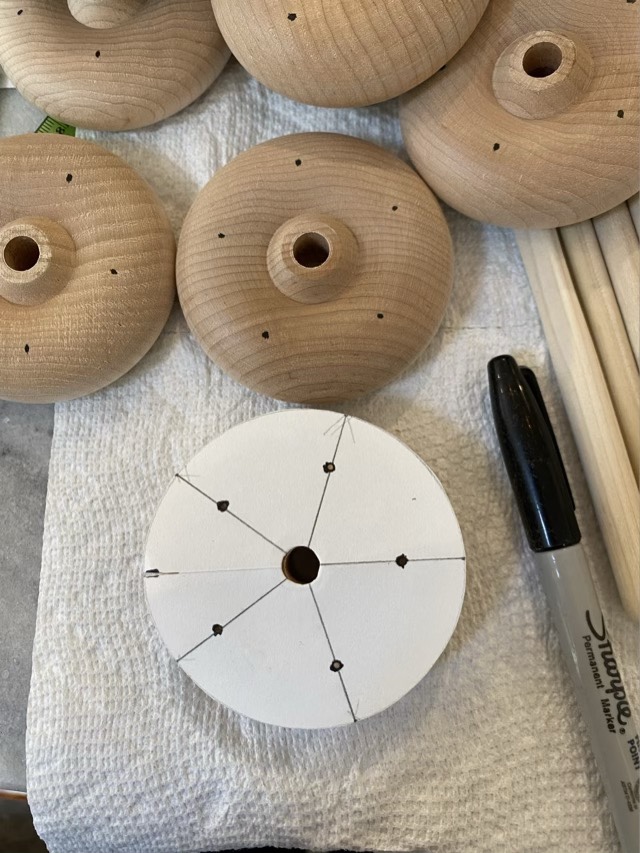
Marking whorls with a template to evenly space five holes
Then came the sanding and finishing. I sanded each piece down to 600 grit, wet the wood and let it dry, then sanded with 600 grit again. Both the whorl and shaft are finished with a clear matte coating to protect from stains. The most delicate part of the spindle is where the screw hook engages the wood, so I wrap the shaft with beeswax coated silk thread to strengthen.
Finished spindles with different colored silk wrap
These spindles can be used as a top whorl with hook, or flipped over and used as a bottom whorl drop spindle with the notch to keep a half-hitch in place. I’ve tested both ways and am pleasantly surprised how long these spin! The finished weight on all of them is around 2 ounces.
To finish spun flax yarn, also known as linen yarn, author Stephanie Gaustad recommends simmering it for 30-45 minutes in a solution of soap and washing soda. I admit I have been avoiding this step for awhile. The treatment of plant fibers is very different than the handling of animal fibers, particularly those that felt easily. I admit apprehension. I finally did take the time to do the finishing step, and my yarn changed color. What?
Plied linen yarn (from flax roving)
My flax roving was from a questionable online purchase. Very little information was supplied, when I received it, it was confusingly labeled both “flax” and “nettle”, and I learned later that roving is an unusual preparation for flax, usually made of the combed discards from making the long staple length flax preparation (called a strick). Definitely a flax rookie purchase. Still, I was able to spin it after much trial and error, and ply it using my spinning wheel.
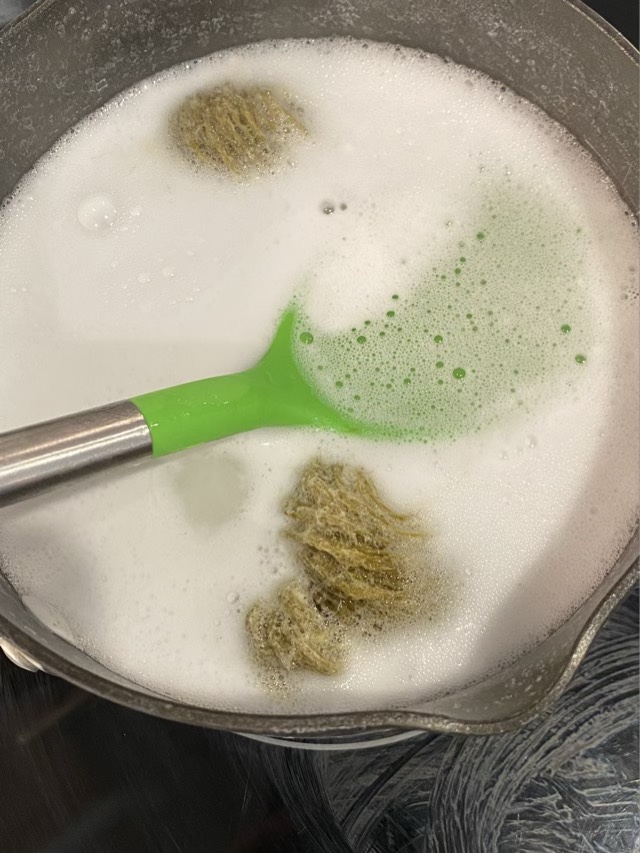
First minute of simmering
I started the finishing process and as it progressed the greenish yellow color of the yarn turned dark.
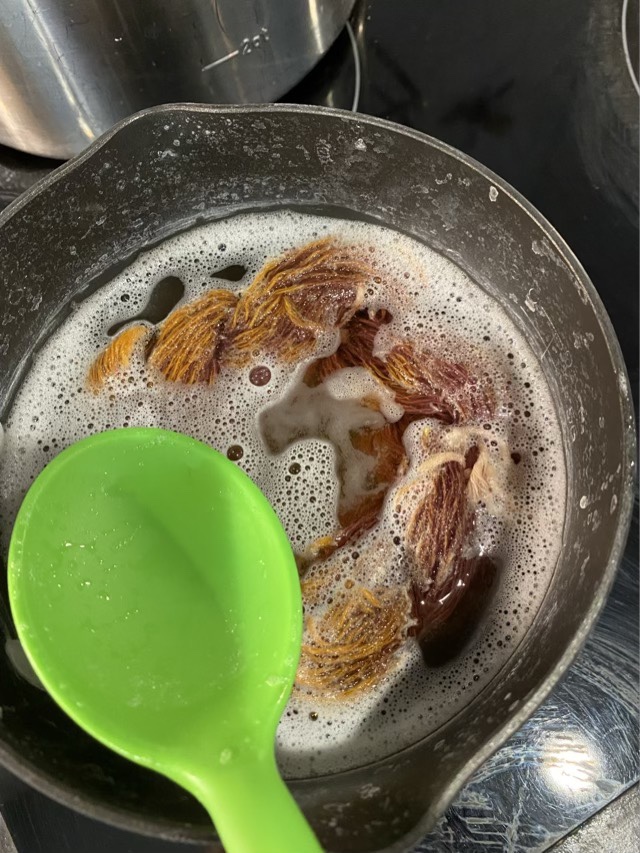
Yarn color darkening Out of the boil and rinsed in cool water, it is purple
After the full boil, my yarn was purple. What? Another rookie learning opportunity. Nettle can be used as a dye, and iron is used by dyers to modify dye colors. I used water from the tap to do my boil, which comes from our well, which definitely contains iron. Hm. I had yet another surprise coming, though.
The dried yarn is orange
After I rinsed and squeezed out the excess water, I hung the yarn up to dry. It turned orange. Really? Really.
There are many lessons learned here. Flax roving is a difficult thing to spin, but possible. Nettle can be used as a dye as well as a fiber source, and natural dyes are sensitive to mineral content in water. I can tell you that I won’t be spinning flax roving again, although I do want to try a traditional preparation. I have never been a fan of dye, and would rather work with natural colors. I like color, but I don’t like color change and color bleed. Dying is a fiddly chemical process.
The next step for this yarn is making sample swatches for my spinning book. All this lovely gained knowledge carefully documented and preserved so I don’t make the same choices again.
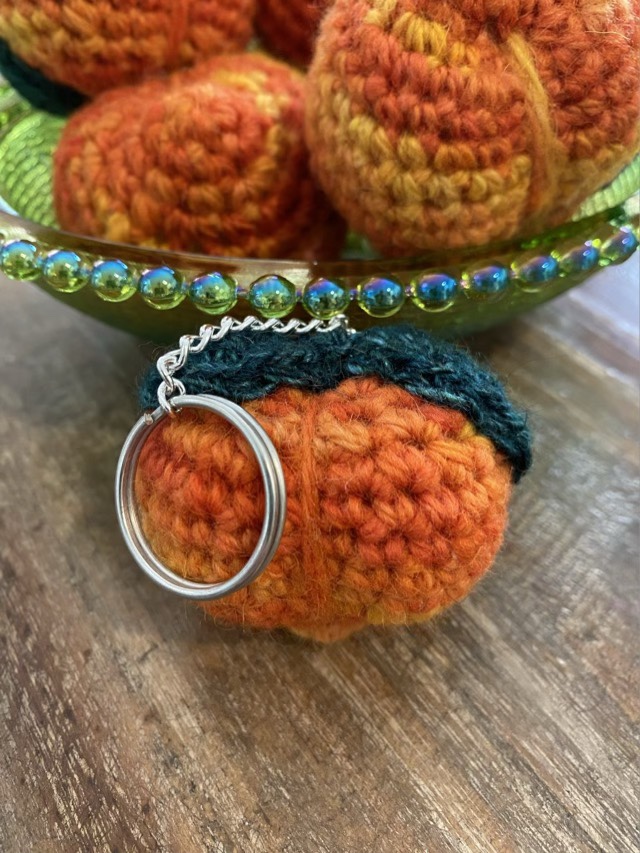
I recently created a PDF pattern for a local yarn shop. It is the owner’s pattern, but they needed it taken from written shorthand to a sharable PDF. It is a cute little peachy amigurumi, and in testing the pattern, I made up 6 little peaches.
Peach amigurumi
The pattern is by Anniewhere at NerdCraft. I’m very excited about the wool yarn I used for the body of the peach, because it was locally spun and dyed by Texas Prairie Fiber Co. I love using locally produced supplies! The leaves I made from my own handspun yarn, that I spun from Blue Faced Leicester and silk blended roving dyed by Frabjous Fibers. This turned out to be quite the collaborative project.
Keychain peach amigurumi
I did make each one into a keychain by sewing on some chain and attaching a split ring. I used hand-spun alpaca scraps from a naturally brown alpaca (Aimee) to sew on the chain. So each peach has a little brown stem.